This will provide a simplified process to open and analyze your model. For more in-depth advice, please see the relevant sections for more guidance.
Version 8.0 / 9.0 (Revit 2025)
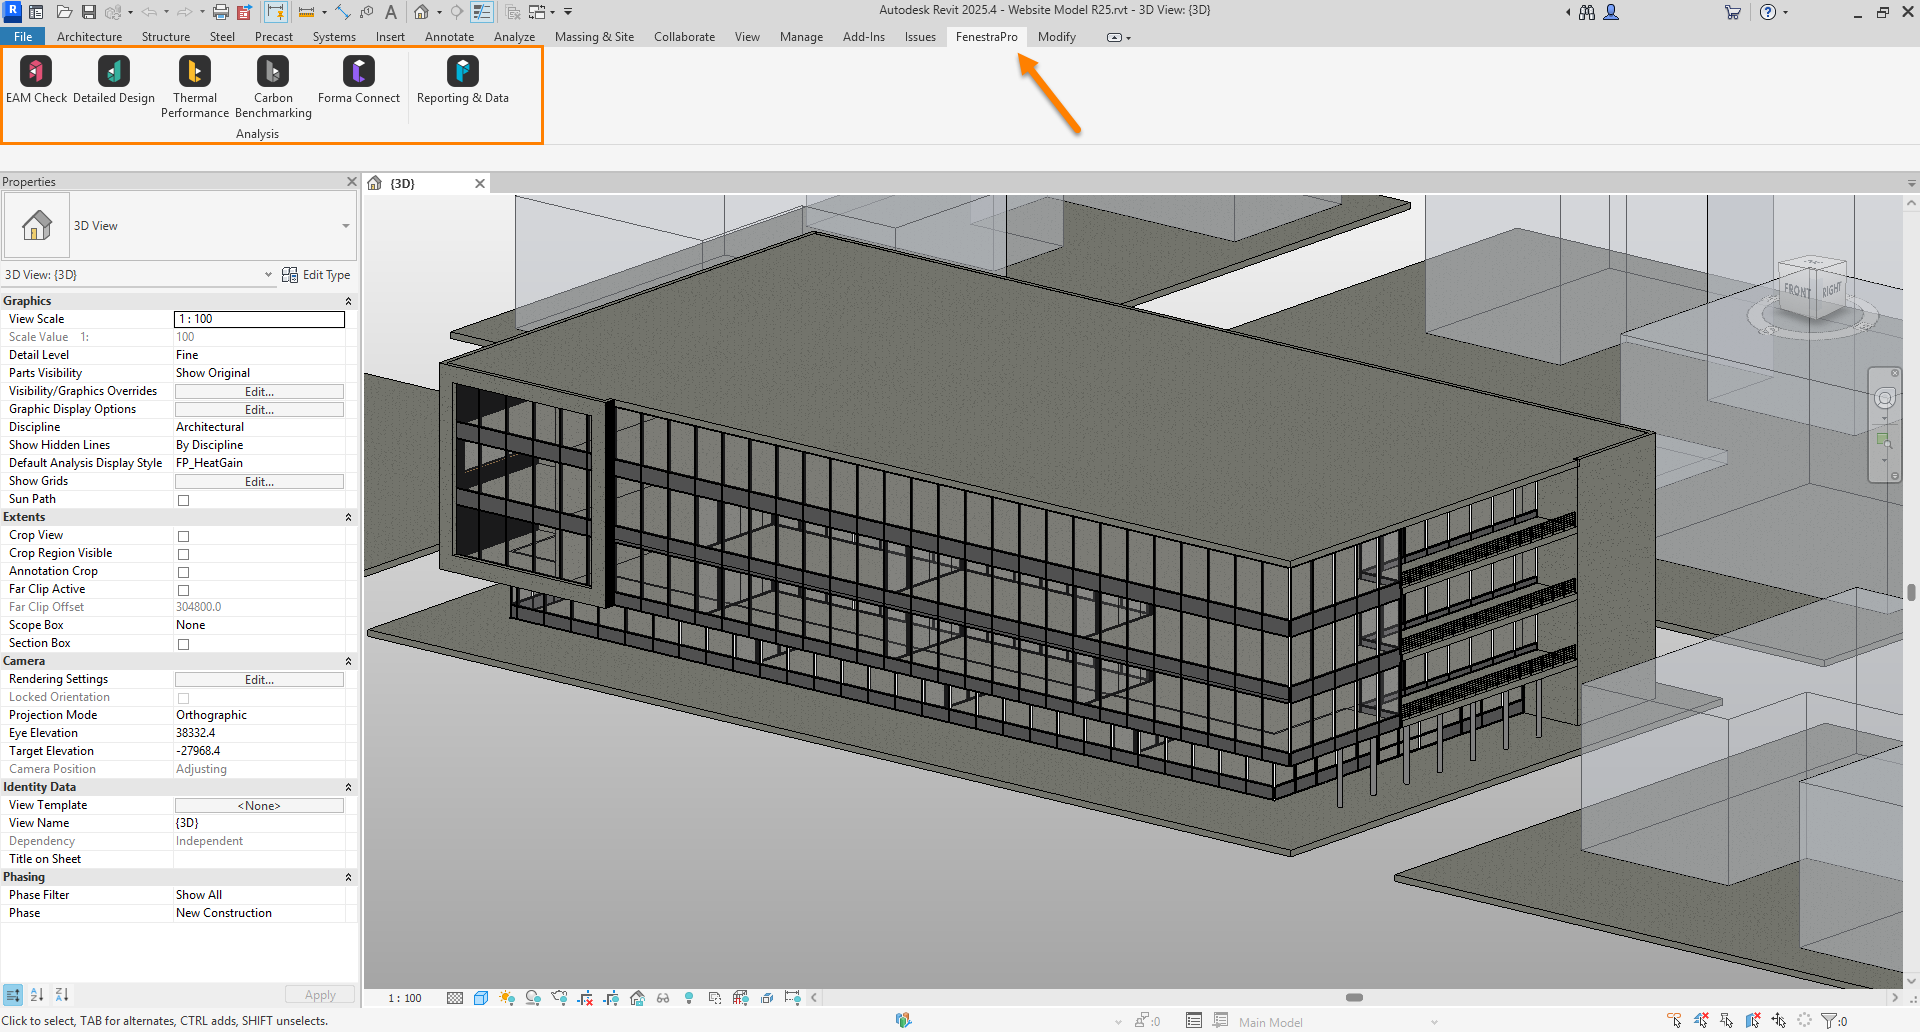
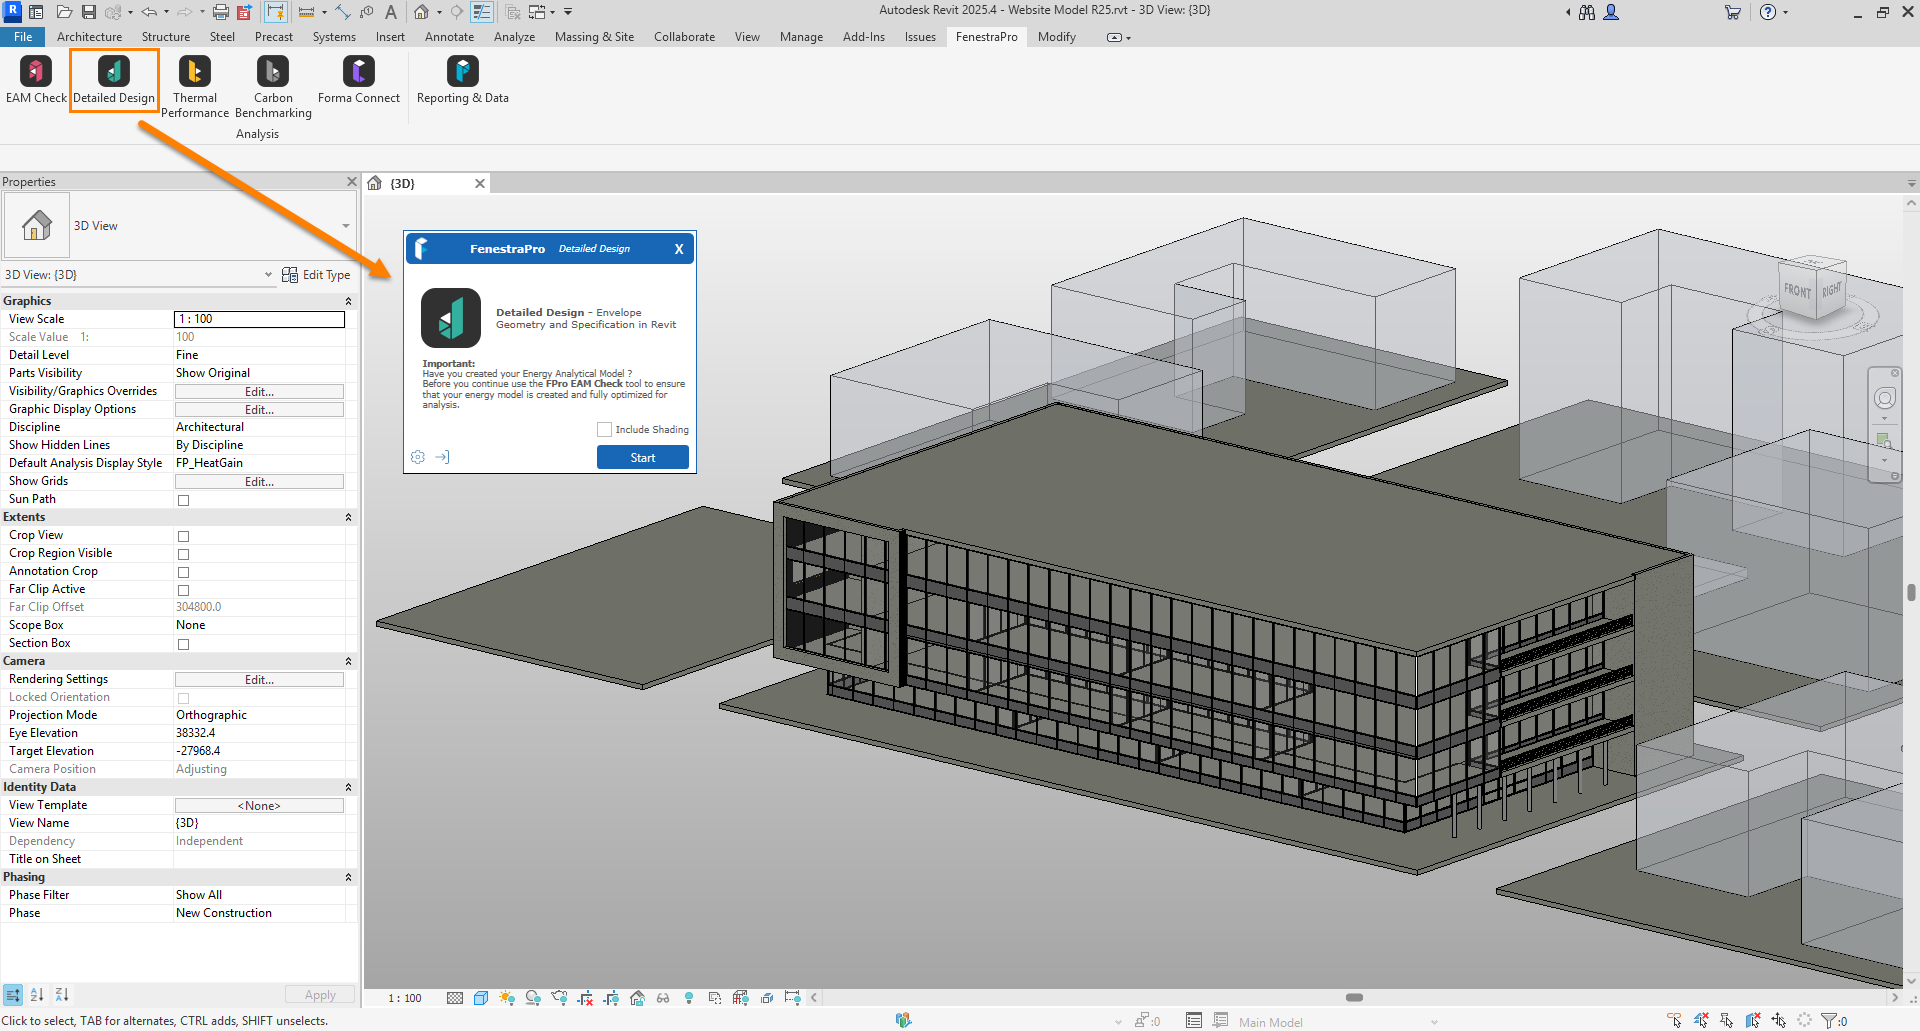
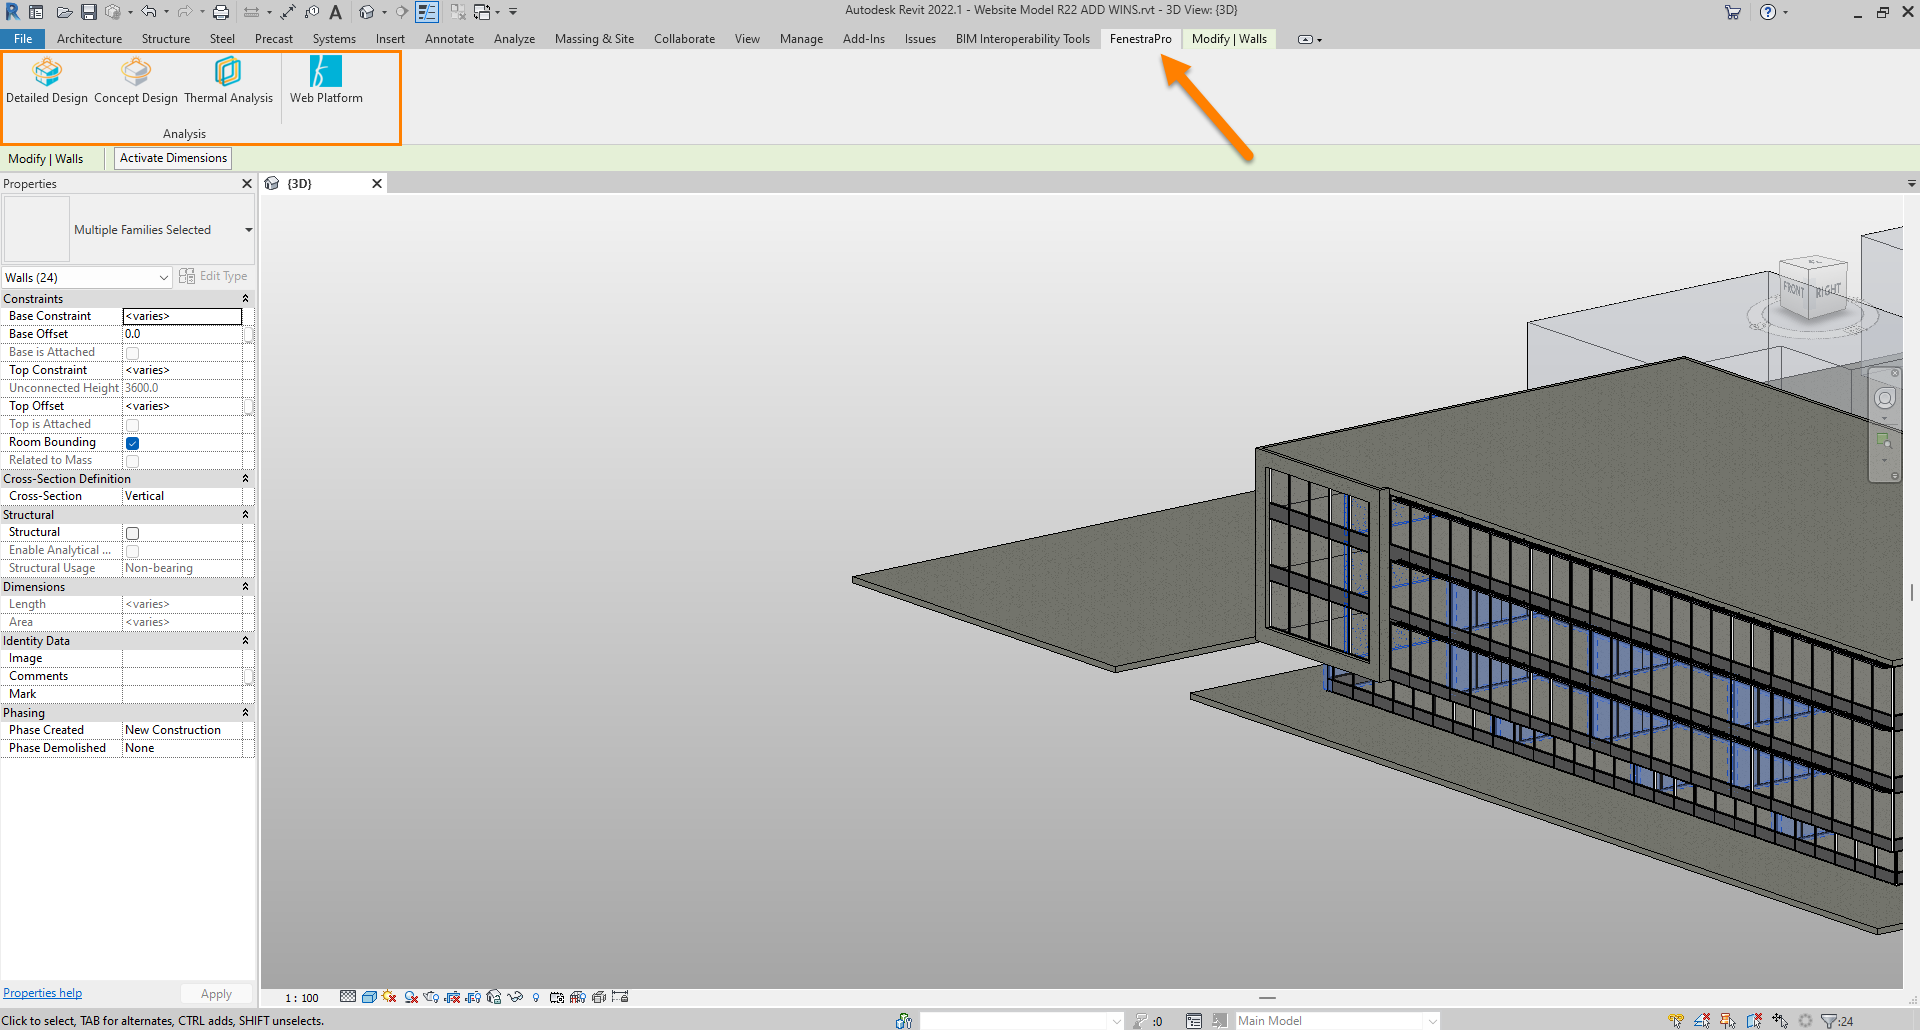
- The application can be found on the Revit menu under ‘FenestraPro’. There are various tools bundled in the installer.
2. If you are unsure about the model integrity, you may open the EAM Check Tool whcih will help diagnose issues.
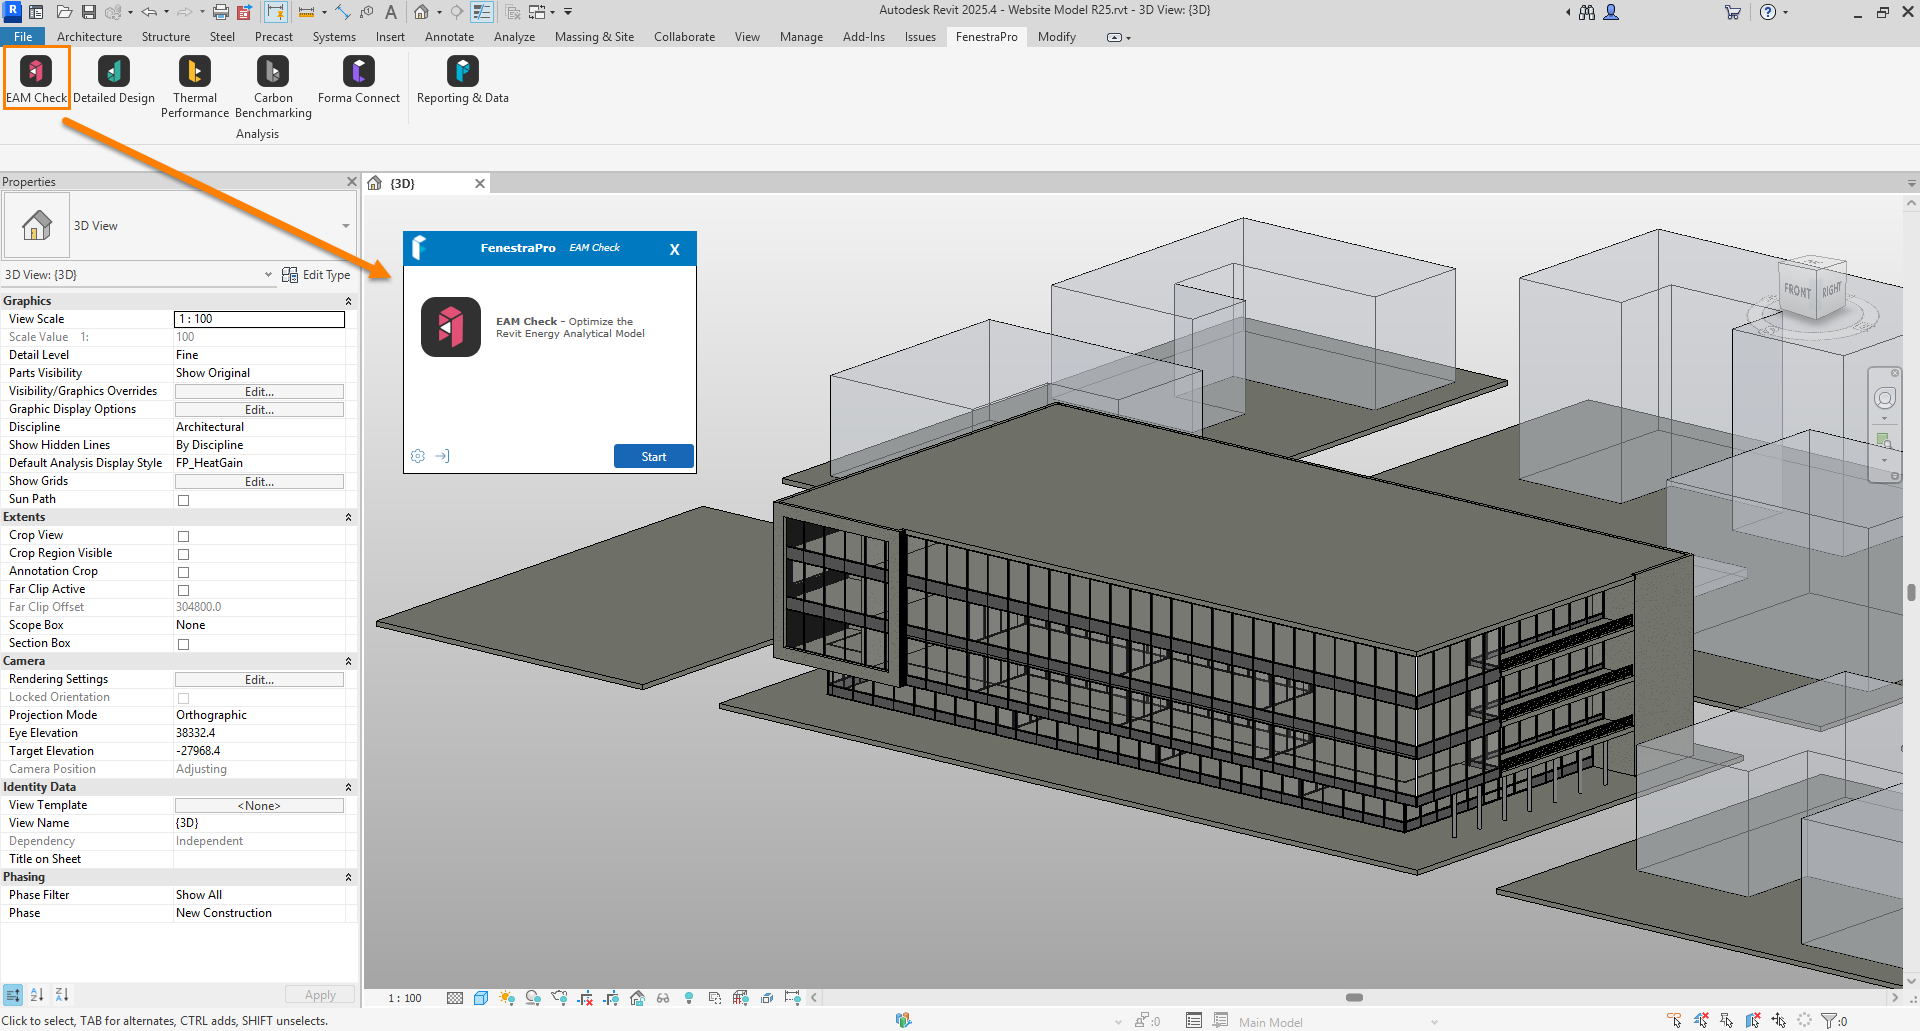
3. The EAM Check option will have guidance on Revit settings, whether elements are msissing properties or are not Room Bounding etc.
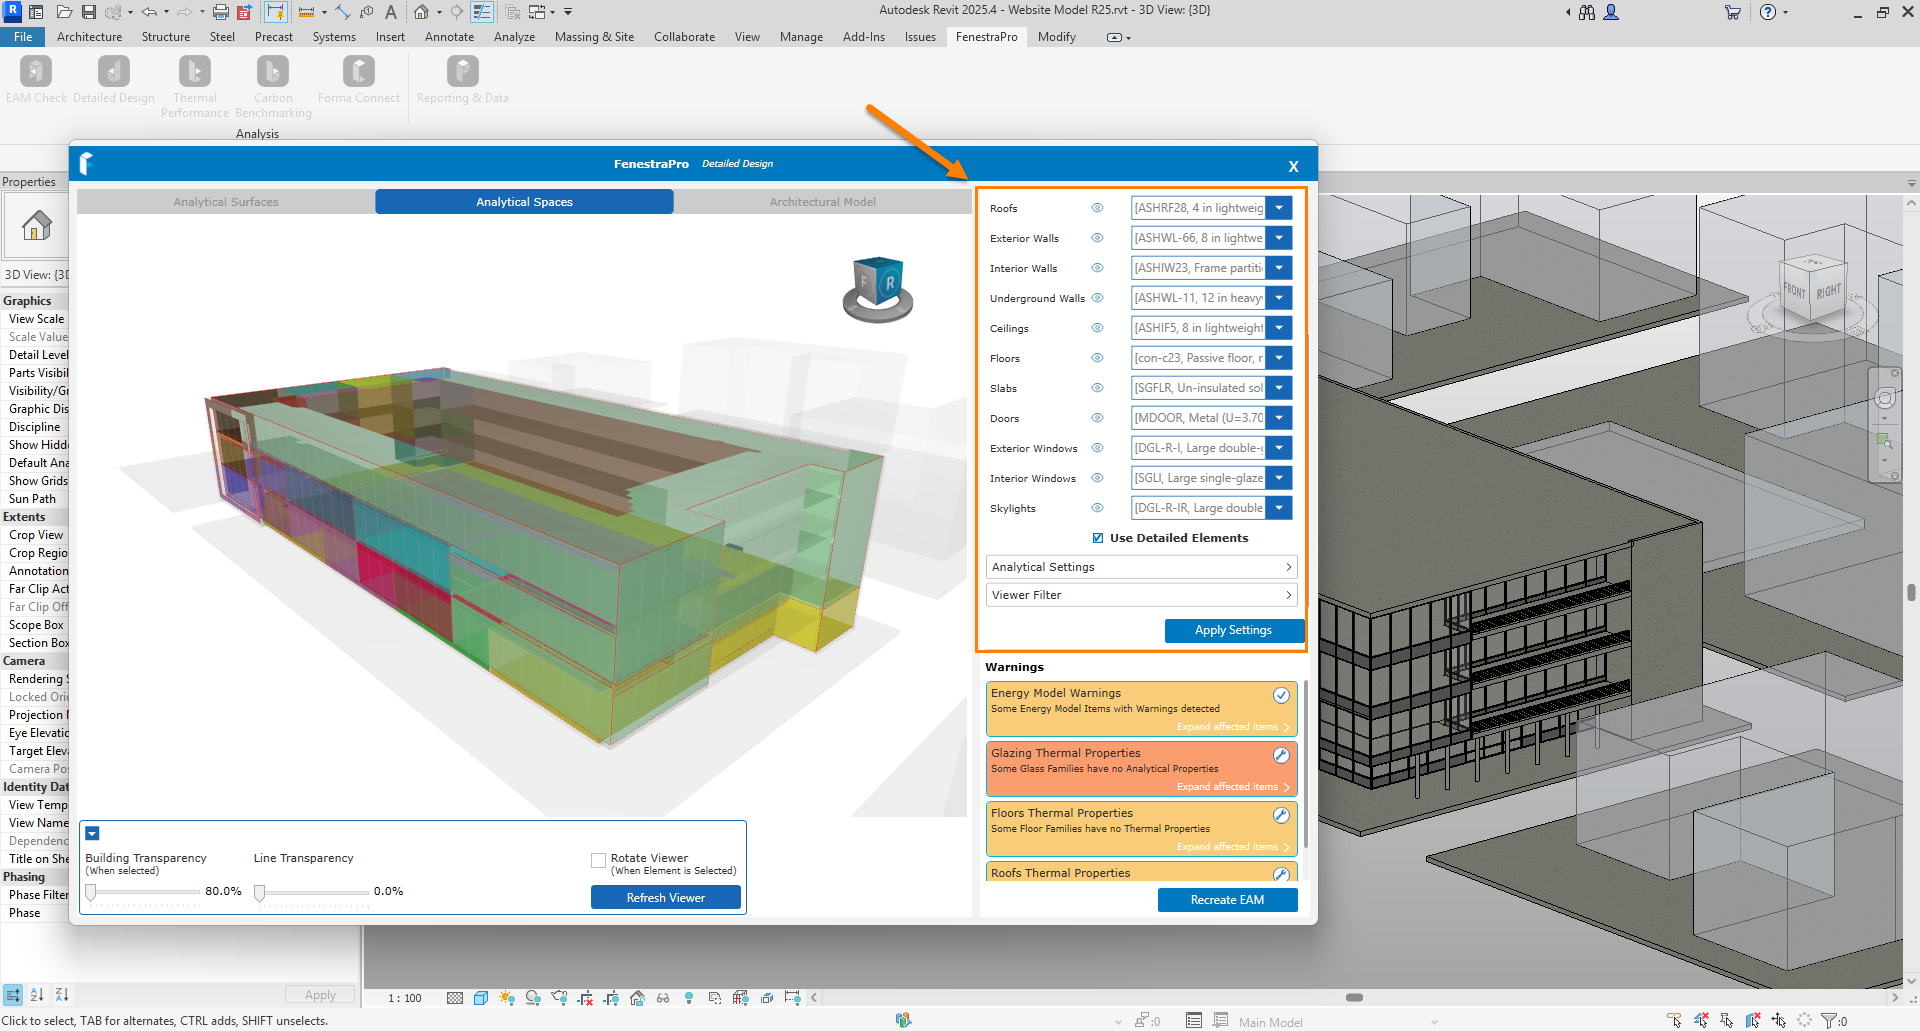
4. Elements without analytical properties can use schematic values as a backup. These may be defined here. Apply any changes and Recreate the Energy Model using the buttons provided.
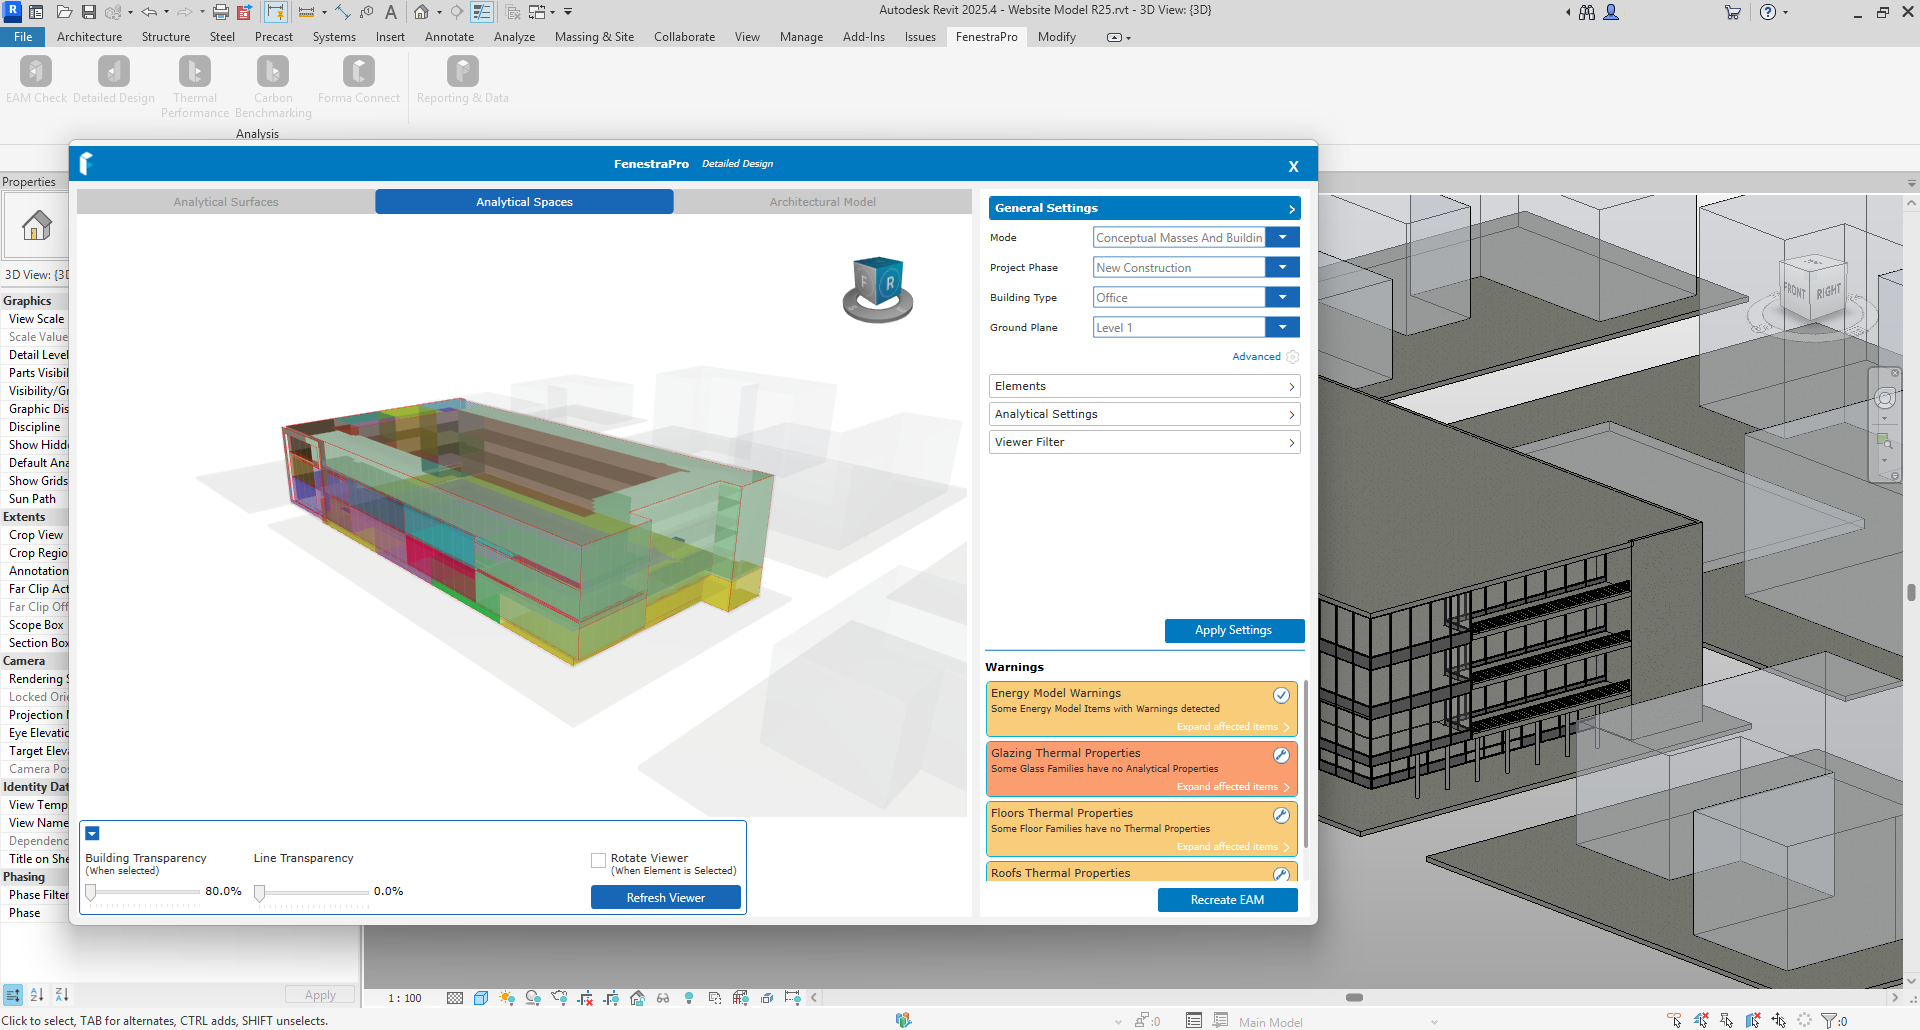
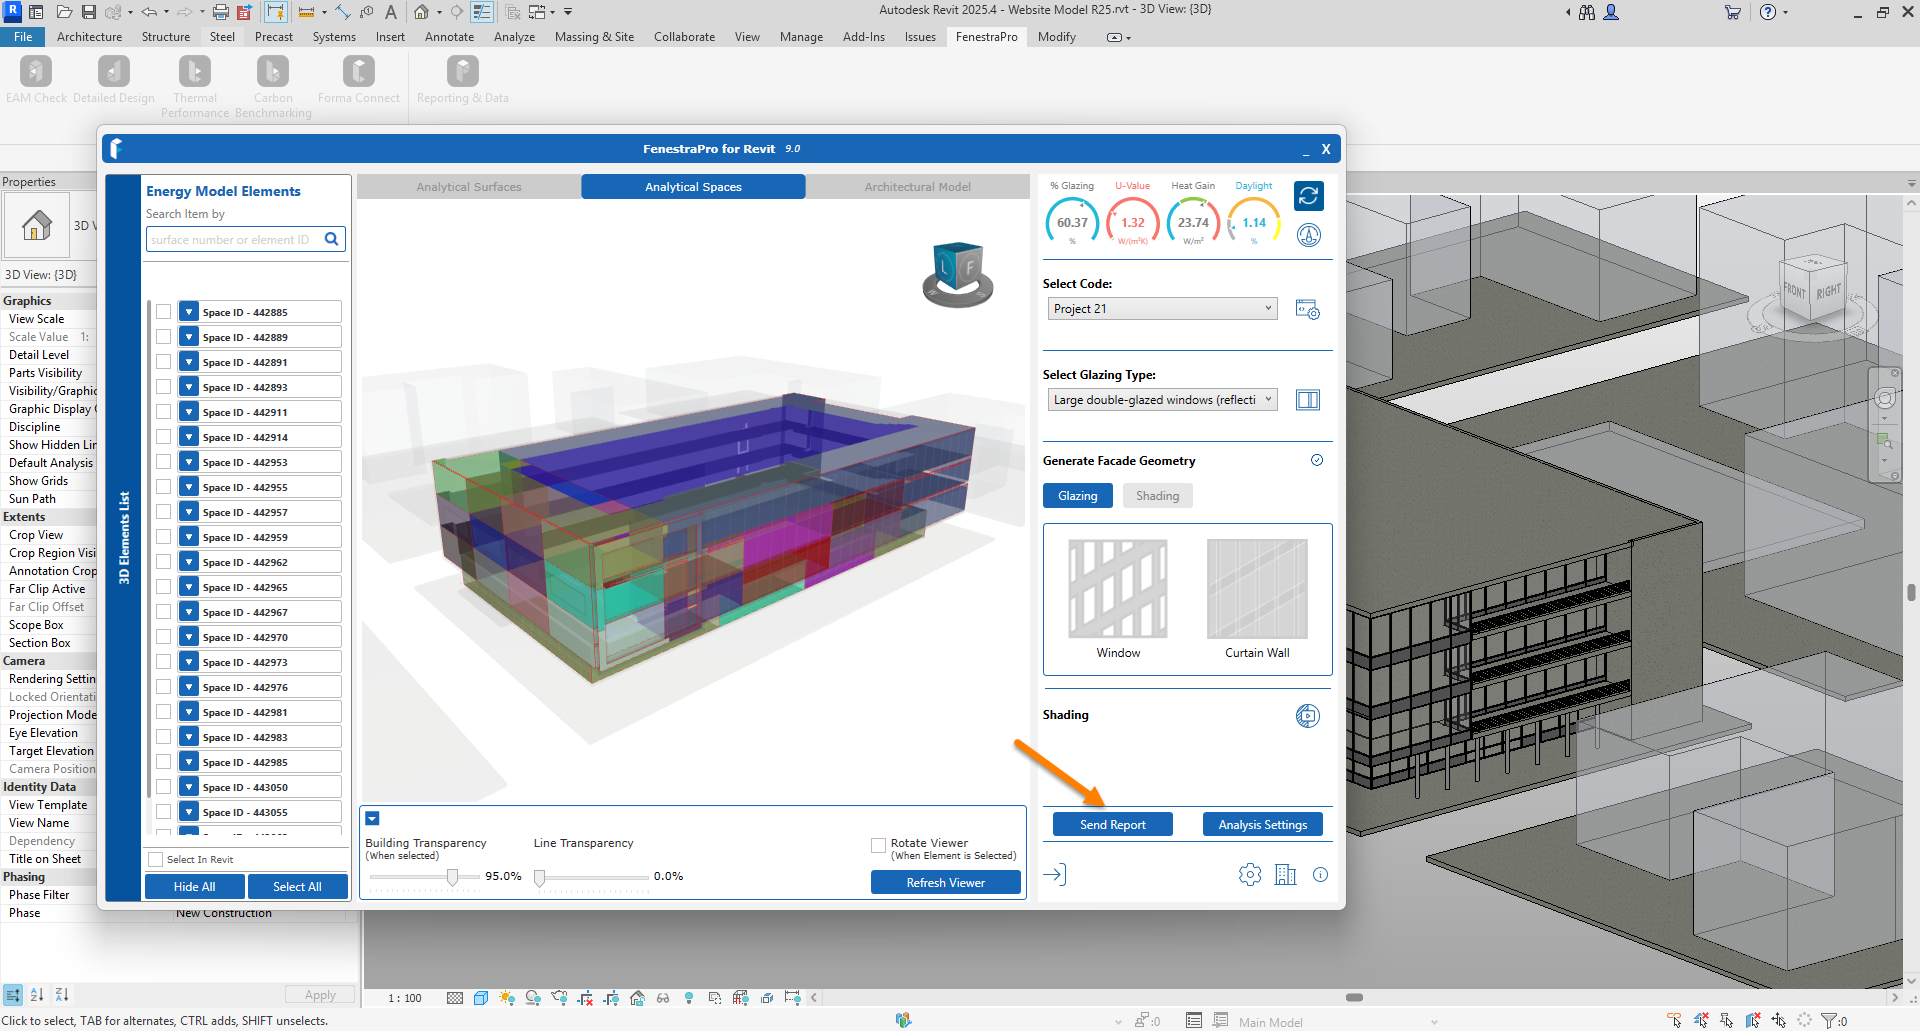
5. Once the model is checked, open the Detailed Design tool to start analysis. There is an option to include shading if there are significant shading factors (surrounding buildings, self-shading etc).
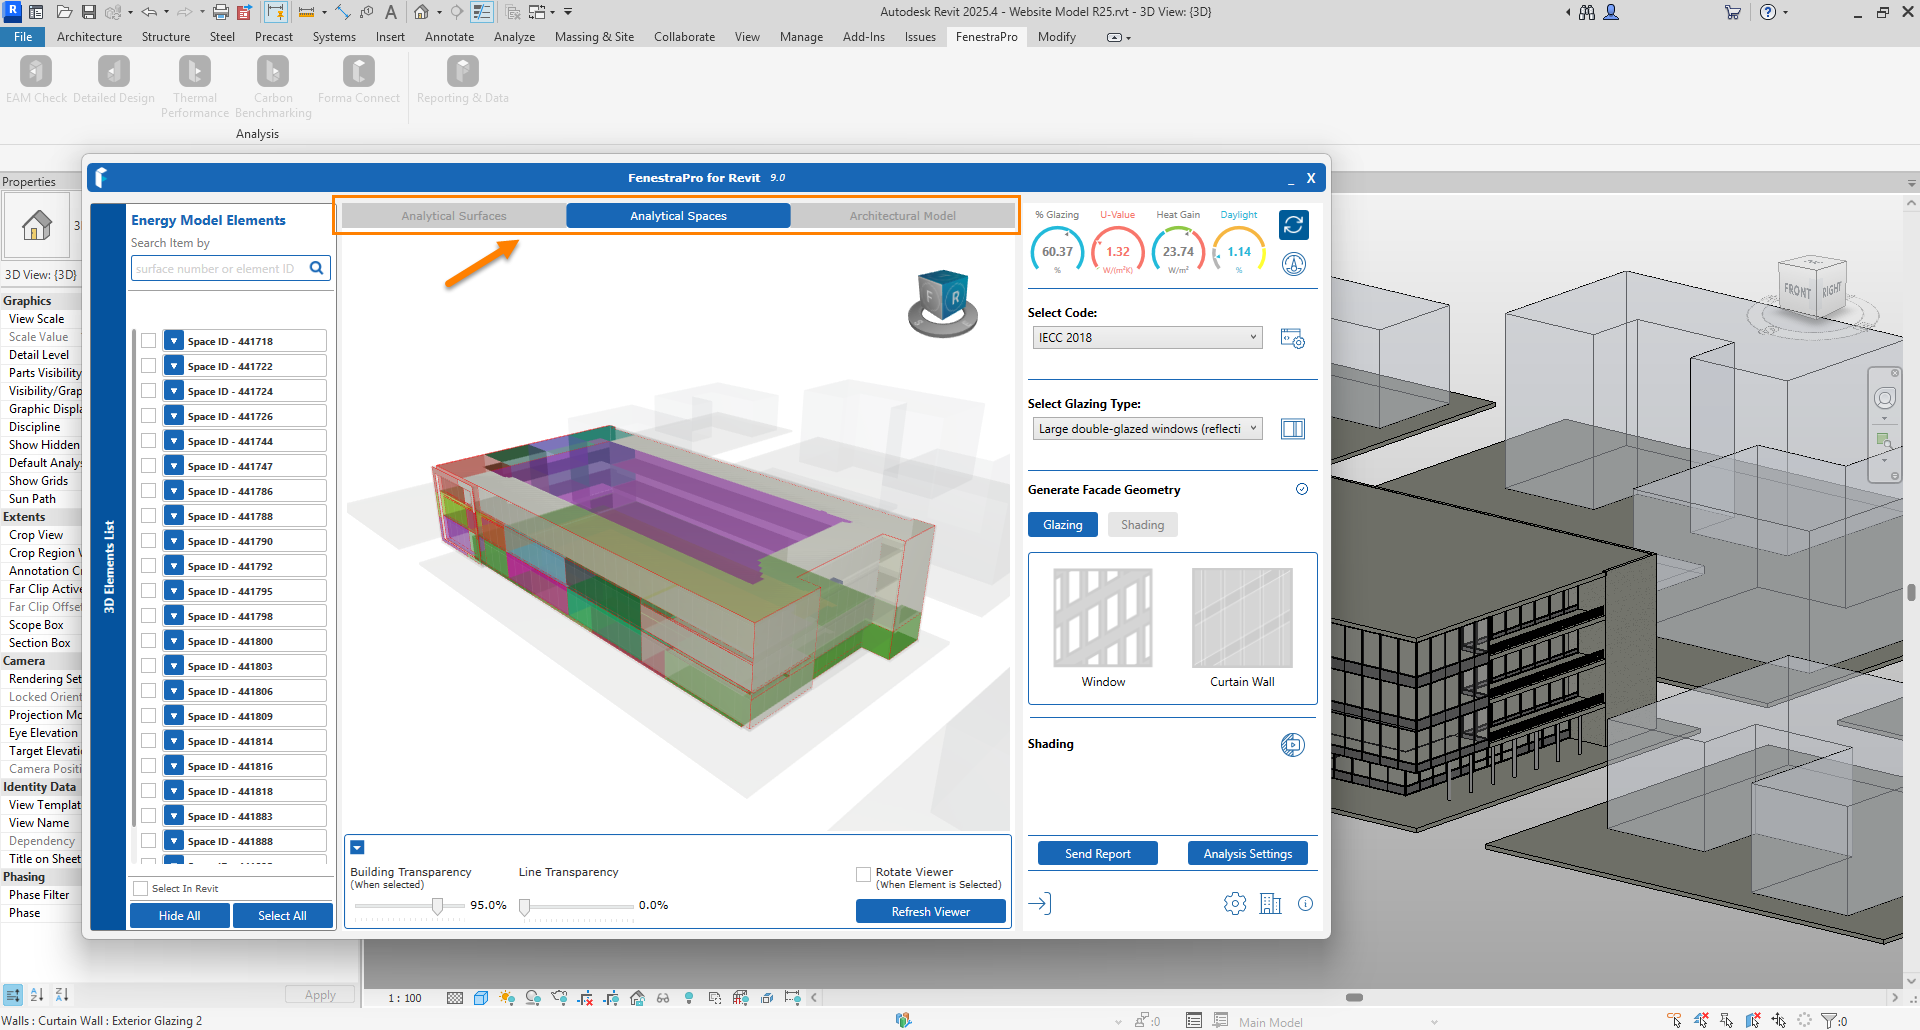
6. The Viewer has 3 tabs for display options (Surfaces, Spaces and Analytical Model). You may make selections by clicking on the model Surfaces/Spaces in the Viewer.
7. The project settings being used can be opened and adjusted here if required (occupancy hours, dates, terrain type etc.

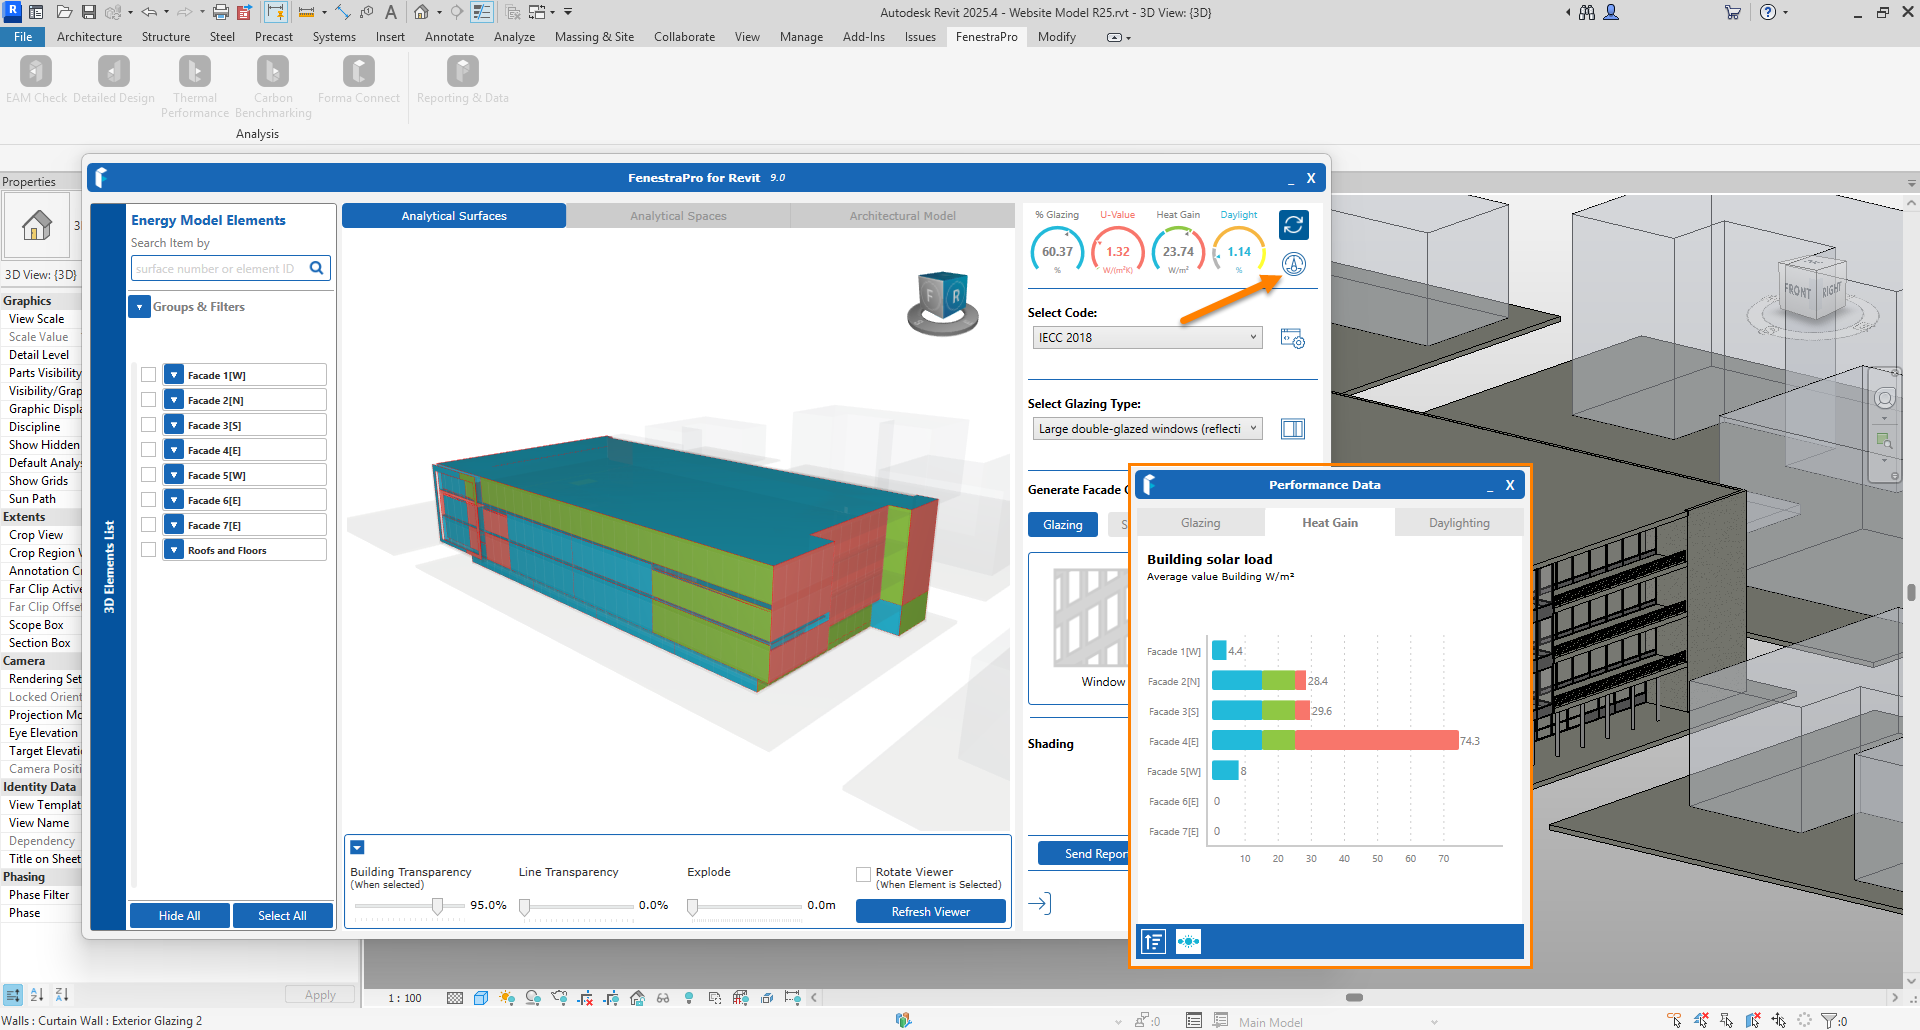
8. Charts can be opened here. Colors will display on the model in the Viewer according to which Chart is selected.
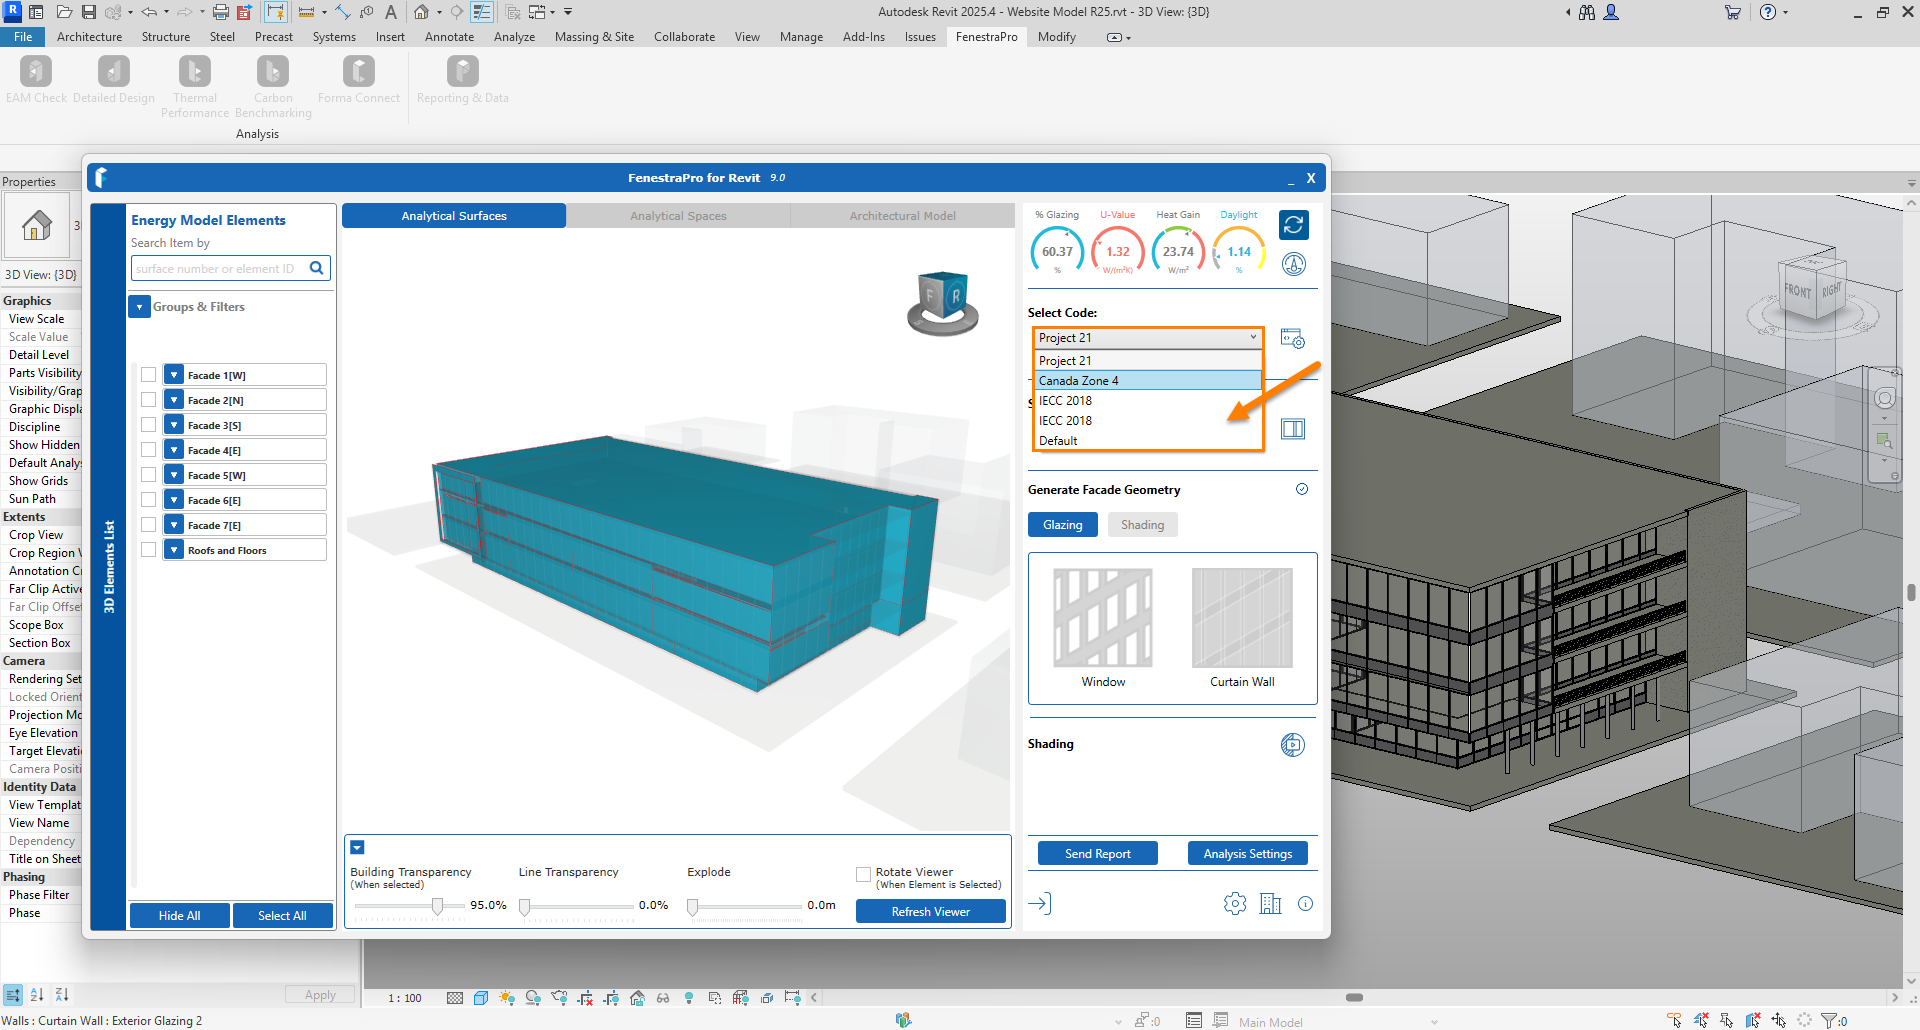
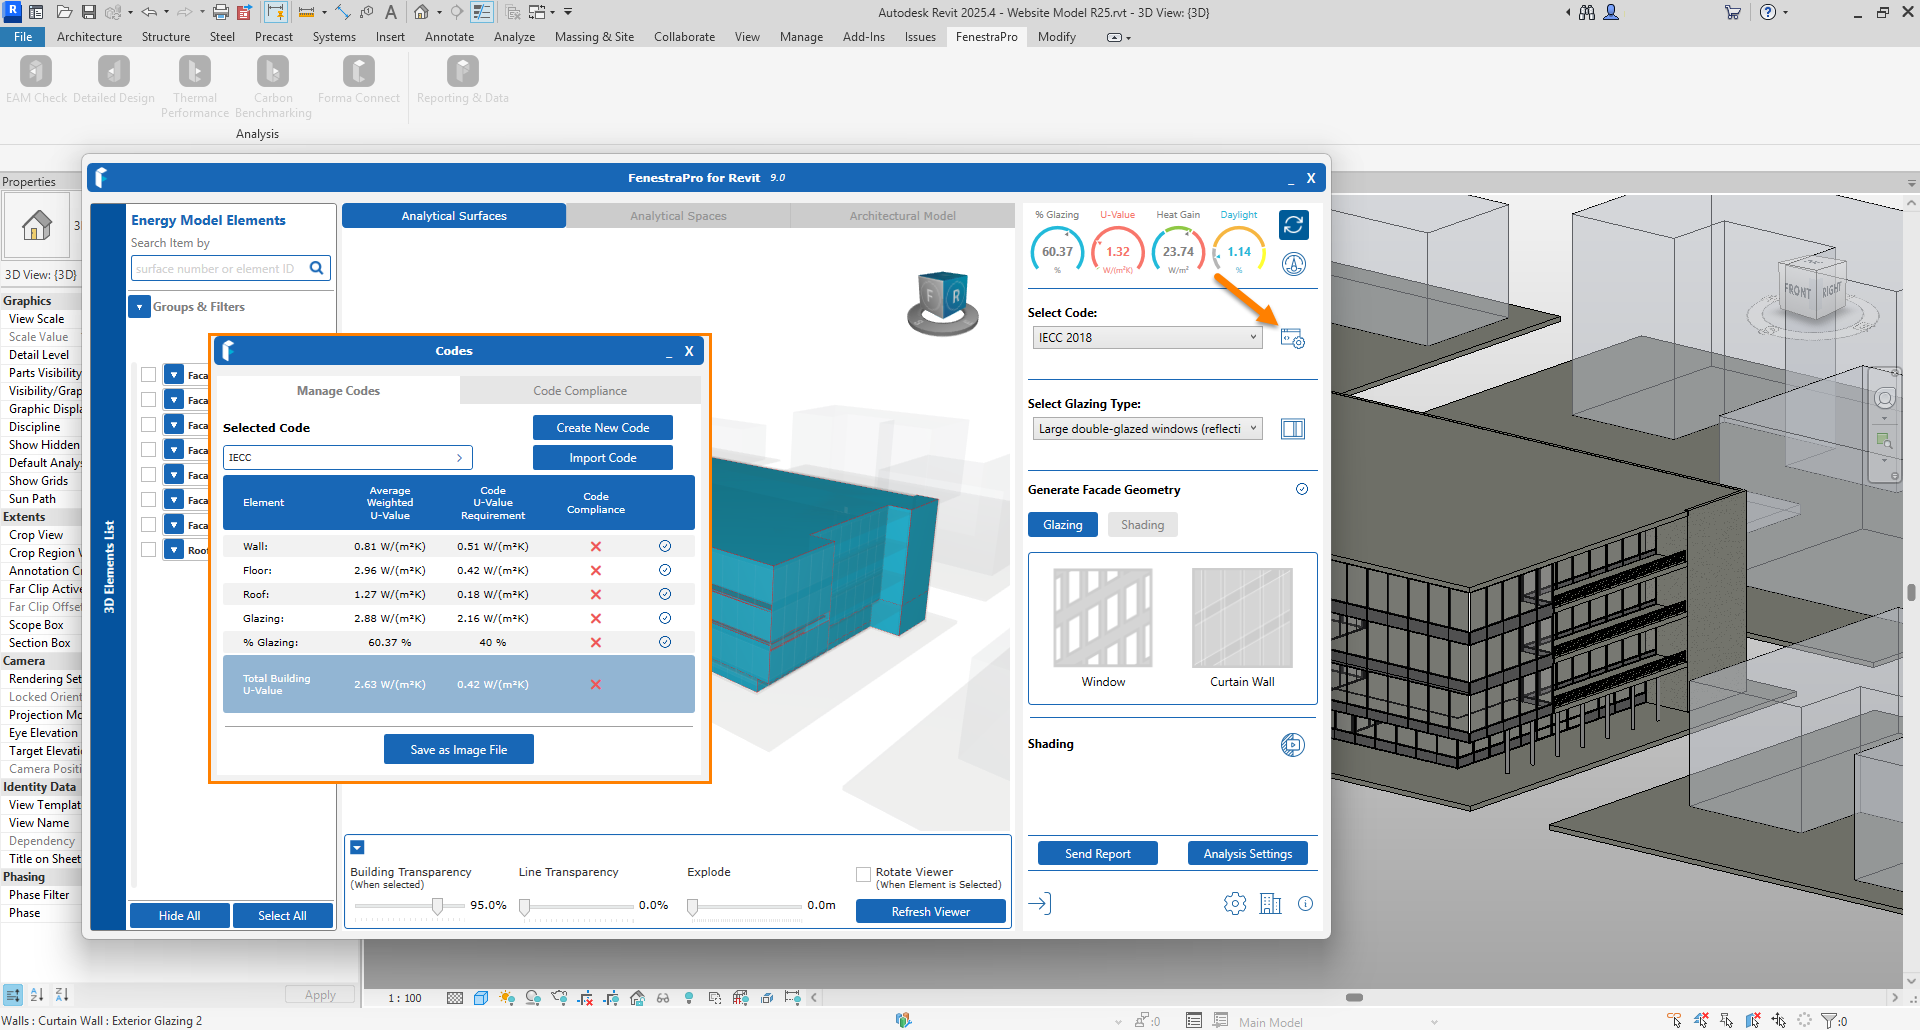
9. An Energy Code may be selected here or you may create a Code for your project. This will then be used to advise on compliance (if model properties comply wiith the Code values). Suggested Codes may be provided depending on your region.
10. The Compliance window may be opened here which displays the values in use compared to Code values. There is a link here to create an Energy Code also.
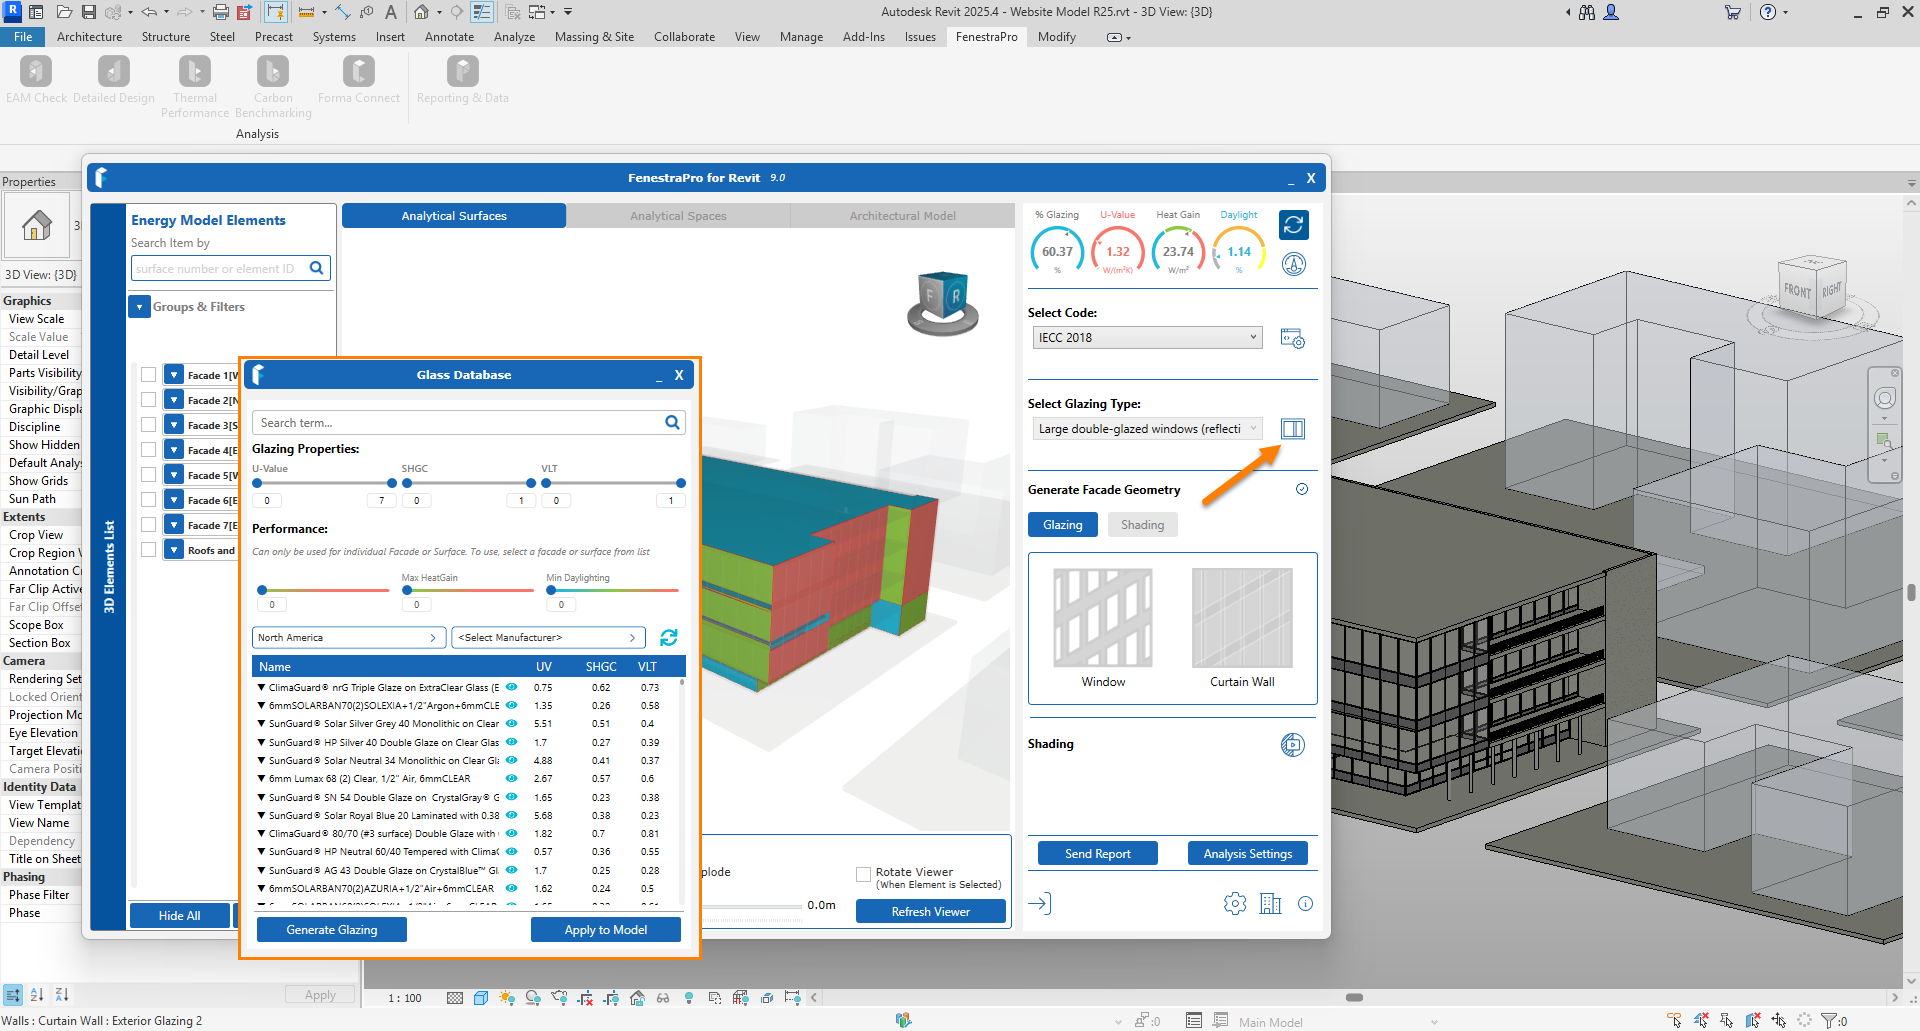
11. By selecting Surfaces on the model, you can change the glass types used in Revit to review how results are affected. The Glass Database may be opened here and sorted/filtered.
12. Alternatively, you may try various schematic types for glass elements and review the results. This will apply to all glazed elements in the model.

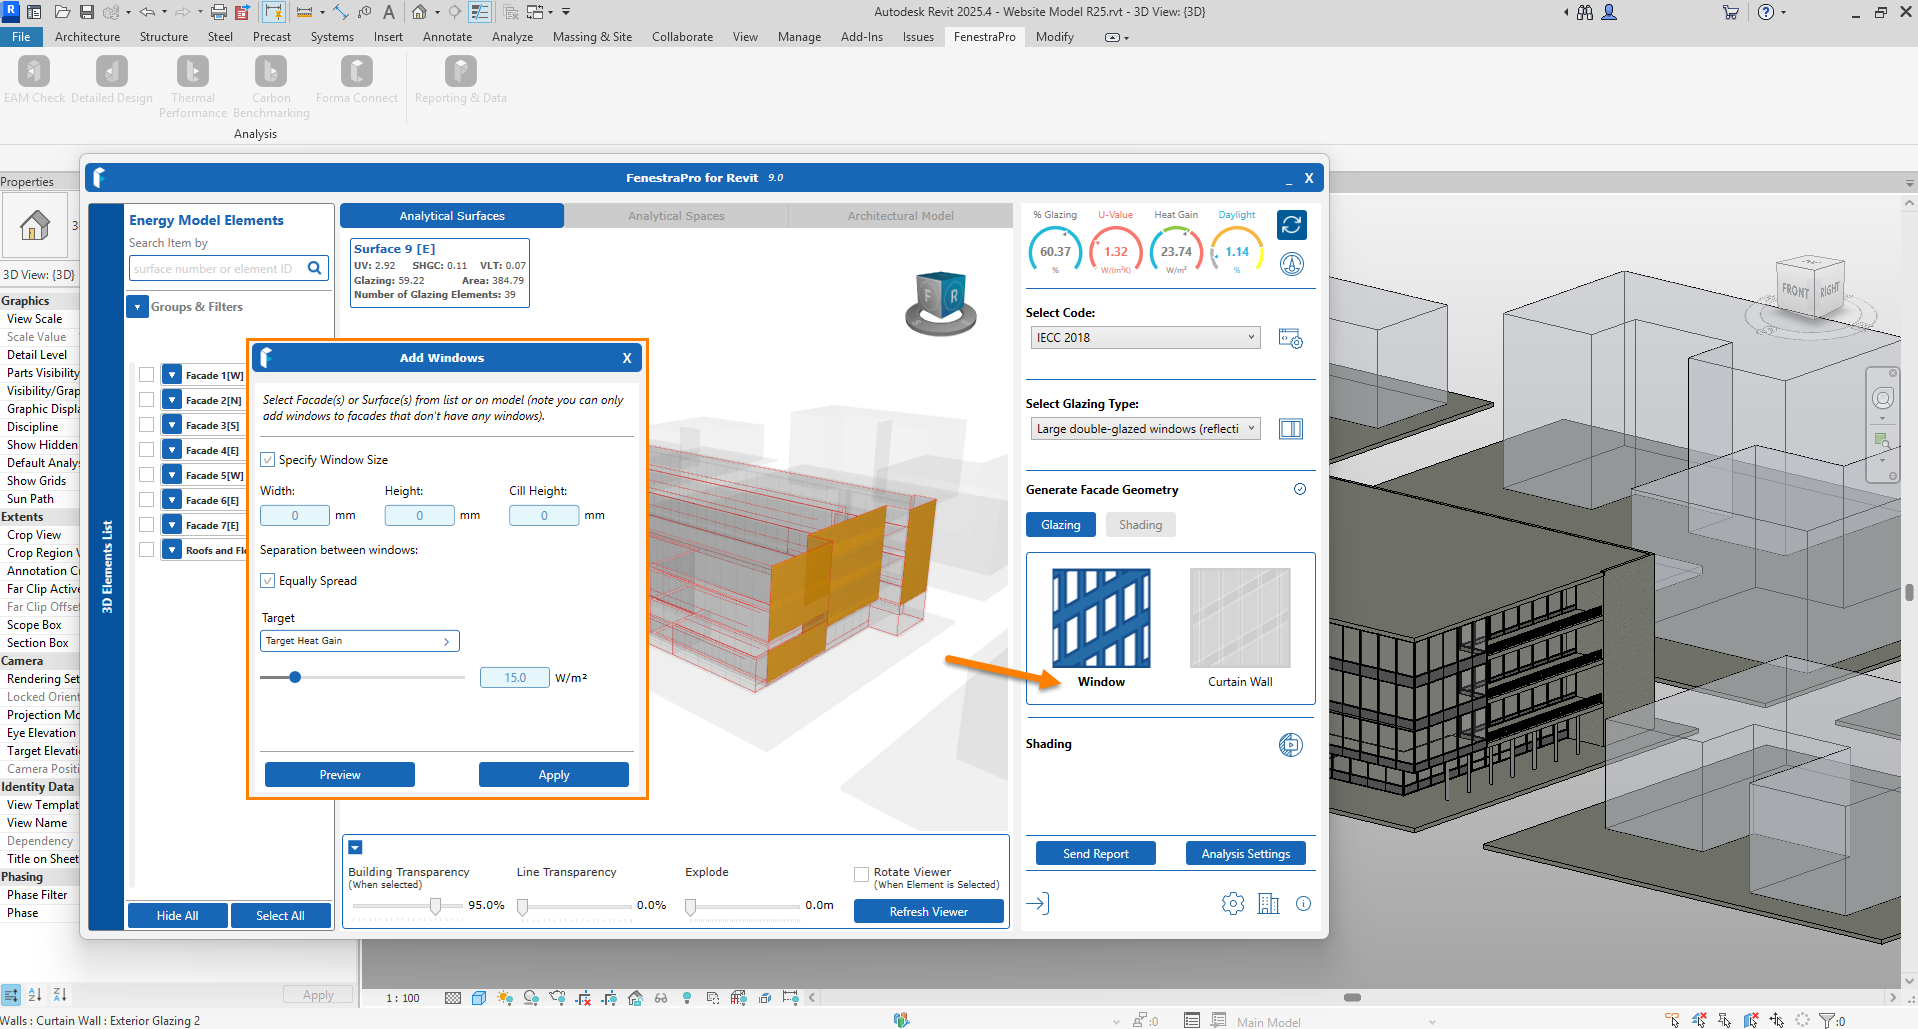
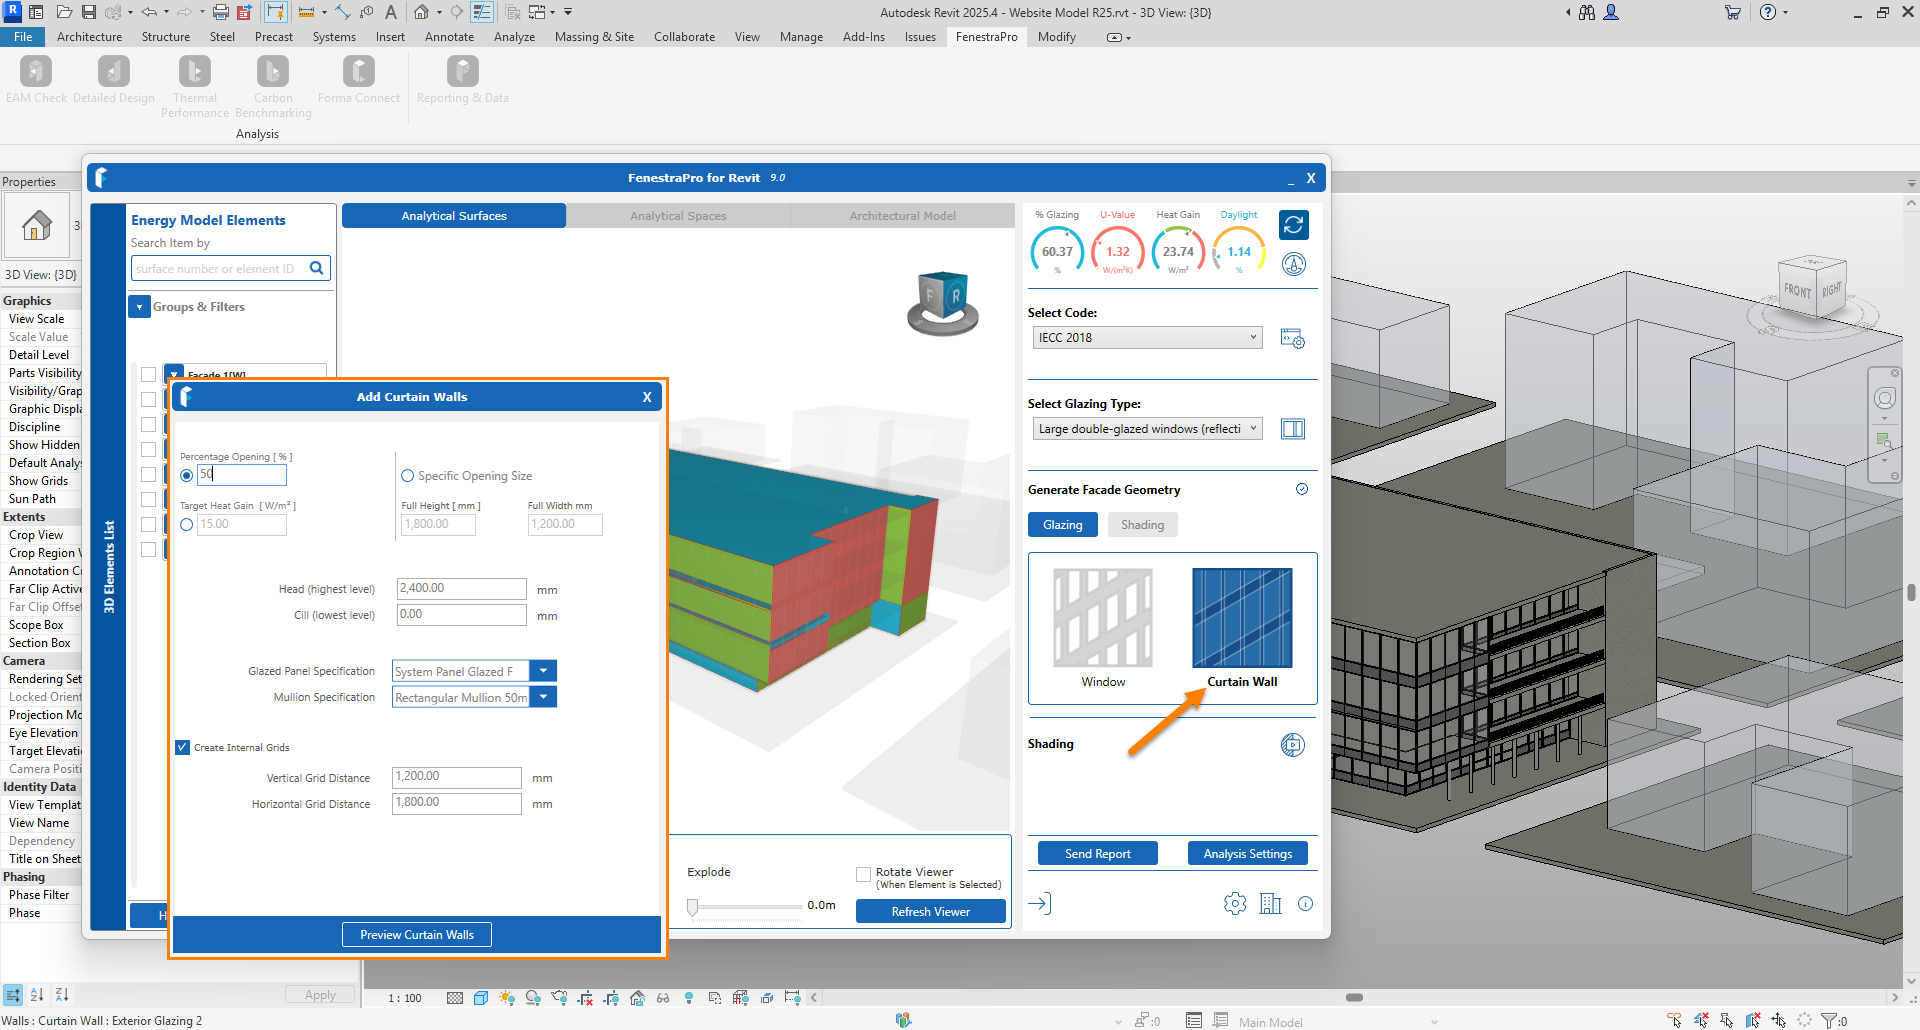
13. Glazing may be added to the Revit model if there are solid walls without any glass elements. You may add windows or curtain walls to a blank facade.
14. Reports may be saved to your Account using this button.
This next section relates to FenestraPro version 7.0 (Revit 2024 / 23) with built in model checker.
Version 7.0 (Revit 2024 / 2023)
- Under the FenestraPro menu in Revit, click on the Detailed Design tool. A dialog window will open. Click on the Start button to load your model into the application. Note: if you have opened your model before with FenestraPro, a Continue button will also display to load the model data faster.
FenestraPro will typically ask Revit to create an Energy Model as part of the launching process when you use it for the first time with a new project. If the Energy Model is not successful in Revit, a message will display and the model will require attention first to fix modelling issues (such as gaps in the enclosure, element or family types etc). Please contact us if you have model issues as we can provide guidance on typical issues. There is also guidance here.

2. Essential model elements and surroundings will load into the application.

3. The main window will open. If the Assign Glass button displays, this means that some glazing elements do not have properties. The application can fix this by assigning a default glass type to get you started. Click on this Assign Glass button – a list of glazing elements without analytical properties are displayed. You may fix all of them at once or select individually. Once this is complete, a message will confirm.


4. Next, there is a Model Check option if required. Here you may check if you have all Energy Surfaces and Spaces, see element functions as well as run a check for warnings. Click on Continue button to move ahead when complete or at anytime if you wish to skip this step.

5. In the next stage, you will select a reference Energy Code with target values. You may see a list of suggested Codes (depending on your region) or you may create a Code in your online account and import here. A placeholder Code is also provided to proceed quickly without defining any specific values. Click on the Continue button to proceed.

6. In the next step, Code values are compared to existing element properties in the model to check compliance. Compliance is indicated by a green checkmark, non-compliance is indicated by a red X.
You may apply the target reference Code values to all element categories using the Set button. This will override existing values for calculation purposes (Revit model elements are not changed). Use the Continue button to proceed to the final step (you may always return to this area later to define values in more detail).

7. In the final step, define project settings and click on the Download Solar Data to get results for the model. If there are significant shading effects (surrounding buildings, self shading, shading devices etc) which will reduce Heat Gains in model spaces, leave the Calculate Shading checkbox on. Once this is complete, click OK to the confirmation message and click on the Let’s Start button to enter the main application window.


8. In the main window, you can swap out Glass Types (which will affect the results), generate glazing on the model, save Reports and review Shading Effects on the model.

