
The Thermal Performance tool provides detailed analysis of curtain panels where there are sub-panels or several materials in the panel family. The tool can query curtain wall panels to find dependent elements’ geometry and materials. This does not need to be done for most normal windows or curtain panels in Revit but only where this condition exists (multiple materials in one family). Revit can apply a single material only to this type of element (entirely glazed or solid etc).
This tool provides a means to:
- Identify the individual parts
- Assign thermal properties to each
- Calculate an assembly value for the family
This tool is used to identify materials and assign thermal properties to panel elements, mullions, frames, spandrels and set boundary conditions. This data may then be used in the Detailed Design tool.
The Thermal Performance tool supports nested components in Curtain Panels. This is where panel families in Revit may consist of different components, sub-panels and materials. This is different to a curtain panel that is simply divided by grids and has various materials inserted it into it. Nested Panels are curtain panel families which are modeled independently, may be edited separately and are nested into a larger panel, possibly with other similar components.

The Thermal Analysis Tool is a separate application but is bundled with your FenestraPro installer and provides information on these types of Curtain Wall Panels.
Where Curtain Panel families are comprised of nested families which may have several different materials, the Thermal Performance tool provides a breakdown of these families and the ability to assign thermal properties to each nested component. Once properties are assigned in the Glazing Tool, they may be exported to FenestraPro under User Defined Properties.
Please see this Section below for guidelines on using the Thermal Performance tool and how the properties set there may be imported into FenestraPro.

Summary of the Workflow
- Launch the Thermal Performance tool
- Select a curtain panel type in the model
- Assign definitions to the materials that display (Frame, Glazed Unit, Mullion etc)
- Refresh the Zones
- In the Exposed Faces area, click on each material and assign materials to the adjacent zones and save these
- Repeat this workflow for all panel types in the model for which you wish to obtain an assembly value
- Once complete, select a Curtain Wall in the Revit model that contains the panels that you defined
- An option to Populate Curtain Wall will appear, click on this so that assembly values are associated with this element
- Repeat this for other curtain walls in the model that also contain the curtain panels that you have defined and populate those also
- Export data to a CSV file, where it will be read by the detailed tool (in version 9.0, you export data to Revit where ‘User Defined’ properties are used in the Type Properties for those families)
The tool will also extrapolate an overall U-value of complex or composite windows and curtain wall family elements within Revit, in accordance with National Fenestration Rating Council Incorporated (NFRC) guidelines.
The process involves listing the materials found in the family. The user is then asked to categorize each material. Categories include Frame, Glazed, Solid as well as an ‘Excluded’ category to remove that material from calculations. The user is also asked to apply a thermal performance R-value or U-value for each usable material.
This allows the tool to organize exposed geometry into performance zones. Each zone can be further refined with Edge-of-glazing U-Factors and an edge condition performance value and category (Frame or Divider). The area weighted average assembly U-value can now be calculated for that family type.
The assembly U-values can be exported to CSV format, with more options in development. FenestraPro can use these exported assembly R-value/U-values to provide an accurate picture of the unit’s performance within the building envelope. Currently, these values need to be manually input into Revit window/panel families.
You are provided with a list of families in the model and may then assign a category for each material and assign a U-value or R-value. This information may then be passed back to FenestraPro to be included into the breakdown details for glazing elements. These properties will then affect the results for Solar Loads and Overall R-value / U-value. The data may then be entered into Revit using Type Properties for those panels.
Units will display automatically appropriate for your model (metric or imperial).

Note: these videos refer to version 7.0 are are to be updated soon.

 Workflow

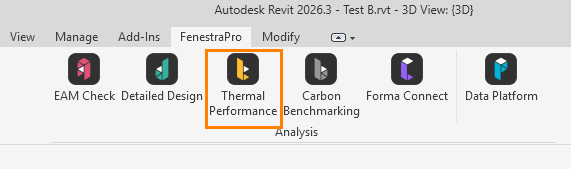
1. Open the Thermal Performance tool from the Add-Ins Menu in Revit.
2. The Add-in opens a new window.
Select a window or panel in the Revit model to begin (use the Tab key on your keyboard to select a panel element on the model). There is a list of steps below to guide you through the workflow.
The Revit ID of the element is displayed in the Tool as well as the orientation on the dial. The thermal properties have not yet been set (some random values may display). Some values may be displayed if they have already been assigned in Revit materials but these may also be overridden. Currently units are R-values for solid elements and U-values for Glazing. These will be imperial or metric depending on the model units.
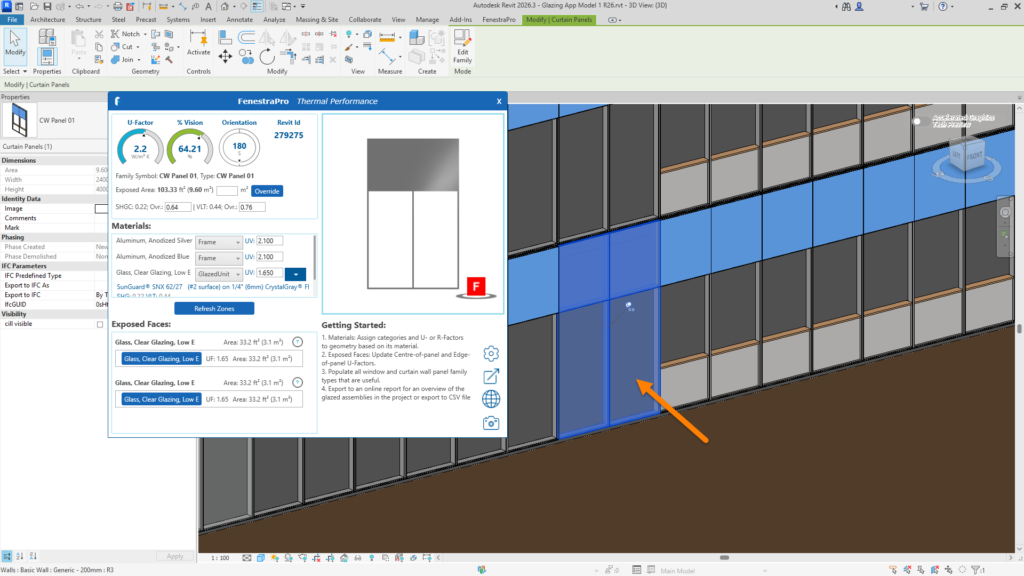
Assign Element Types and Values
3. For each material that has been identified in the panel family, a category should be selected or excluded.
‘None’ will display if no material has been set when the Revit family was created but this should not be left to remain as ‘None’. Materials may be created in Revit for the project and you may assign these in the Tool.
Assign a category for each material using the options: Glazed Unit, Solid Unit, Frame, Transom, Mullion, Divider or Excluded.
For Glazed Materials, the Glass Database drop-down list is provided to select a sample glass type or a product from the included vendors. You may toggle the list from Revit to the full FenestraPro Database.
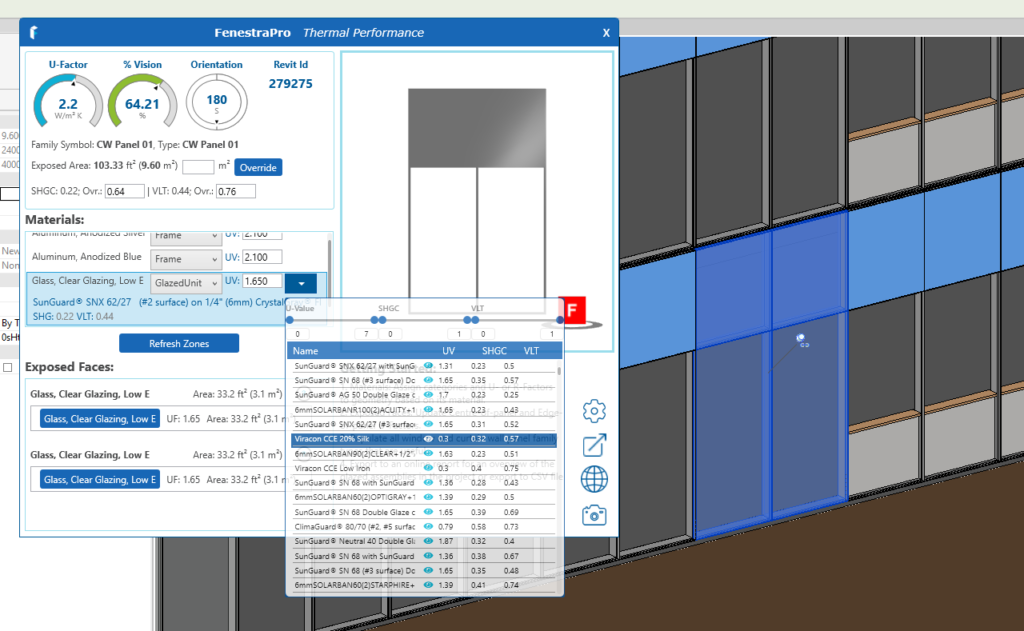
Enter values for each material type listed if known.
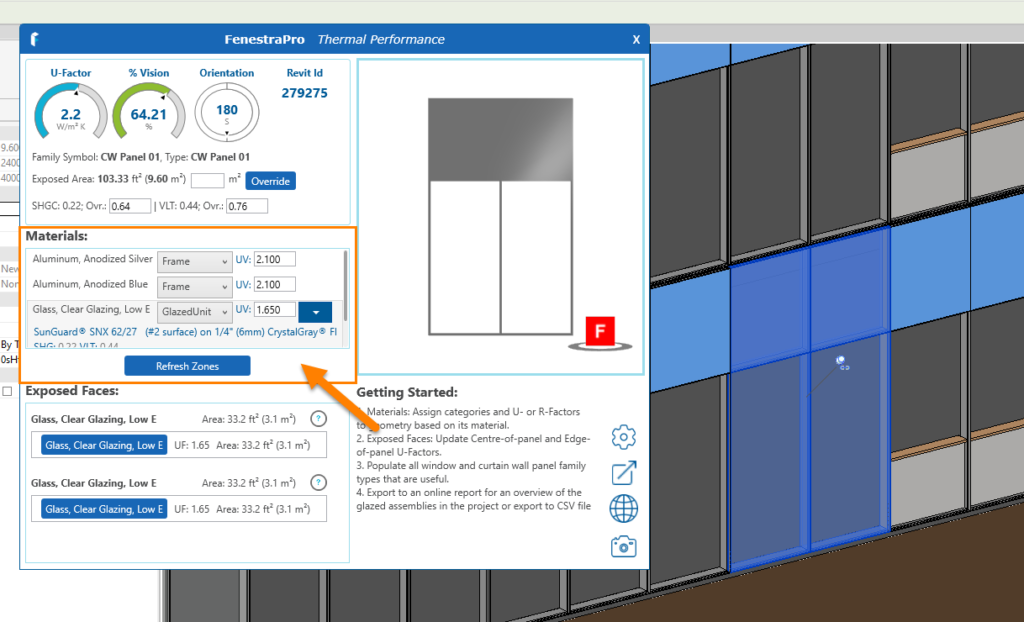
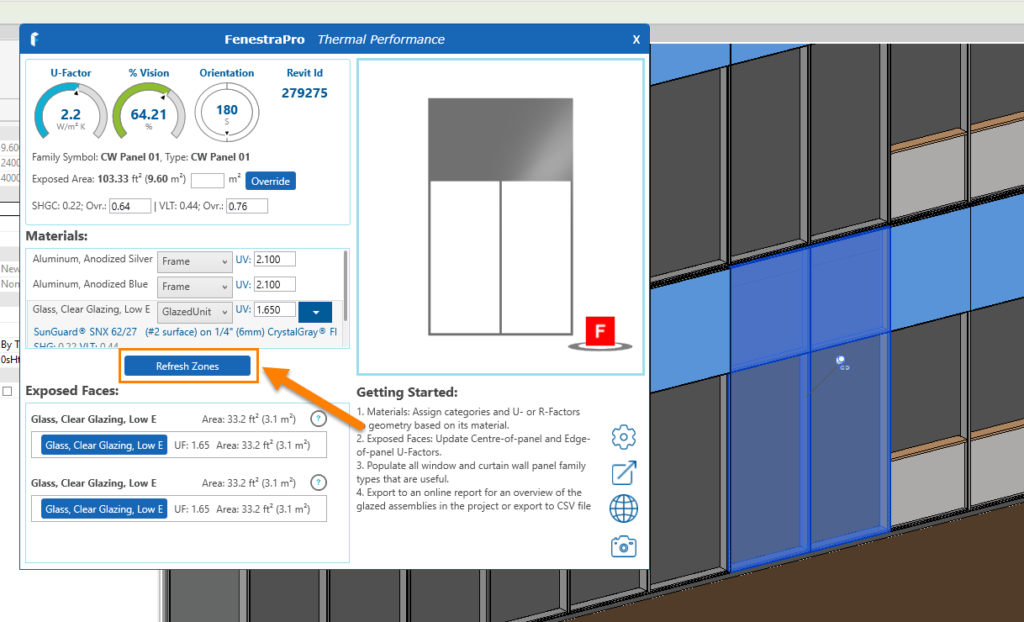
Refresh Zones
4. Once all materials are assigned to a category (the value should not be left as ‘None’ for any material), use the Refresh Zones button shown to update the results. A weighted average is used based on NFRC guidelines.
The Panel Viewer will display the relevant panel. You may orbit in the viewer also by holding the right mouse button and dragging your cursor in the viewer. Shift + Right mouse button = Pan. You may also zoom with your mouse wheel.
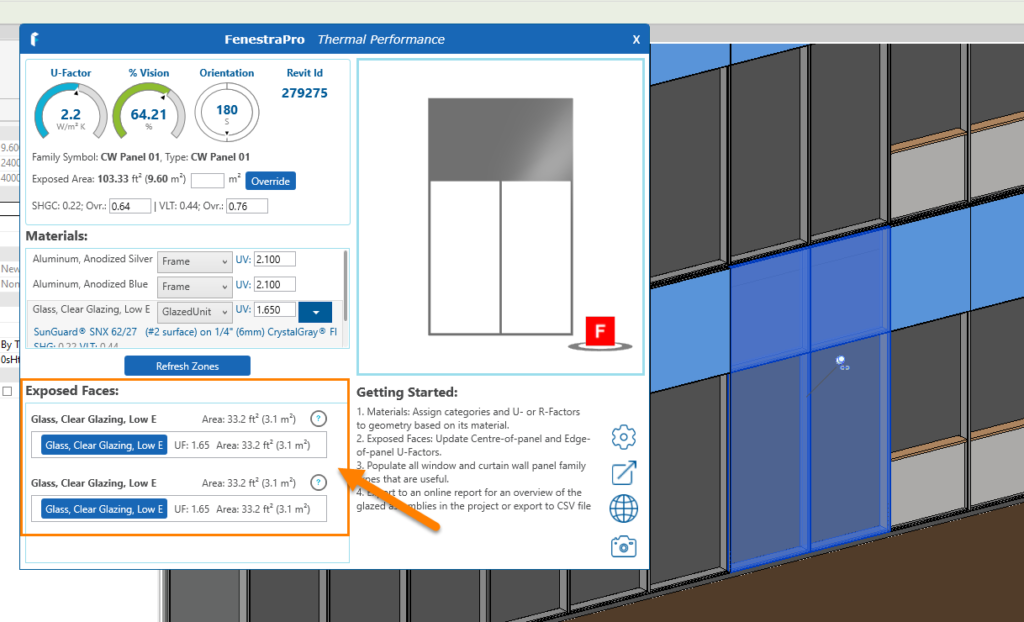
Define Exposed Faces
5. The Exposed Faces are also displayed in the lower panel with areas and properties. These are the surface elevation areas which are in the same plane as the curtain wall.
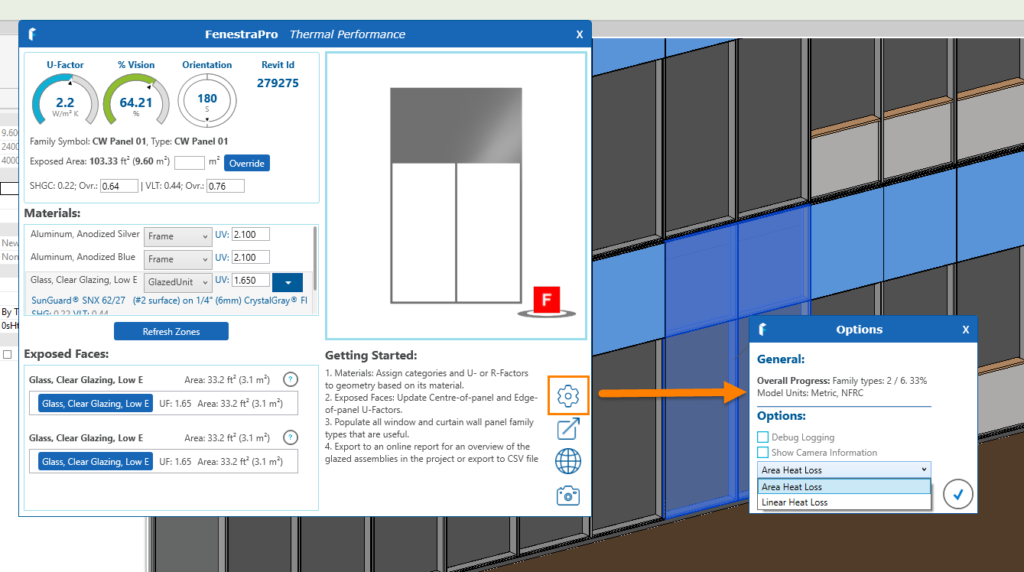
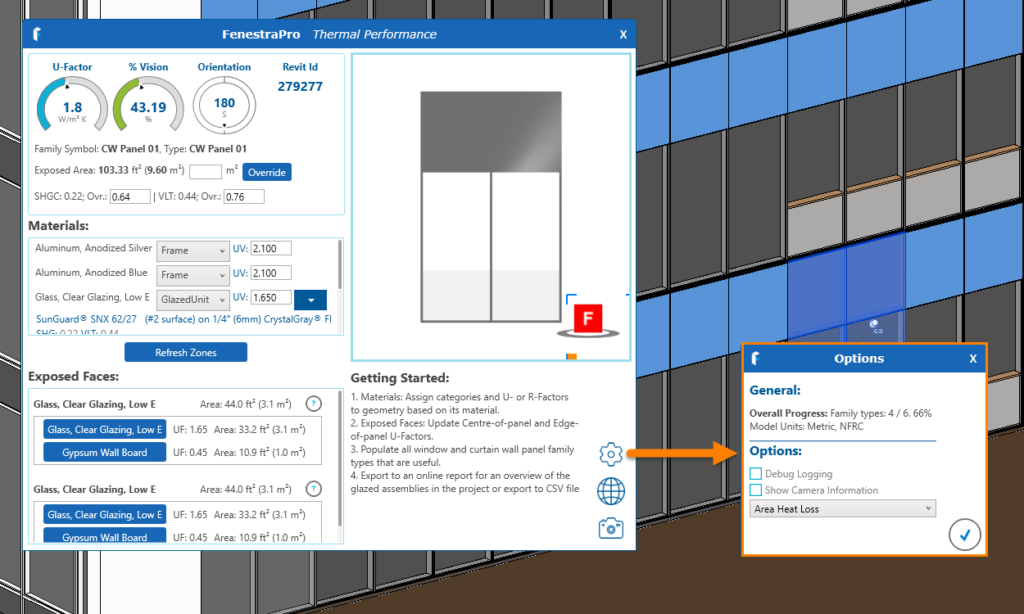
Note: The tool includes a Linear Heat Loss calculation option as well as the Area Heat Loss option in Settings (wheel icon).
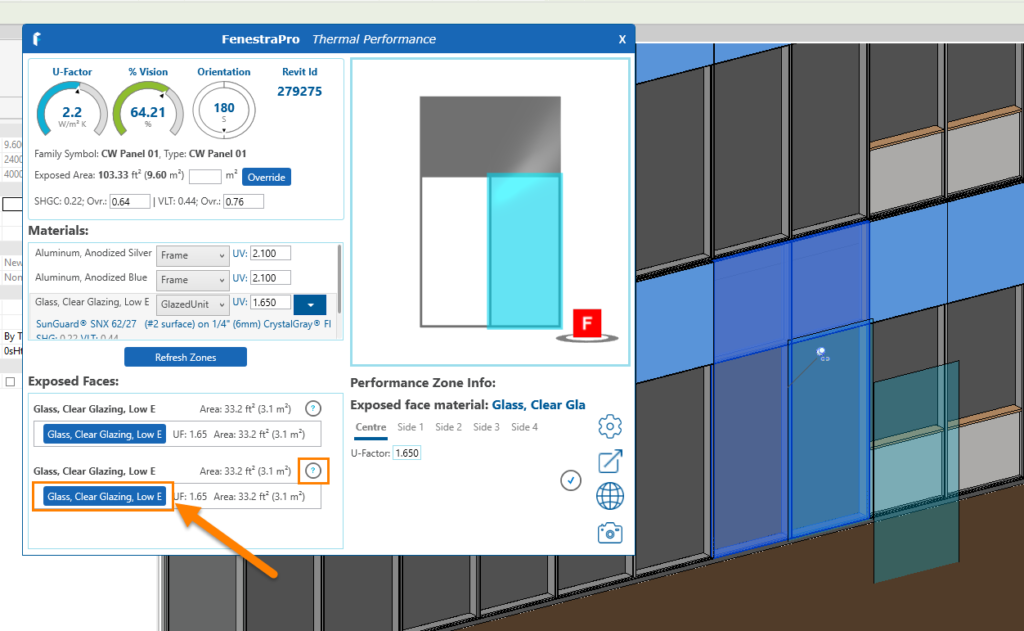
6. Clicking on the question mark icon or the buttons which contain the materials will highlight these locations on the model and in the Viewer.
The Dashboard will then display a U-value or R-value for this panel. This is a weighted average using the areas and properties of the various materials in the panel.
7. The Solar Heat Gain Coefficient and Visual Light Transmission on the Dashboard may also be overridden if you wish. The Exposed Faces settings provide a value where the materials are parallel to the curtain panel. In situations where materials are angled, there is a separate workflow, described in a separate article. You may review values for Center Pane and Edges of a panel, where it meets another surface. This requires advanced knowledge of U-values and psi values for the materials. Click on the checkmark when complete.
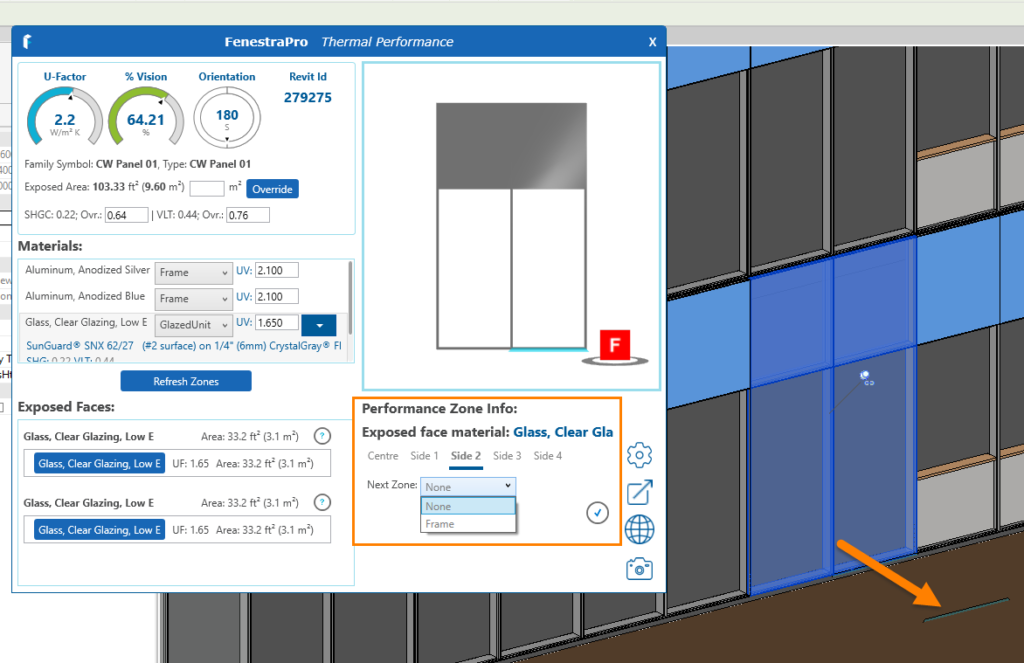
The Tool provides the ability to go into more detail with panel conditions and uses guidelines from the NFRC (National Fenestration Rating Council). Different areas and conditions on the panel are identified and analyzed. For instance, the Center of Panel U-factor is separated from the Edge of Panel where it borders onto a frame.

Where a material touches the surface and divides it but does not break the Surface, a Divider is identified. Here, a Center Pane U-factor is identified as well as an Edge of Panel U-factor. Users should input values in these cases provided by third party tools such as Therm (LBNL).
Clicking on the Tabs (Center and Sides) will highlight the item in the Viewer and in the Revit model. If a frame breaks through the Surface, you may input a value. If it does not break the exposed Surface, it is a divider and will be treated differently. You may still input a value for this type of condition.
Edge of Panel default U-factors are set as 1 (imperial) or 5.678 (metric). A U-factor may be set for the panel and a material category may be set for the surrounding items (Frame etc).
This should be done for each material listed in the section on the left hand side of the application.
Once values are set for a panel type, this will apply to other instances of this family in the Revit model (this does not need to be repeated for each instance).
Another Panel type in the model may then be selected and the process repeated until all family types in use in the model are dealt with. Once a new panel is selected in the model, the items contained in the family are displayed and you may set values for each material type.
Very small Surface areas (edge of materials etc) may be excluded if they will not have a large effect on the results.
Note: Areas are currently rounded to two decimal places, so larger windows may not always display significantly greater values than smaller windows.
Panel Orientations
8. Select a curtain wall to check panel orientations. Two buttons will display in the window. You may check the orientation and flip this if required. Options will display to Show Orientation and Populate Curtain Wall.
A globe will display in the model. This should typically be on the outside of the building envelope so that panels face outwards. If panels are not displaying correctly, you may flip this orientation. You should check all curtain walls for correct orientations.

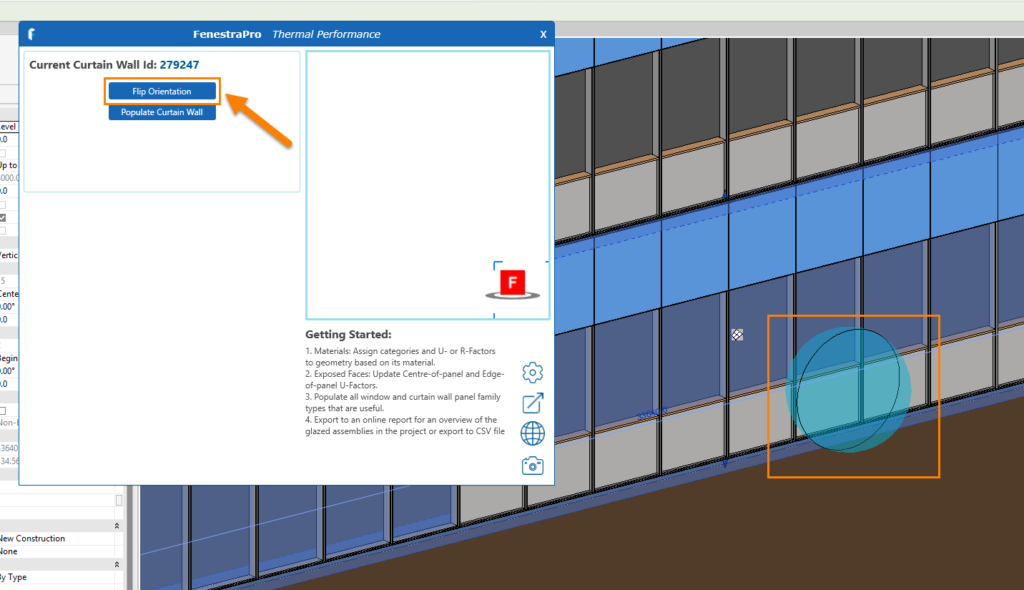
9. The next step is to Populate Curtain Wall. This means that all instances of the panel types that you have defined, will be set to those properties in that curtain wall. You should do this for each curtain wall in the model so that panels that you defined are assigned.
10. Once Populate Curtain Wall has been used, you can also now set the frame value. Use Refresh to update the final values.
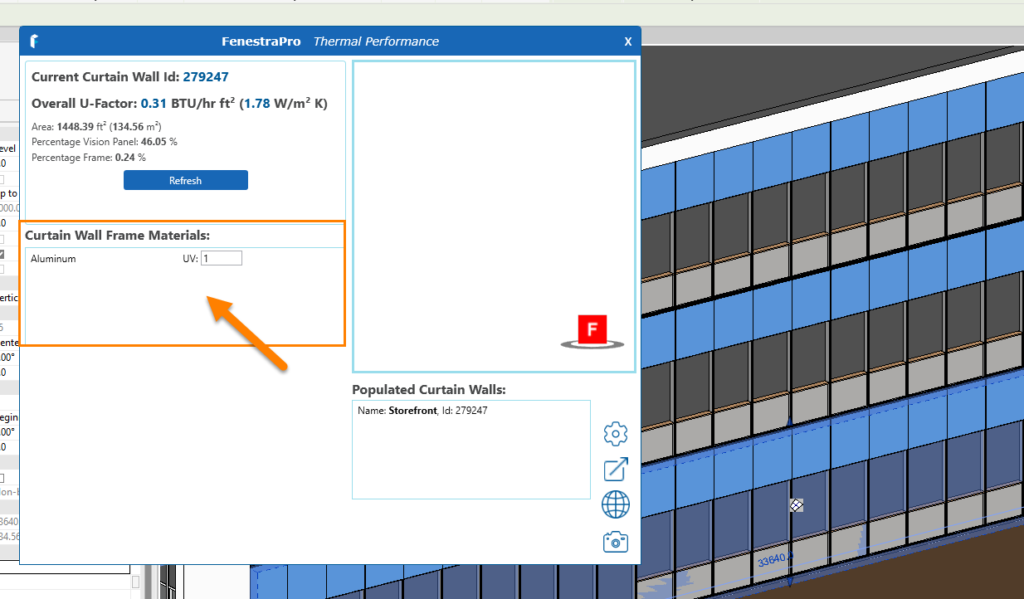
When complete, you may return to the components window by selecting a panel on the model.
11. When all Curtain Panel types have been assigned properties and orientations checked, you may export the data to Revit, where they will be used by FenestraProto calculate results. Revit family type properties will be updated and these will be read by the Detailed Design Use the button shown to export the data.
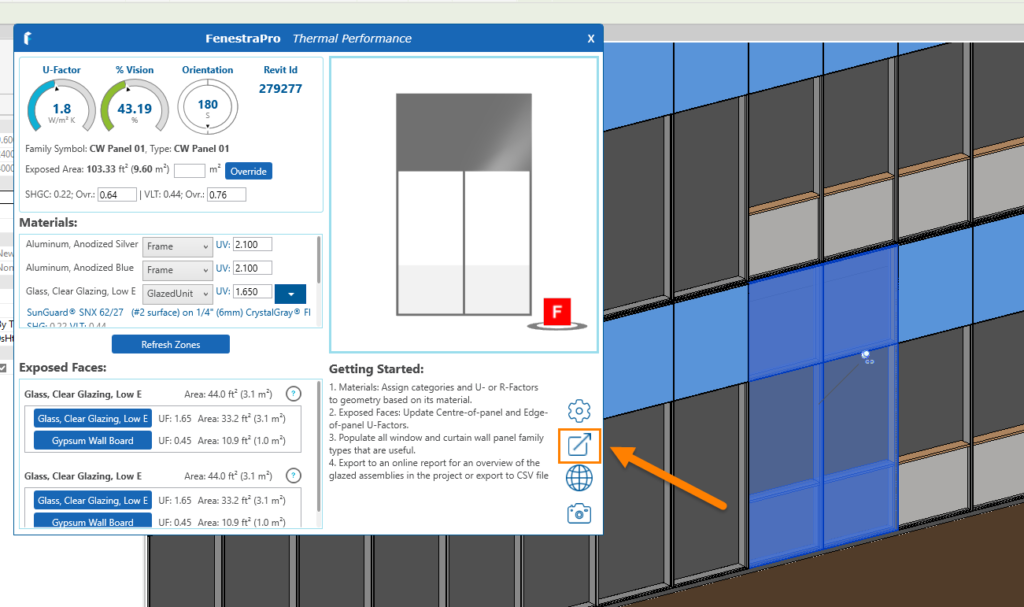
A window will display to review window or panel families and confirm that you wish to export these to Revit. This will change the properties of these families in Revit (and can be seen under Type Properties).Use the checkboxes for window or panel types that you wish to export, then click the Apply Selected button.

12. The Settings button provides extra information for debugging and is generally not required to be modified unless you are having issues, technical support my request that you turn this on to get more detailed information.
 Reading values from the Thermal Performance Tool
13. Once values are defined for nested panels and a report saved, when the model is opened in the Detailed Design tool in FenestraPro, it will then use these values (including the new glazed area). Ensure that the ‘Use Detailed Elements’ setting is used to read detailed properties (rather than schematic values).


Outputs
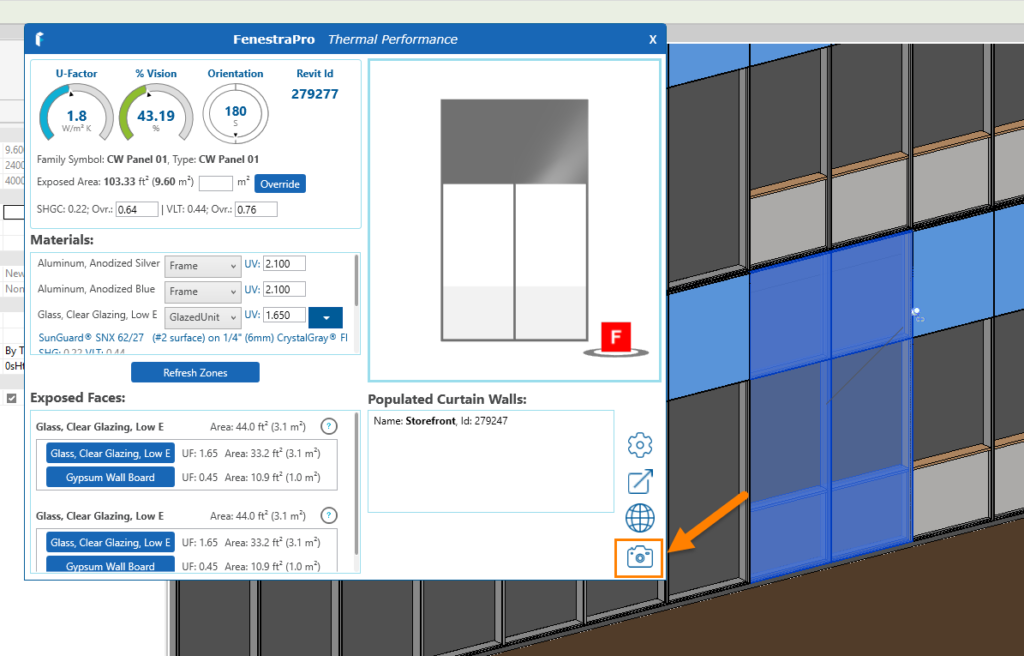
Curtain Walls/Windows that have had their panel properties assigned using the tool, may then be saved to a .cxl report if you wish. This is not required but may be useful to review the data. Click on the camera icon button to save the report to a .cxl file.
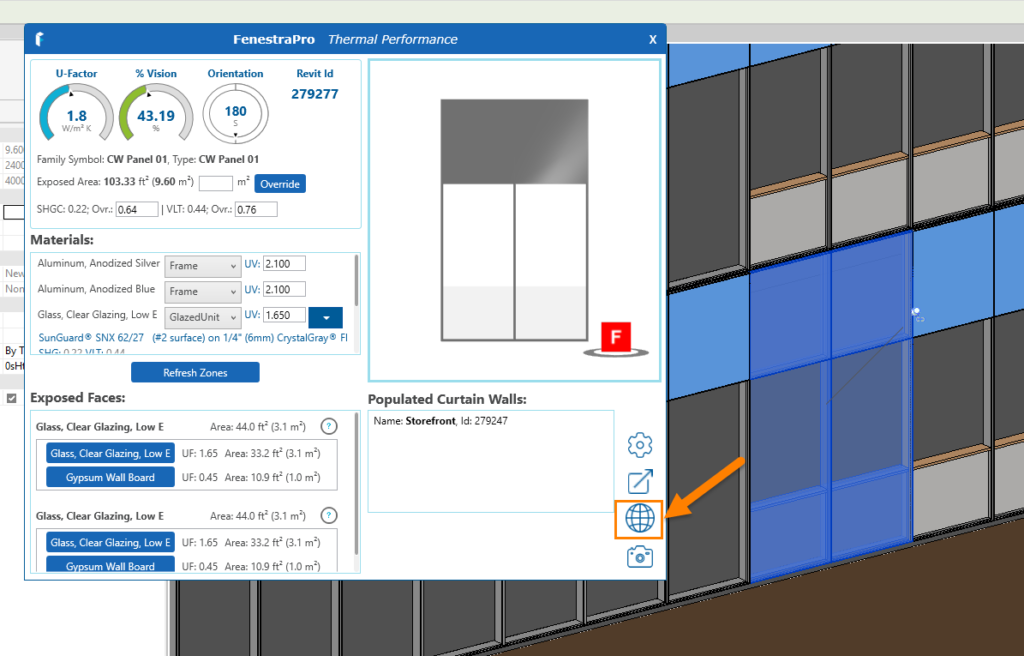
Data can also be sent to a html file in your online account using the globe icon.
CSV files van be created in the FenestraPro folder with data produced using the Tool.

Files exported from the Tool are as follows:
- Curtain Wall Panels CSV file
- A file for each populated Curtain Wall
- Windows CSV file
Optional: If you wish to review the data, it may be imported into an Excel file. Note: It is not necessary to do this, this information is only provided if you wish to review the data in detail.
10. To view the Data in the CSV file, a few steps are required.
Open MS Excel or similar application, go to the Data tab and click the ‘From Text/CSV‘ button.

The CSV files will be saved in your FenestraPro local folder under the model name along with a numeric string.
For example: ‘C:\Users\(YourName)\AppData\Local\FenestraPro\TEST123′
- Select a file in the folder list to import
- From the pop-up window that opens, select ‘Edit‘ (1 in the image)

Click the ‘Use First Row as Headers’ twice, so that the numbers are imported as numbers and not text.

Note: that access to these parameters may not always be successful due to various limitations of nested components.

Tutorial Videos (this relates to version 7.0)

