
Once a Glass Type has been selected from the list and you have selected and highlighted it, it may be applied.
Applying a type from the Glass Database will change the glazing type assigned to the relevant elements in the Revit model (not just in the application).

You will typically see two options:
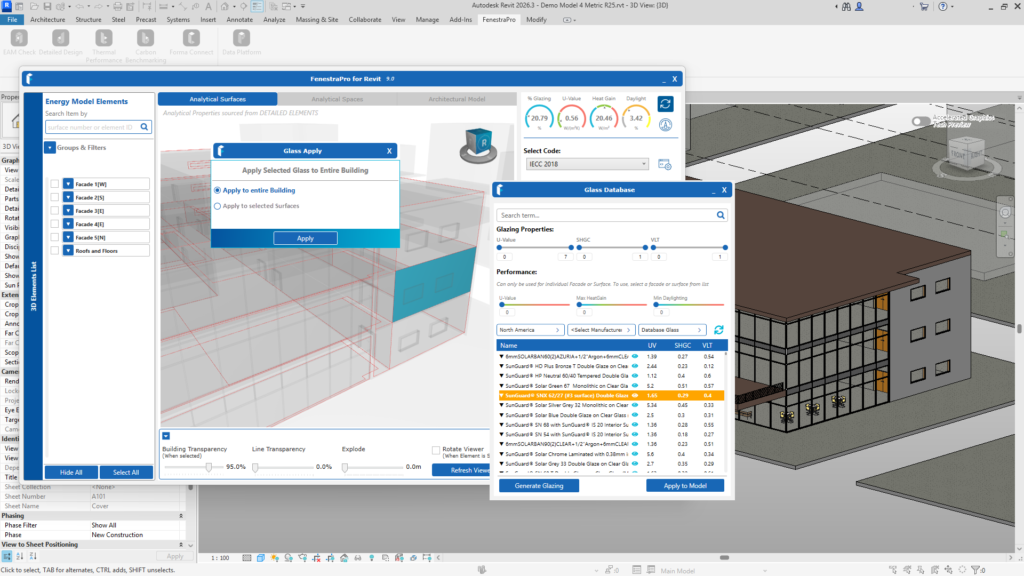
Apply to Building
This will apply the glass type selected, not just to the element family on that Surface (window/curtain panel) but to every instance of this family in the model (even if these are on surfaces that have not been selected).
To control glass types on a different area of the project, new window or curtain panel types may be created in Revit under a different family name. This may be an option to help manage performance/specifications on different Surfaces. that you wish to have independent properties.
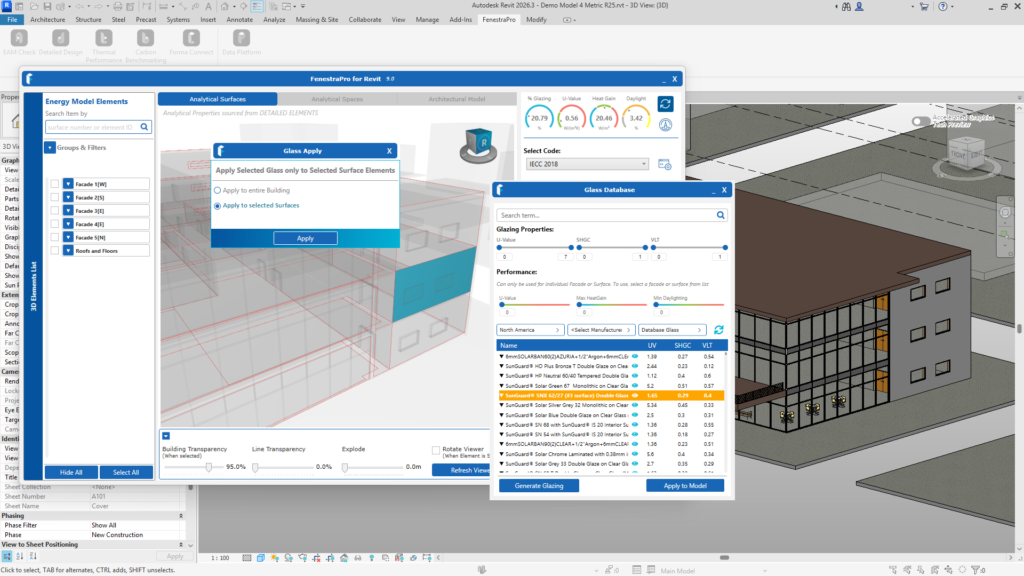
Apply to Selected Surfaces
This will apply the selected glass type only to the glazed element(s) on the selected Surface(s). To do this and leave other instances of this family on the model intact, a new family will be created in Revit with the name of the glass type chosen. This will be used on the selected Surface since the properties will now become different from other existing instances of this window/curtain panel elsewhere in the model.
Note: If you later wish to change this glass type, it would be good practice to create a new Panel Type/Window family name or return to a generic Panel Type. This will avoid confusion as the Panel Type/Window created by the application uses the name of the glass type used. If the properties for this glass are subsequently changed again, the glass will update but the family name will refer to the previous glass type and may cause confusion.
Note: The FenestraPro Glass Database must have been synced to Revit after the onboarding process (loading your model into the application). If this has not been done, you will not yet see the new glass types in Revit’s list (under Type Properties) and glass types will not be applied to the model until this is done.
It is not recommended to ignore this message and try to apply new glass types, since your changes may not be saved or updated after restarting Revit. A message will advise you to save the model and restart Revit to allow syncing to happen. Syncing of the FenestraPro Glass Database to Revit will need to be done separately for each Revit version that you are using.
Note: it is not recommended for users to manually edit Revit’s internal database of materials or construction types unless you are competent to do this as incorrect syntax or mistakes could disable this file and your model may not be read correctly by Revit. FenestraPro simply transfers additional glazing types from its database to Revit.
Glass Types which are already in Revit’s internal list, will be substituted immediately for the existing glass type. Then use Refresh on the application Dashboard to update the results. Imported custom glass types may need to be synced to Revit first, and Revit restarted (the imported glass was added to the FenestraPro database but not yet to Revit). Save the model first in Revit and restart if needed.
Note: If you have made separate glazing family types in Type Properties for different areas of the model but did not save these changes before closing the model, these new family types will not appear in the model when Revit is restarted. Glass Types which were to be applied to these family types will then be cancelled.
When applying a new Glass Type, a message may display asking if you wish to apply these changes only to this Surface (instead of all instances on the model where this element type is located). This message may not appear if this is the only Surfaces where those elements appear.
If this is your intention, a new family type for this window or curtain panel will be created with the product name of the Glass assembly used. If properties for this element are subsequently modified, the name of the family type may not match the actual analytical properties (there will be a mismatch). In this case to avoid confusion, please rename the family type to match the properties chosen.
If the application was unable to change the glass types in Revit, this may be due to Revit’s glass list being out of date (the FenestraPro database is not yet displaying in Revit’s Type Properties).
Note: If Revit’s Edit Type window is open, this will prevent any changes being made. Please ensure that the Edit Type window is closed before using the Glass Database.
If for any reason, the properties cannot be changed you will see an advisory message showing that the families could not be updated.
There may be instances where the glass type does not update in Revit. This may be due to:
- The Glass Database has not yet synced to Revit. Save your model and restart Revit and FenestraPro after the first install before making any glass changes to ensure that they update correctly. This only needs to be done one time. Trying to update glass types from the application when these entries have not yet been updated in Revit, will not be successful (save your project, restart Revit to allow it to update, then apply the glass type(s) again).
- Type Properties are open for that element in Revit (this will block the updating). Close Type Properties and deselect the element in Revit.
- The setting for ‘Define Thermal Properties by‘ under Analytical Properties in Revit is not set correctly to Schematic Type but is set incorrectly to User Defined (custom values) or Building Type. Element properties cannot be updated when these settings are used.
- Glazed elements are in a linked file (they must be in the host model so that the application can access their properties).
It does not matter if elements are pinned or not in Revit, elements can be updated using the Glass Database.

