
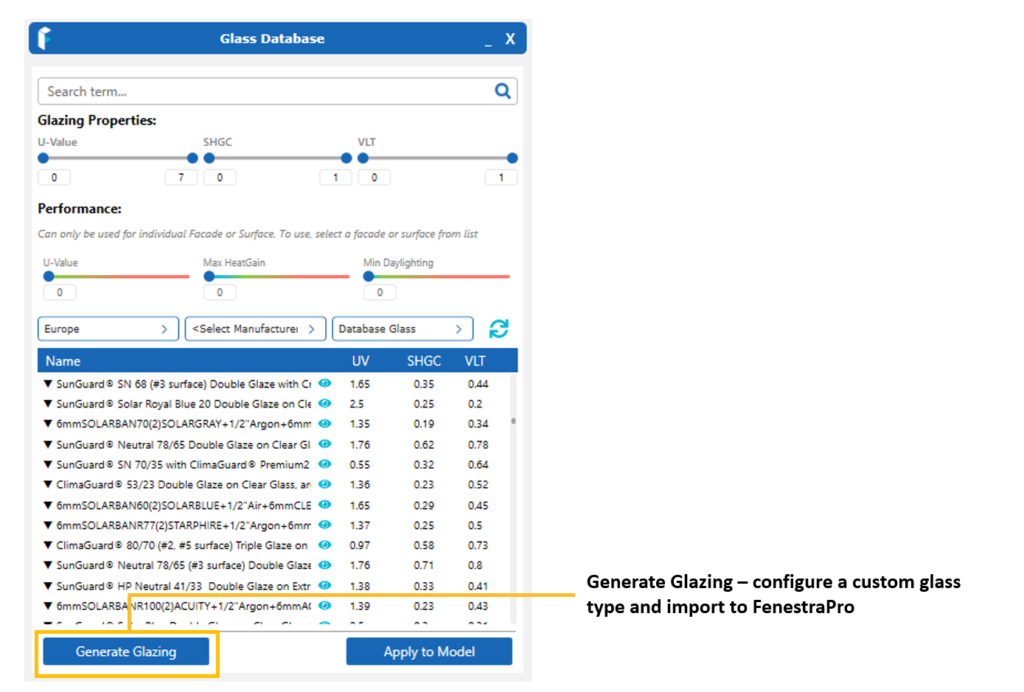
It is possible to use Tools on the manufacturer’s websites to configure custom Glass Types and import these into FenestraPro. Functionality will depend on current partnership agreements with glass suppliers (not all may have active functionality).
Use the Generate Glazing button provided to link to a supplier’s website to start the process.
Note: It is also possible to go directly to a manufacturer’s website and configure a custom glass assembly. Once this is done, there is an option to send this to your FenestraPro Account if FenestraPro has an active partnership with this vendor. Currently, Vitro Glass has functionality to send glass make-ups to FenestraPro.
Once a glass assembly has been configured, you will see a buttons on the vendor’s website to send this data to your online FenestraPro Account area. The custom glass may then be viewed under ‘Switch to Custom List’ in your online FenestraPro Account.
Once the new assembly has been imported to your online FenestraPro Account, it will also appear in the Revit application (the glass database will need to be resynced to Revit). You can then select this glass to use in your Revit model.
TO CONFIGURE AND IMPORT THE GLASS ASSEMBLY
Configure the IGU on a manufacturer’s web page and the detailed specifications for the unit will be displayed once complete. Availability of vendors will depend on current partnership agreements.
For Vitro Glasses, select ‘Vitro Architectural Glass (formerly PPG) under the Manufacturer dropdown list. Then define the thickness of glass panes and coatings if required.


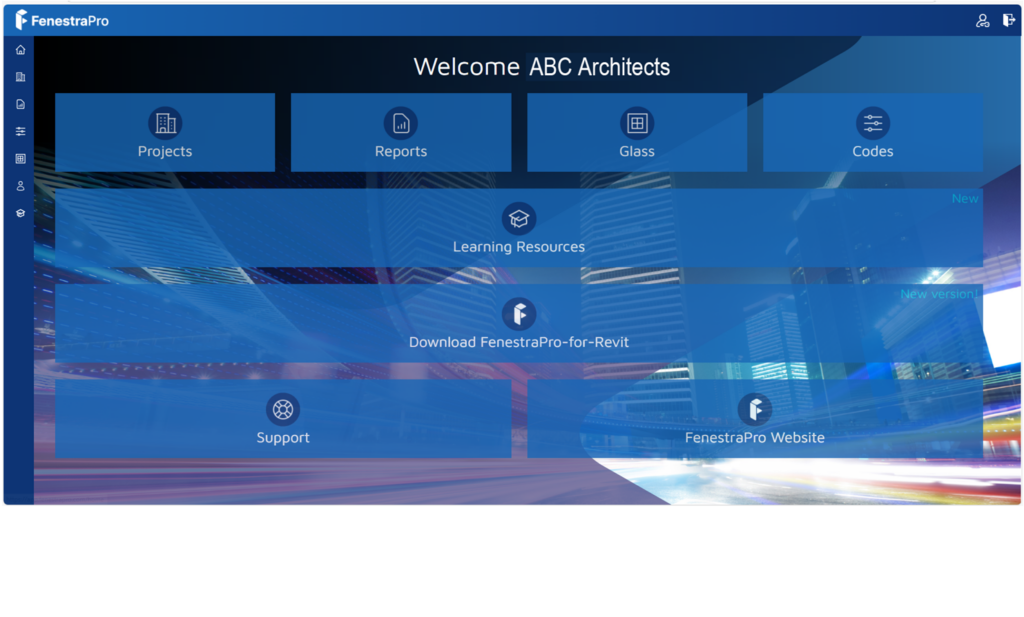
A button with the FenestraPro logo will display. Click on this button to send the IGU to your FenestraPro Account and to the Revit Add-in. You may need to sign into your FenestraPro Account to view the imported glass type. Go to the Glasses area in your Account area and use the button ‘Switch to Custom List’ to display only imported glass types.
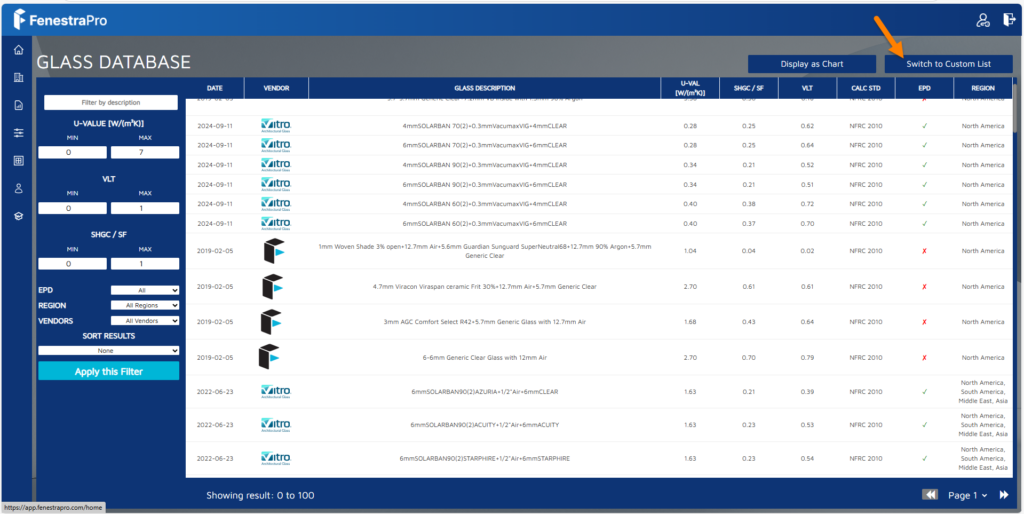
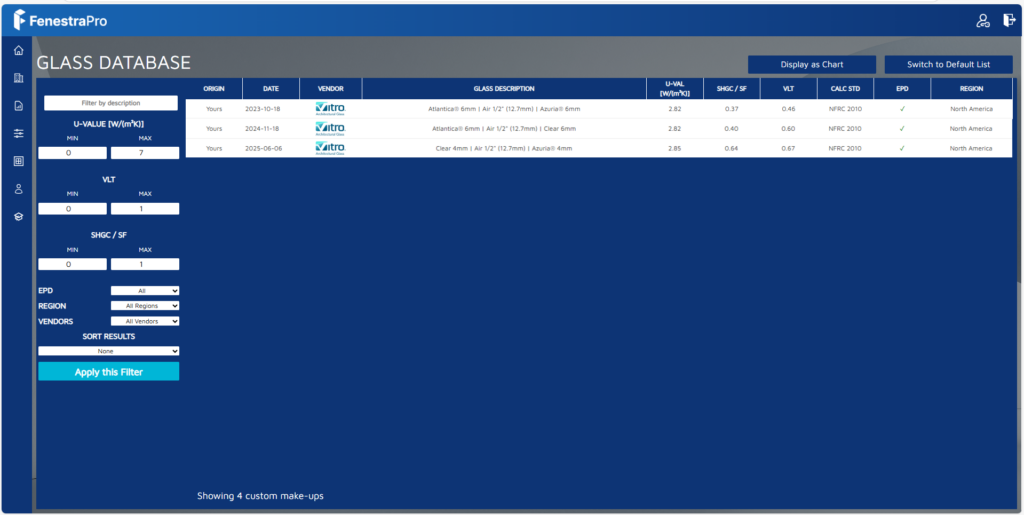
The custom glass will then appear in the Glass Database in the Revit Add-in once the list is resynced. Revit should then be restarted to also update its internal list.
The Glass Database list may be filtered to display only imported glass types using the button shown below. Note: any active filters (including region filters) may prevent the imported glass type from being displayed in the list. This imported/custom glass type may then be applied to Surfaces on the model using the normal Glass Database workflow.
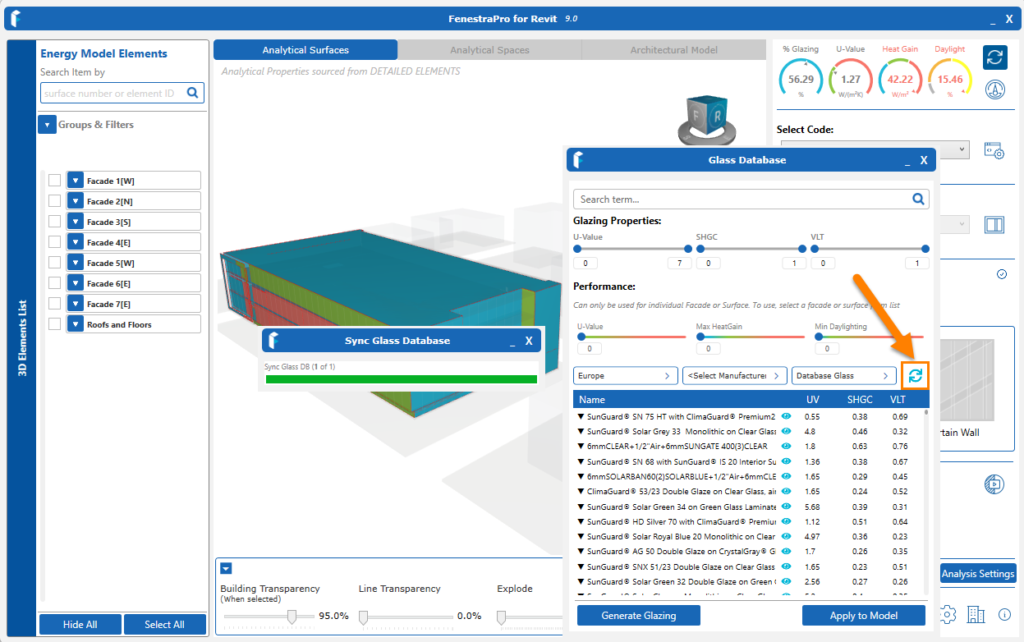

If you do not see the imported glass in the Revit Add-in, use the Sync button in the application to update the list. Note: you may not initially see the imported glass type if a region filter is applied, so this may need to be first adjusted.
Note: Revit will need to be restarted to add this custom glass to Revit’s internal list and it will then display in Type Properties after a restart. This will then allow you to apply this to the Revit model if you wish. Once this is done, the custom glass is now available to be applied to surfaces on the model. If you try to apply the custom glass to the model before the sync is complete and Revit is restarted, updating may not be successful (since the glass type did not exist in Revit when applied).
Once the imported glass has been synced to Revit, you may then select it in the application and apply it to surfaces along with other glass types.
Share the imported Glass Type
It is possible to share the imported glass type with a colleague or another user with a FenestraPro account. In your online Account, you may click on the glass type and a dialog window will display with options. One of these will allow sharing with another FenestraPro user.
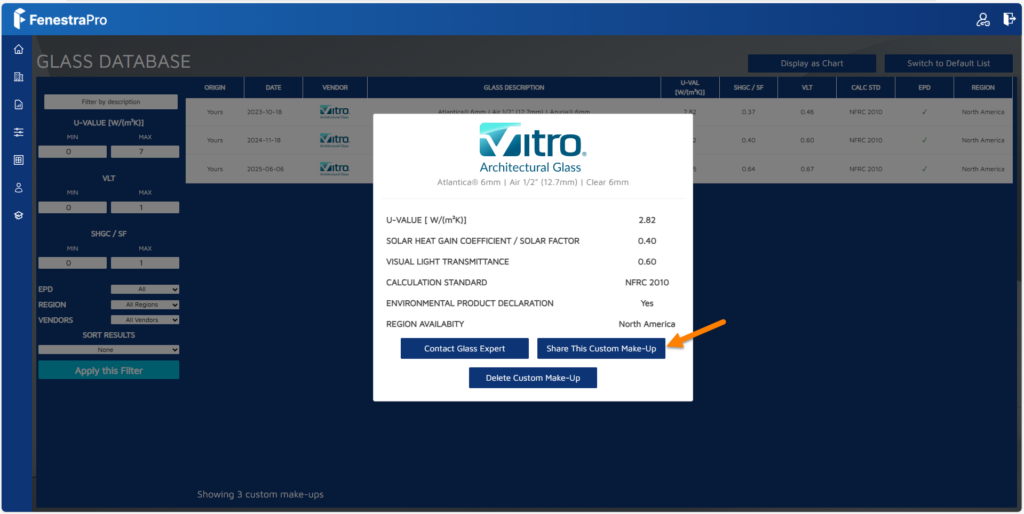
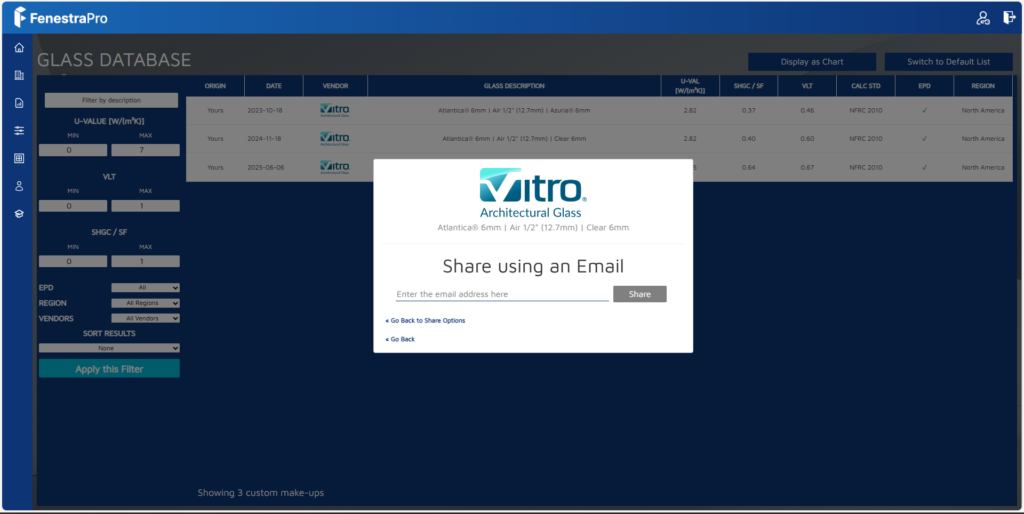
There are options to share with another User (listed on your license subscription), share with a Team on which you are a member (all users will be notified) or share with an email address (the user must have a FenestraPro Account to be able to view this glass type).

If you use a custom imported glass type in a Revit model and share this model with another user, they will also see this construction type in Revit under Type Properties as a temporary entry (even if they don’t have this in their Revit list). Once they change the glass type however to another, it will disappear (since it is not in Revit’s internal list) and it won’t be retrievable anymore.
If you uninstall FenestraPro or upgrade to a new version, the imported custom glass type will remain in Revit’s list.
Note: If you import a custom assembly from one of the manufacturer’s websites, apply to model elements but then delete this from your FenestraPro account, it will persist in the model and in Revit as an entry as long as it has been synced to Revit using the application. You will not be able to apply this to model elements however using the application if it has been deleted from the Glass Database but you may do so directly from Revit. FenestraPro will still read the properties of this glass type and display these in the application. Uninstalling the application also will not remove this glass type from Revit.
It is also possible to add custom construction types to Revit’s internal file. Note: This should only be done if required, by a competent person who is familiar with xml editing and has knowledge of correct syntax. It is not generally recommended for normal users. If you do not feel comfortable doing this, please ask advice as editing this file incorrectly may render this file unreadable. You may also contact us for advice.
New glass type entries that have been added to Revit by FenestraPro, will then appear under Analytical Properties options in Revit’s Type Properties after it has been restarted and may then be assigned to glazed model elements and read by FenestraPro to get results.

