
This is a list of known issues which are generally easily resolved and helpful information below to get the best experience from the software.
Results
Glazed elements in the model must have a glass type assigned to glazed elements in Revit or from the application. The model must also be a Revit model (not generic imported geometry from Rhino/Sketchup/CAD etc). If there are no detailed analytical properties, elements may use schematic types but only if overrides are checked. If this is not done, then no properties are assisgned and no results can be calculated. Walls must also have thermal properties assigned to provide values for facade performance (walls and glazing). Roofs and Ground Floor properties can also be used to check compliance with reference codes.
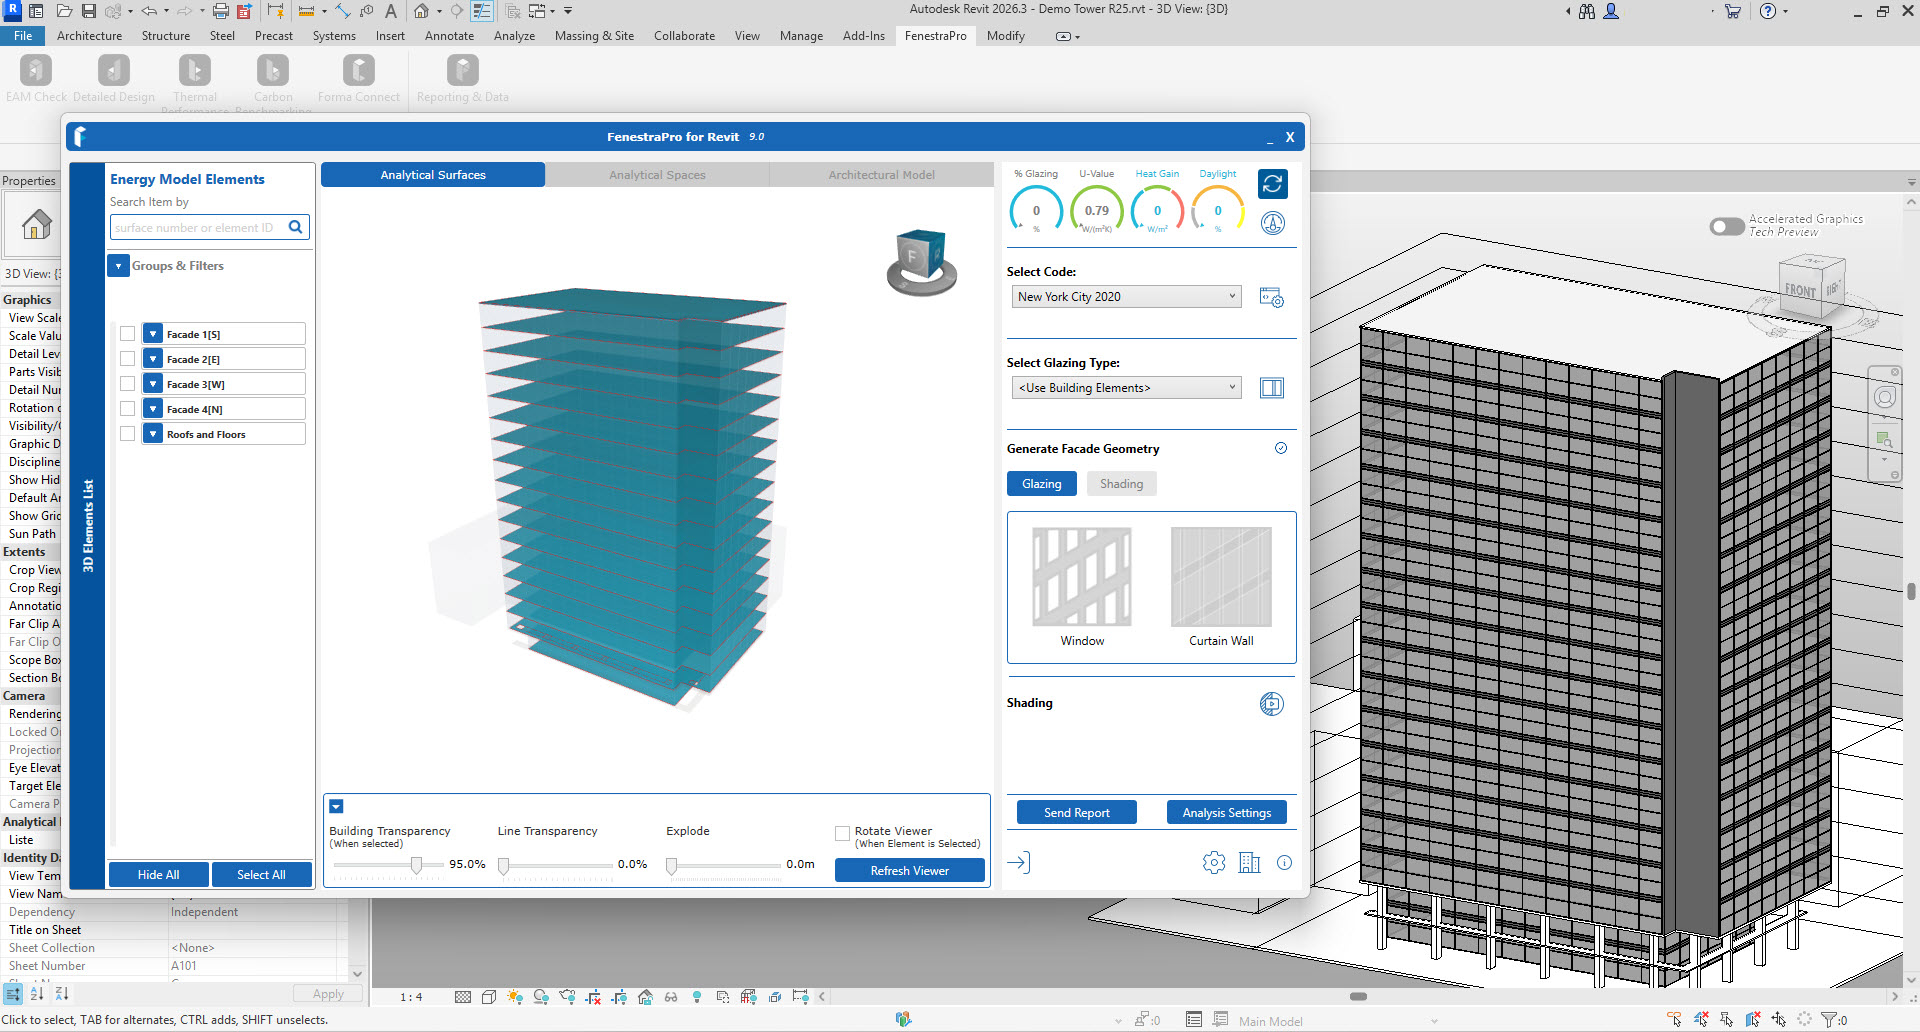
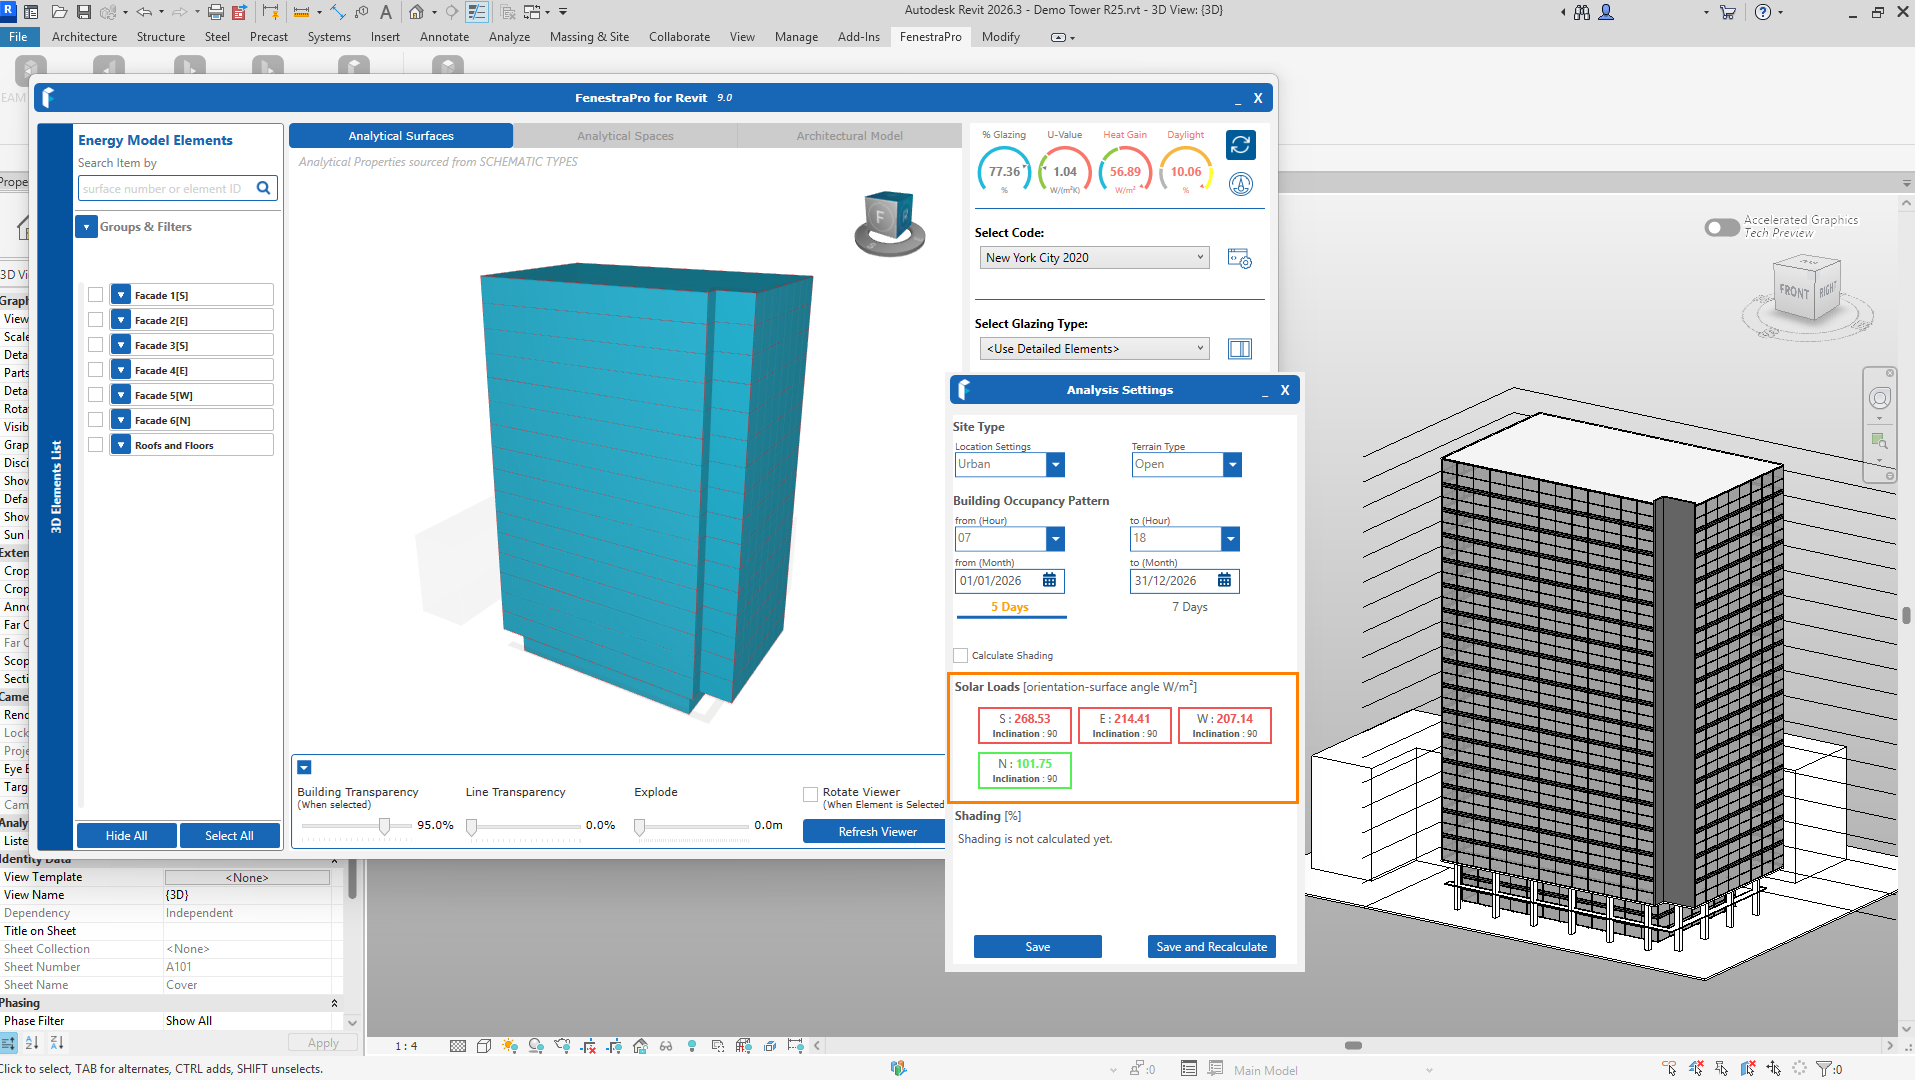
Issue: When calculating Solar Loads in Analysis Settings, results may not appear or may take a long time to process.
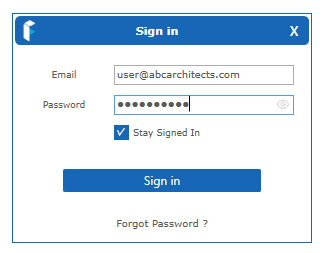
Solution: Please Sign Out and Sign back into the application. The License token may periodically expire if the Stay Signed in is not checked. Expired license tokens will prevent the application processing results). Sign Out of the application and re-launch the application. The Sign in window will appear. Please enter your credentials again to proceed (your email and password), a new token will be assigned to your new session to enable calculations and results.
Note: If you have curtain walls in your Detailed project, the panels must be a curtain panel family in Revit. This can be confirmed by selecting a curtain panel and going to Type Properties. If any panels are wall type families, analysis will not be possible. Please see the Section on Model Preparation for guidelines on auditing your Revit project before analysis. Gaps in the enclosure, non Room Bounding elements, incorrect energy settings and missing analytical spaces etc may cause issues with results displaying.
If you still have issues, there may be other modelling issues. Please contact us using support@fenestrapro.com with a screenshot and description of the issue.
There may be several reasons for this. This may be due to:
- Modeling issues
- Missing analytical properties
- Revit settings
There may also be modeling issues which may include gaps in the enclosure, element functions, generic geometry etc. If Revit elements are not being read to create the energy model, this would mean that no results display. Please see the Model Preparation articles for more information. If you need assistance, please contact us at support@fenestrapro.com.
Glazing Elements must also have properties (analytical or schematic and settings must be correct to allow these to be read). This is covered here.
In some cases, it may happen that after several models have been analyzed, that results fail to display on the Dashboard.
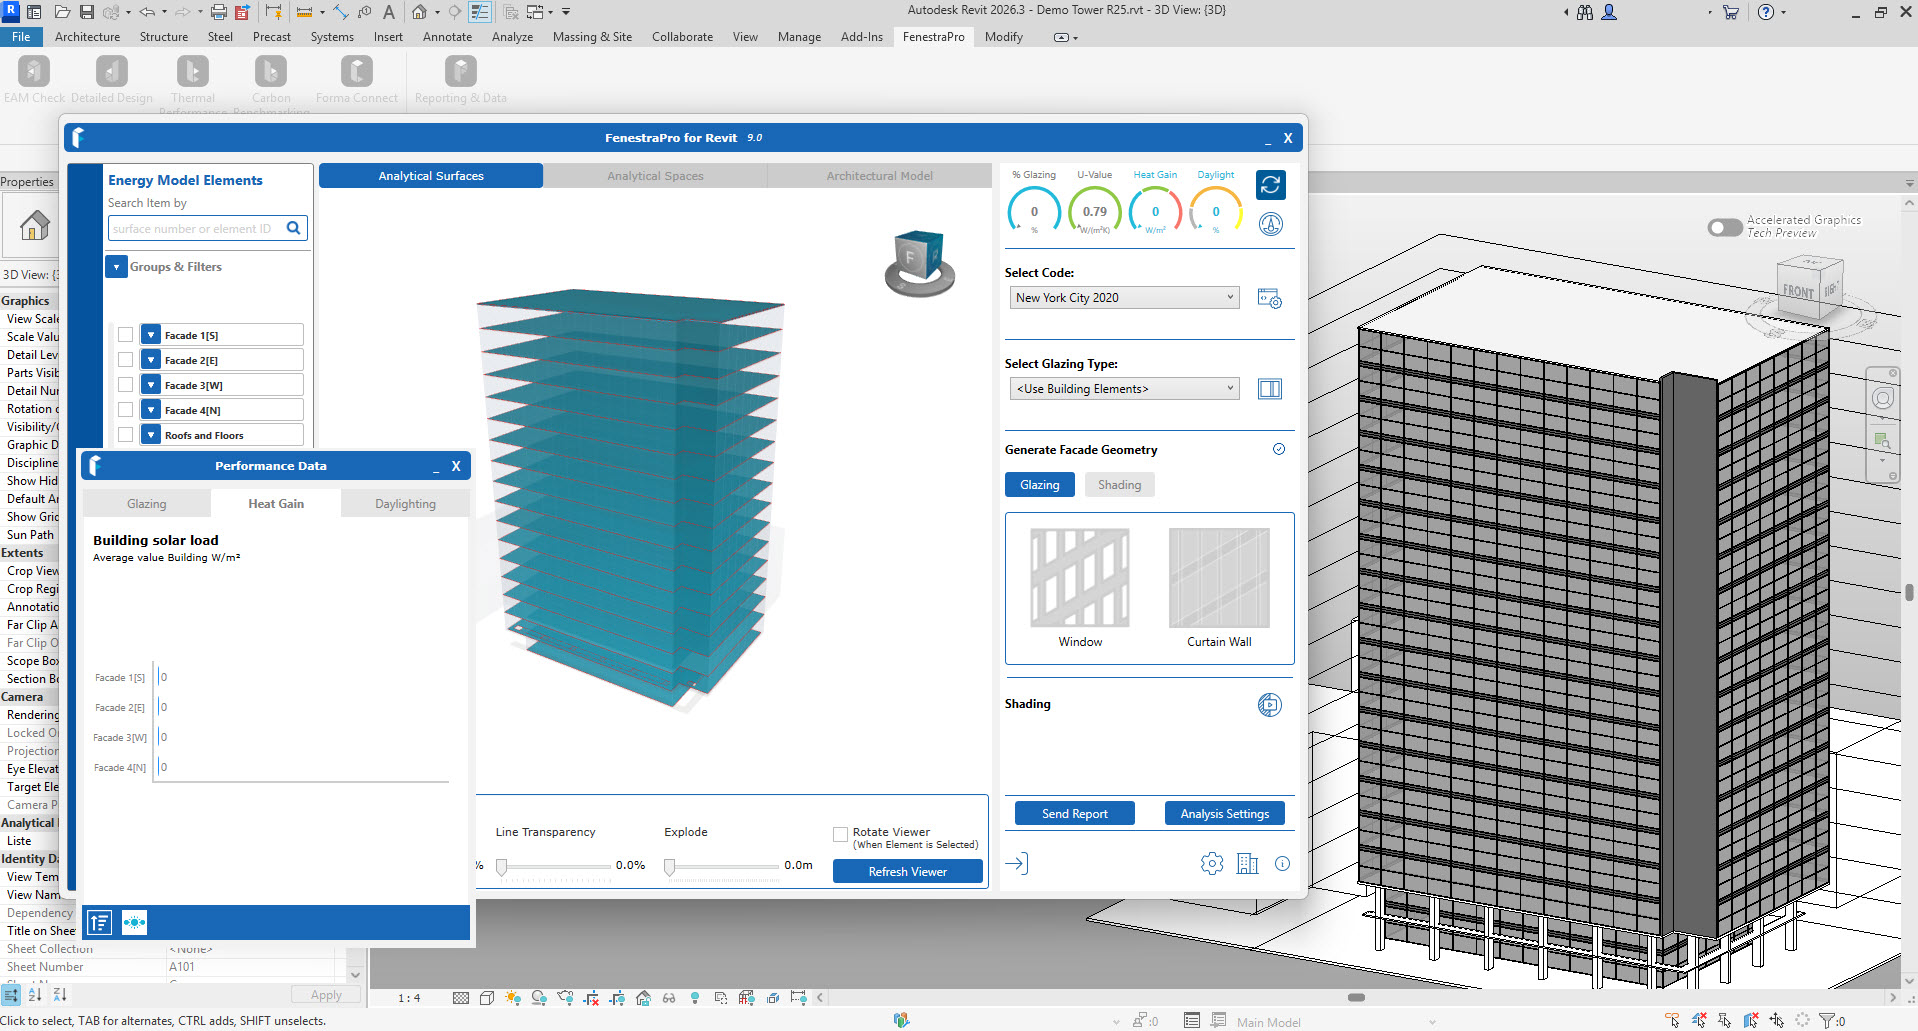
Models with enclosure issues, clashing elements, roofs modeled as floors, missing analytical properties or incorrect energy settings etc may cause this issue. Please review model issues and resolve before relaunching the application. There is a page on Model Preparation here in this Section. The EAM Check tool may also be used to review issue in the project.
You may delete the cache (previously stored results) if needed from the application using the Settings window.
This may also be done manually by going to the FenestraPro folder on your machine if you have permission to edit files.
This folder may be found for version 9.0 using these paths:
C:\Users\Your User Name\App Data\Local\FenestraPro
Note: (the App Data folder may not always display until folder view settings are adjusted on your machine). Recent Log Files (dates are included in the names) may be safely deleted here. A fresh one will be created when you start a new session. Note: All results/data from previous sessions on these dates will be deleted.
Several requests in succession may also backup in the queuing system to the webserver. Please be patient and wait for the Dashboard to display results.
If you are using Test Models with the same Name and Project Information, previous results and settings may persist from the previous model. In this case, please Clear the Cache (record of previous results and settings) as shown above to reset the model condition and start afresh.
If a problem persists, please contact us at support@fenestrapro.com with a description of the issue.
The selection of Surfaces will affect the results displayed. Choosing one Surface with 50% Glazing and another Surface with 0% Glazing will display an average of 25% Glazing. Heat Gain and Daylight average values will also be different on the Dashboard than when a glazed surface only is chosen.
Where Surfaces may be grouped/filtered by Percentage Glazing, a user may wish to avoid any surfaces which have zero glazing for this reason.
Open Building Manager and calculate the Solar Loads again. This will populate the latest results for the model in its current state. Possibly, the model was modified or there was an error contacting the web server to get the solar data.
You may check there to see if there are any messages about your internet connection. A poor internet connection may not allow FenestraPro to calculate the Solar Loads or display the Charts. It may be helpful to close the application and restart. If this does not help. Close both the application and Revit and restart again.
There may be modeling issues causing this issue (gaps in the enclosure, generic geometry used instead of Revit elements etc). Please see this Section Model Preparation for more details.
If some Surfaces are not highlighting on the model, this may be due to model issues or missing properties for glazing elements.
Please ensure that model issues are reviewed before launching the application and that all glazed elements have thermal properties assigned. In a Plan View in Revit, You might try to place Rooms or Areas in spaces which do not have any. If you are unable to place rooms, this will indicate that there are enclosure issues in the model - walls/floors etc may not have a 'Room Bounding' condition or there may be gaps between elements. You may select a wall element and check in the Properties Palette in Revit if 'Room Bounding' is set.


Please see this Section for Model Preparation issues and for how to assign analytical properties to glazed elements.
Depending on whether the Perimeter Zone Division is checked or not in Revit's Energy Settings, you may get a different number of Energy Surfaces for the model. This is due to the intersection of perimeter zone planes which also may divide the exterior into separate areas. In FenestraPro, you may see separate Surfaces on an orientation where you would expect one larger Surface. In this case, you may need to uncheck this setting if required (Analyze - Energy Settings - Perimeter Zone Division on/off). The values for Analytical Resolutions in Revit may also affect the generation of Surfaces. These may be adjusted if required to improve assignment of areas.

If the Ground Plane in the 'Energy Settings' area is set to a level above the lowest floor, Analytical Spaces may still get created for levels below that which is defined. Analytical Surfaces will not be assigned to these lower areas however. Consequently, these spaces will display in the application but selecting these in the Viewer, will not produce isolated results for these areas since the Analytical Surfaces are missing. This issue is being explored.
In the Facade Navigator, each Facade should have a list of Surfaces with the same orientation. For example, Facade 1 South, should list all South Surfaces under that Facade.
If you expand an item such as Facade 1 South, and you notice an opposite orientation eg. North Surfaces in this list (when you expect South), this may be due to building enclosure issues. This is where floors, walls, roofs or glazing allow significant gaps in the model. Shafts in Revit may be penetrating floors or roofs and be compromising the enclosure when Revit's Energy Model is generated.
If you notice that Surfaces under a Facade orientation have a mixture of different directions, this may also be due to elements that have been modeled inside out (solid Walls or Curtain Walls) as the energy surface orientation coming from Revit may be a factor. This should not be an issue however in version 7.0, it is more likely to be other modeling issues. You may check the element orientations however and modify if required. Note: Care should be taken, as adjusting this may have adverse effects depending on how the element is joined to another (eg. adjusting a curtain wall may also move the wall element). You may always Undo in Revit if this occurs, to revert to the original condition.
When creating a Curtain Wall, this should be placed in a counter-clockwise direction to ensure that it faces outwards. Windows also have a toggle arrow to flip their directions if necessary. The double arrow that displays in a Plan View when an element is selected, should appear on the exterior of the element to indicate the external surface.

There are more details from Autodesk here:
If changes are made to the model geometry, a new Energy Model will be required to update the current model condition and assign Surfaces again. New Surfaces may be generated or previous ones removed depending on the new model condition. If internal wall divisions are removed, areas which were previously separated may become part of another Surface. The assignments will follow Revit's current energy model. The numbering and amount of Surfaces also may change, this is expected.
If the model is changed substantially while FenestraPro is open (glazing is created or deleted or geometry is altered), you may use the Refresh button on the Dashboard. The Refresh button should identify a change in the model condition will ask Revit for a new Energy Model, rearrange Surfaces and get new results. If this does not update the application, it may be prudent to close the application and relaunch it. The Revit model should typically be complete and ready to analyze before launching the application rather than modifiying the model while the application is open.
Fully glazed door families in Revit will not usually contribute to glazing percentage since their VLT value will typically be zero and the Construction Types available in Revit are limited. The FenestraPro Glass Database does not currently support Glass Doors as they are added as Construction Types for windows and curtain panels only. There are a few workarounds for this.
- Option 1: Change the door family into a window family. You may select the door family and open Type Properties in Revit. Then duplicate the family and edit the name if required.

- Select the element and open this family in the Family editor.


3. You can make this element a window family instead of a door family. Once in the Family Editor, go to Family Category and Parameters. Change the category by highlighting windows in the list. Save the family and load into the model.

It is not possible to simply replace a door with a window family by changing the type using Type Properties in Revit (since it will not appear under the door types), you will have to place the window element on the model instead of the door element. This widow element can then have its glass type modified by going to Type Properties in Revit or by using the Glass Database in the application.
If you choose to change the family back to a door family, the glass type will remain in the family with its properties for u-value, SHGC and VLT. If you change this construction type to another in the Type Properties list, it will be lost however, since all glass types are not available for door families in Revit.
4. Option 2: Define analytical properties for the family. You may also hard-code values into the Door Family by using the Family Editor and entering values for each parameter. These values will then always display in Type Properties, even if a different construction type is selected. Only parameters which are not hard-coded will change as different construction types are selected.


When creating a Curtain System, they should be created separately on each orientation and for each wall of the project. If Curtain Systems are placed on several orientations and on several different areas of the model at once, it will be read as one object and separating these out into independent Facades and Surfaces will not be possible.
Creating multiple curtain systems at once in Revit, provides information to the application for one system with a number of grids. The application will get an average orientation across all grids. This could lead to unexpected orientations and results. It is best therefore, if 'Select Multiple' is not used during Curtain System creation. Each orientation should receive one Curtain System separately (rather than selecting all walls on different orientations). This is typically done using a Conceptual Mass in Revit and converting wall faces to detailed Curtain System elements. Each wall face should be converted separately to a single Curtain System.

Curtain System creation is most compatible when the glazed walls are modeled in separate editing sessions in Revit.
Note: The Compliance export function may not always contain all data required for third party software. Elements should be listed however and if all values do not populate, these may always be edited in the 3rd party compliance tool by the user (thermal properties etc) to update to known values if required.
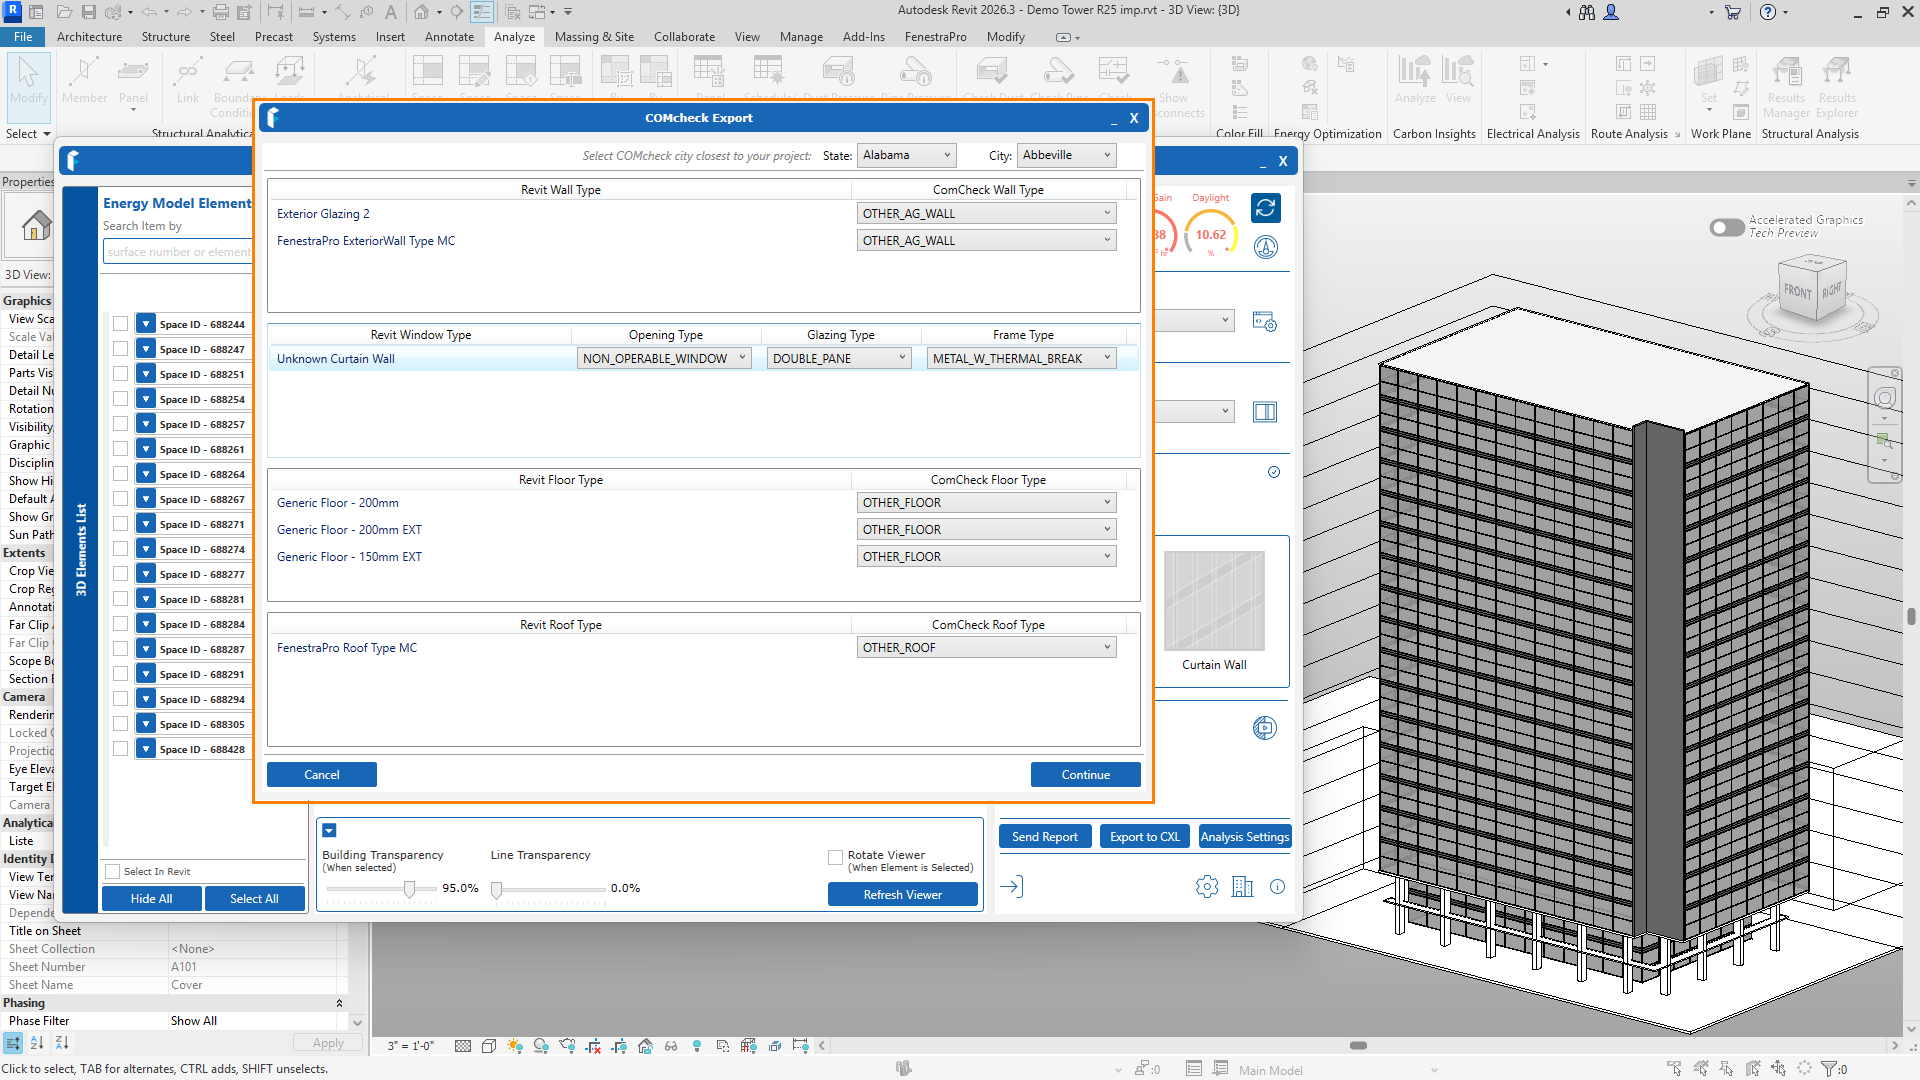
As long as linked elements are set as Room Bounding in Revit, this should not be an issue. These will then contribute to the model enclosure (Roof, Floor or Wall elements etc).
Analytical Properties of Glazed Elements in linked files can be read by the application but these cannot be modified by the application unless they are in the host project. Glazed Elements need to be placed in the host project so that the application can access and modify properties. Thermal Properties of solid elements in linked files can also be read by recent versions of the application but may not be read by older versions.
Solid elements may be linked in (Roofs, Floors, Walls) and if set as Room Bounding, they will contribute to enclose the model. The application will produce results for the glazed elements. Solid elements that are linked into the project, will provide information on their thermal properties.

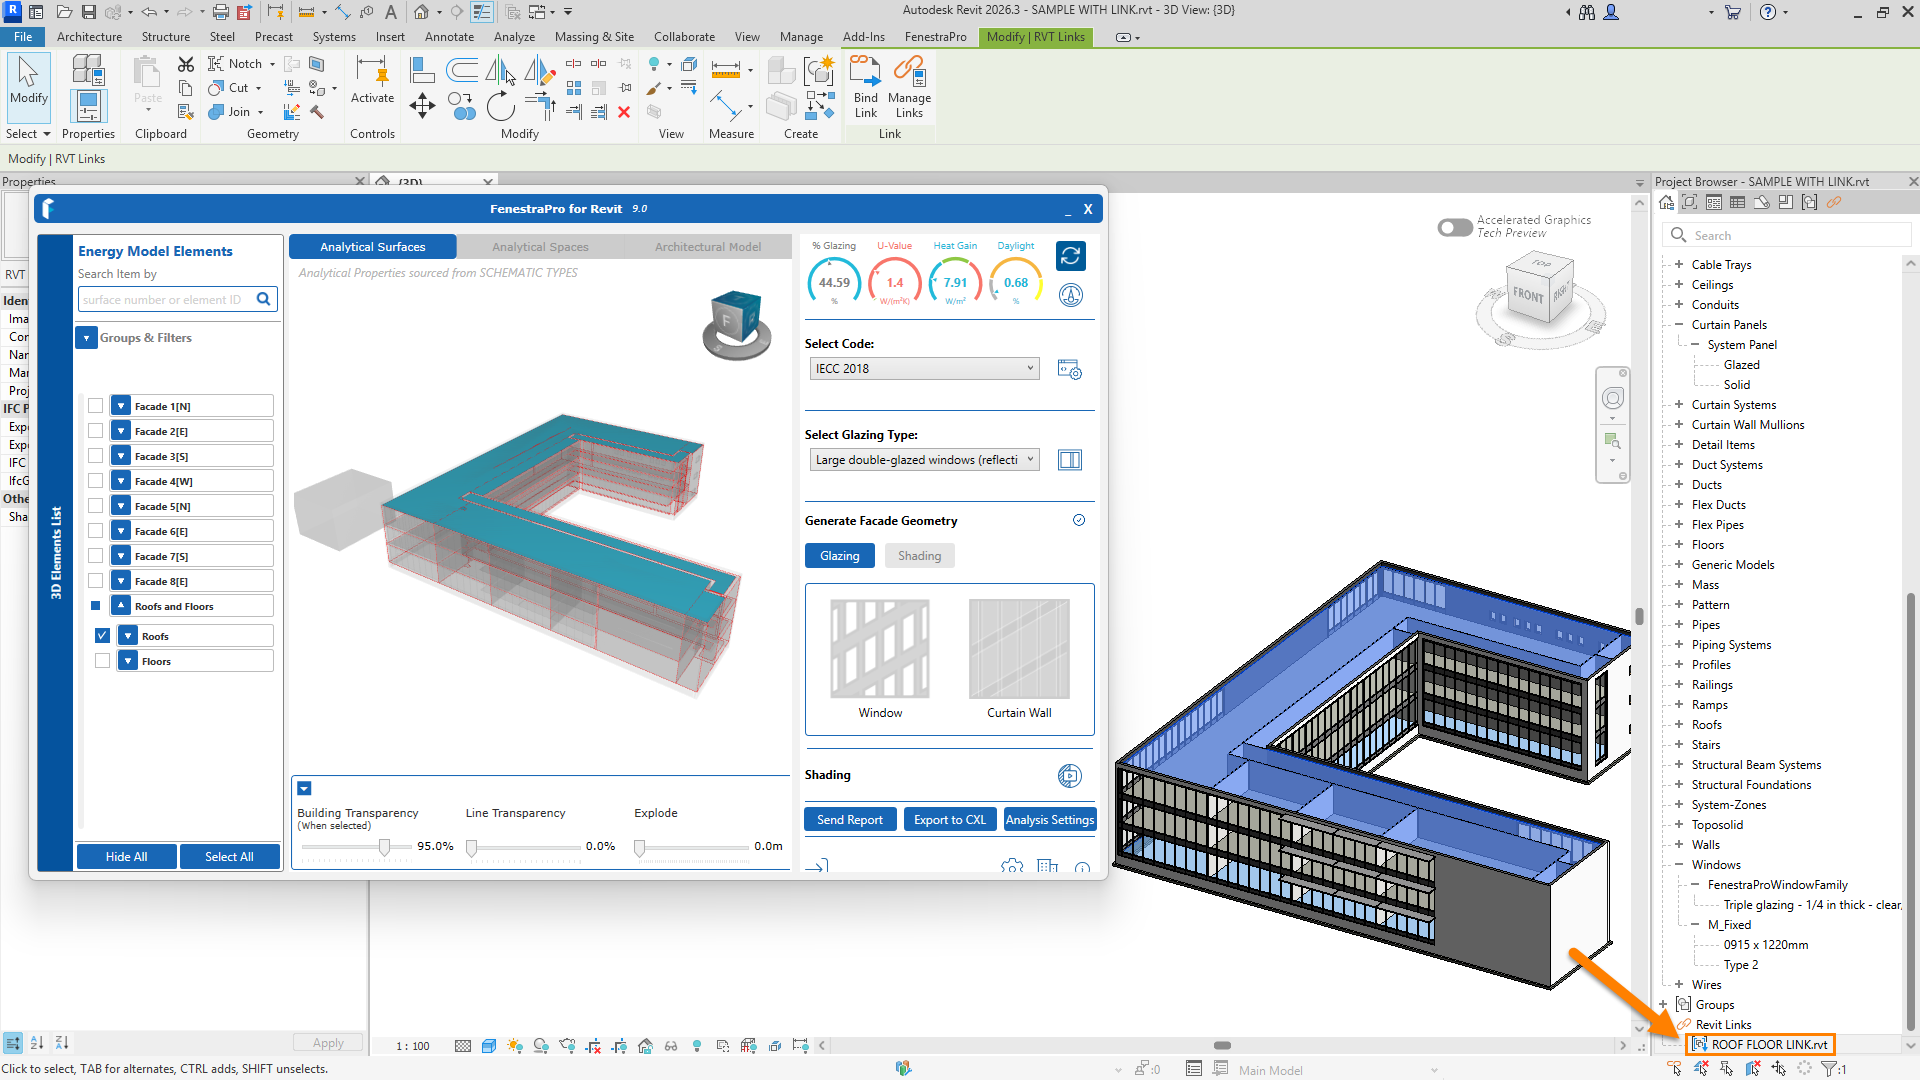
Surrounding Masses in linked files, will create shading effects on the model and will therefore affect the outputs for Heat Gain and Daylight.
This may occur if the Energy Model was created but then masses were modified/moved/deleted later. When generating an energy model with the mode 'Use Conceptual Masses and Building Elements', conceptual masses will also be included in the view. If these masses are later modifiied/deleted etc, these Analytical Surfaces/Spaces may appear but the masses that they were based on have now been removed or modified. These can be removed by going to the Energy Settings and changing the Mode to another type and generating an Energy Model again in Revit. Then change the Energy Mode back to the recommended mode. When you relaunch the application, a new up to date Energy Model will be created. This should clear the redundant surfaces.
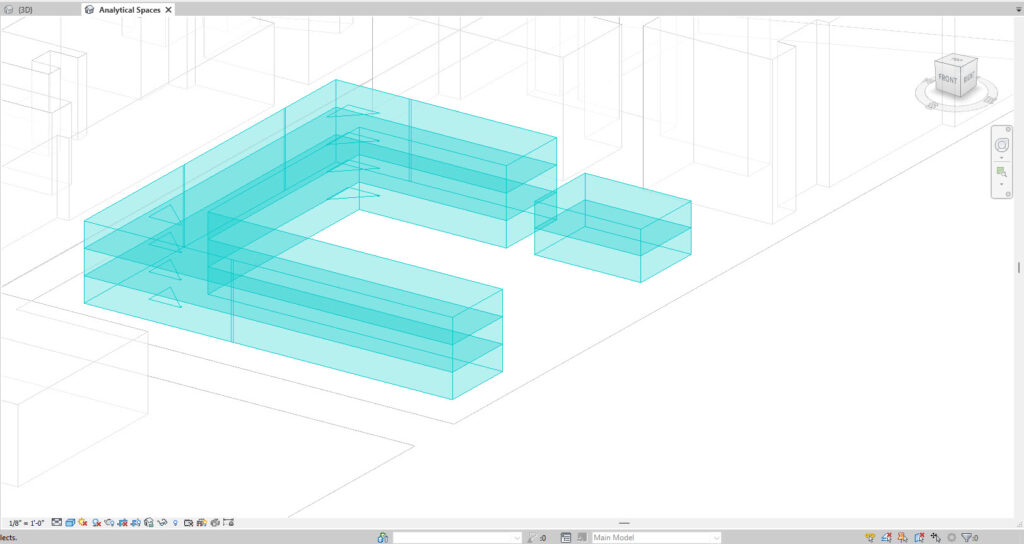
It may rarely happen that the 'Data Successfully Calculated' message in the Building Manager appears more than once during the application workflow but this will not affect the application. It may be resolved by saving your model, closing the application and Revit and then restarting Revit.
It will be necessary to close FenestraPro and re-launch if the True North compass direction is modified during a session. If major changes in Revit are made while the apllication is open, a new Energy Model will need to be recreated and the Solar Loads will need to be recalculated to update the results to the new site condition and Surfaces renamed to update the orientations.

Functions
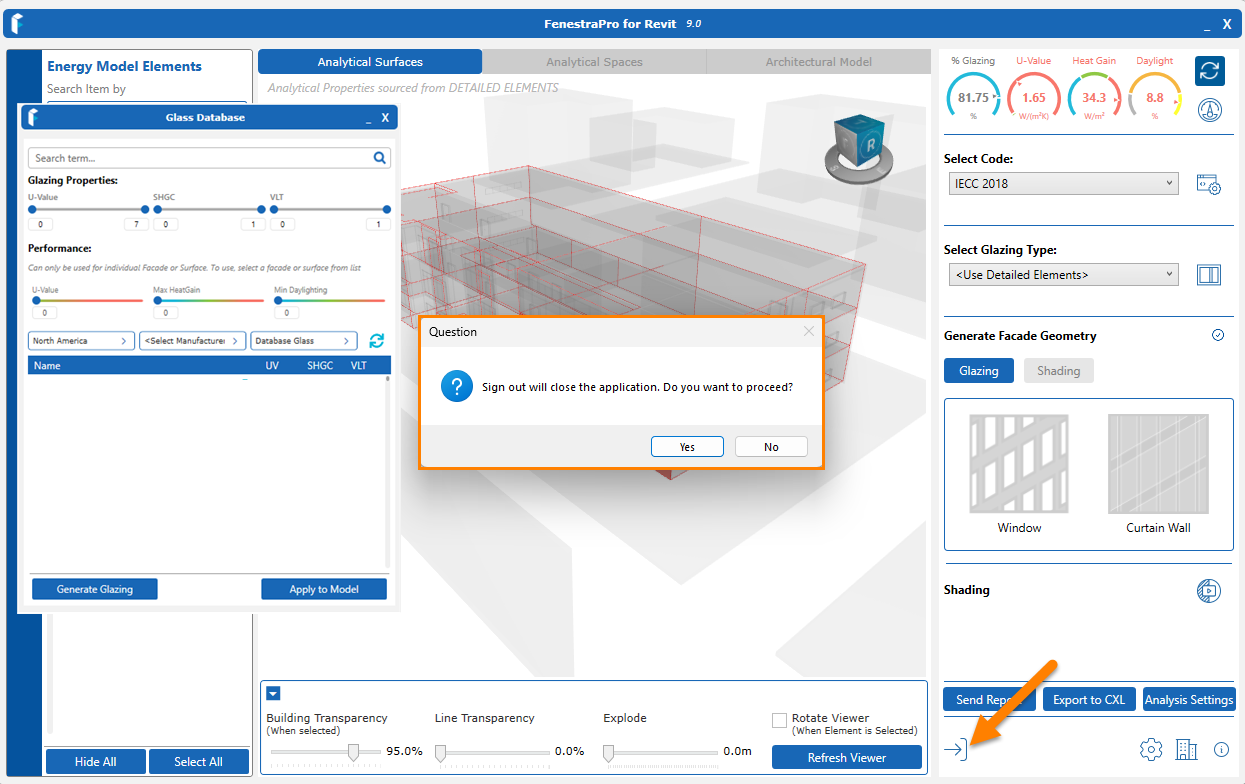
Periodically, your license token may expire. This may happen over an extended period (if you return after a vacation etc). This is easily resolved by signing out and signing back into the application. Use the Sign Out button. When signing in, you may also check the option 'Stay Signed in'. This will prevent the license token from elapsing again. This may also be due to wifi issues (connection to the internet). Please check that your network connection is active and stable.
Sync
When the application is first opened after being installed, the FenestraPro Glass Database will sync with Revit. This will add new glass types to Revit's internal list. It will be necessary to restart Revit one time to update. You may check using Type Properties if the list has updated. If not, please save your model and restart Revit.
There may also be an issue with access to this file and permissions to edit. You may require assistance form your IT Department if user permissions are restricted to modify files. During installation, FenestraPro will check that permissions are set correctly to allow the application to update this Revit file. If the Constructions.xml file is subsequently edited manually or substituted by another file, permissions may revert to read only, then updating of this file with new Glass Types will cease to function. This may be resolved by re-installing FenestraPro which will restore permissions to write to the file.
Security permissions may also be manually set for this file, this is an advanced process and is recommended to be done by those with sufficient expertise. Please contact us (support@fenestrapro.com) you need assistance or if editing permissions are restricted on your machine or if your Revit files are stored in a location other than the C: drive.
Custom Glass
When a custom glass type is configured and imported from a glass manufacturer, you will need to sync the Glass Database again with Revit to update. There is a button above the Glass Database to sync any updates. Save your model and restart Revit so that it can update its internal list of glasses.
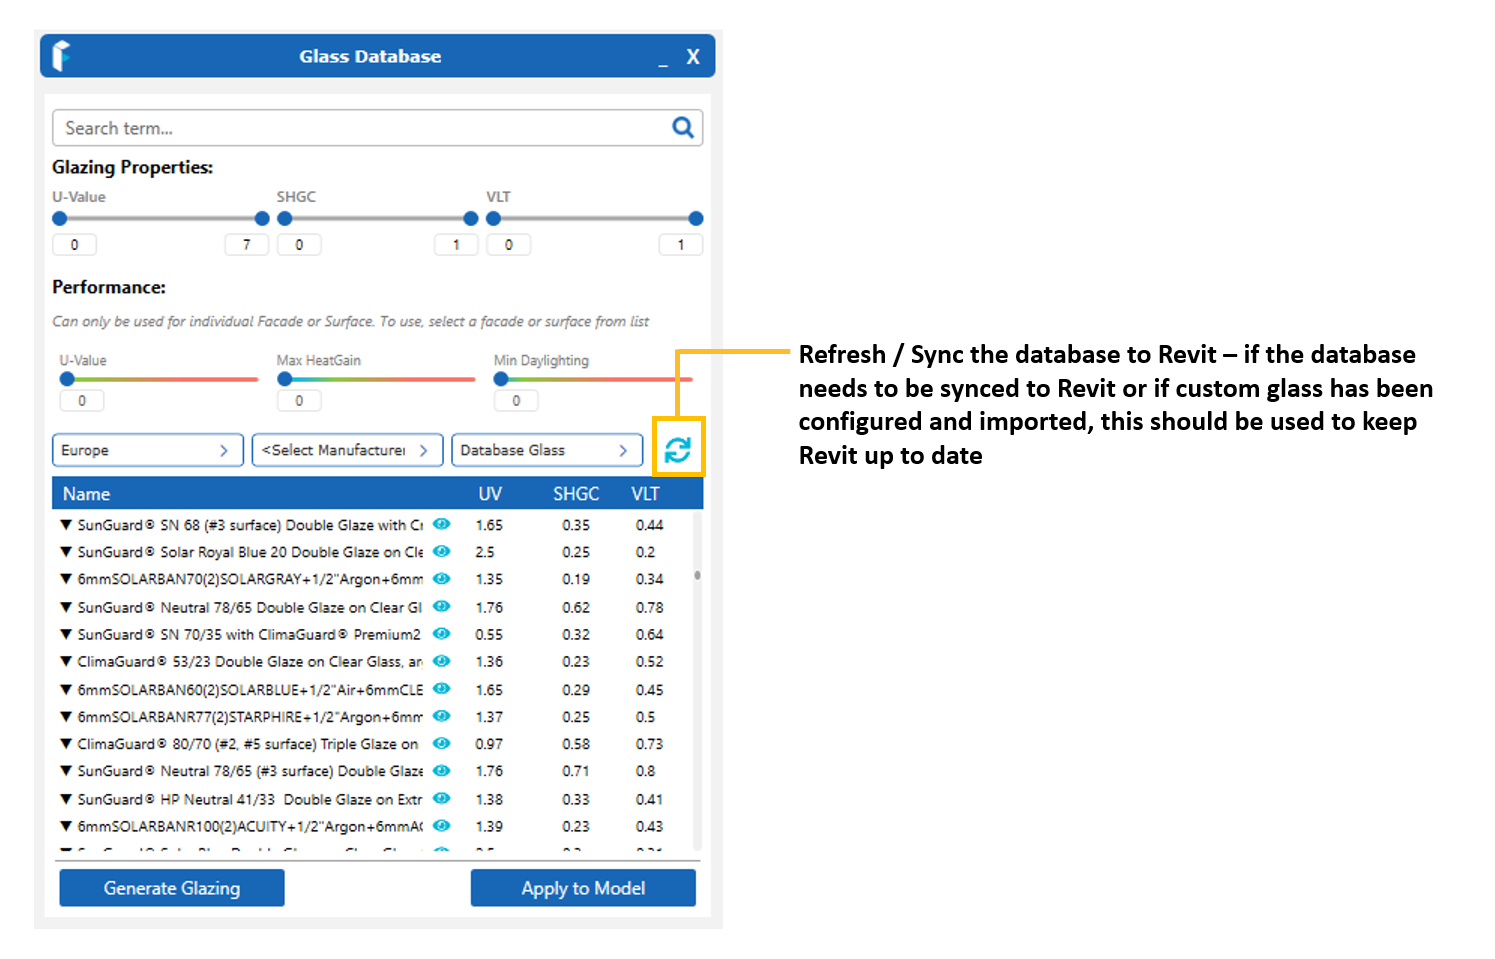
If there are multiple entries in Revit’s Constructions.xml list with the same name, Revit will use the entry which is last in the sequence. Because of this, an entry which has the same name in the Glass Database and is chosen for selection, may have a set of properties which do not match an entry in Revit. This may happen if you create a name for an imported glass which has already been used. Each entry will have it's on unique ID however.
This may occur where there are several entries in Revit for Glazing Types which have the same name eg. ¼” Double Glazing. Revit's internal list may contain an entry with one set of properties, a second entry with another set of properties and a skylight entry with a different set of properties.
Revit invariably will use the last entry that appears in the list sequence which may be the skylight version. An entry chosen in the Glass Database which appears to have the same name, therefore may not map to the correct Revit entry as expected since there are multiple entries with the same name.
Users are therefore advised to check the thermal properties in Edit Type to confirm that the entry has mapped correctly and that these are the properties that they intend to assign. This may be resolved by avoiding using existing names when importing a new glass type. The name in the Constructions.xml file may also be edited to avoid duplicate names but this is an advanced process and should only be attempted by a competent person. Editing the file incorrectly may cause errors and prevent the file from being read so caution is advised. Only users with expertise in writing syntax and coding should attempt modifying this file.
It is known that older versions of Internet Explorer (eg. Version 7 and older) and other older browsers may not provide the required links to the online service.
Please use a more up to date browser or another browser type eg. Google Chrome, Mozilla Firefox, Microsoft Edge etc
This may also occur when you are creating a password for your online Account. If possible, use a more up to date browser and make this the default browser before clicking on the invitation email link. Alternatively, you may copy and paste the url from the non-functioning browser into another browser.
An error may occur if FenestraPro is used to map glazing properties in the model which has just been modified or deleted. This may occur for example, if the Add Windows or Add Curtain Walls feature is used and then this is reversed (the glazing that was created is then removed/undone). Attempting to apply properties to this glazing in FenestraPro may cause an error since the element no longer exists in the model.
This may also occur if properties have been applied to glazing which is subsequently deleted. This is not an error but simply a referencing issue where model elements are created or removed, and dependent properties need to update. Users are advised to work methodically and allow the application to refresh and update as changes are made. If major changes to the model geometry are to be done, it is best to close FenestraPro, modify the model and open the application when you are ready to analyze again.
If any changes are made to the model geometry, please use the Refresh button on the Dashboard to re-create the Energy Model to keep the results, surfaces and referenced elements current.
This may occur after elements which were generated on the model are then deleted and Revit must recreate the Energy Model to update. The Surface has changed while Revit or the application is using the older version of the Energy Model. You may see a message in Revit similar to ‘The Referenced Object is not valid...’. Use the Refresh button on the Dashboard to regenerate the Energy Model.
If the model is large or complex and refreshing takes time, FenestraPro may also be closed and reopened, a new Energy Model will be created and the current Surface condition will be identified.
To Add Windows or Add Curtain Walls using the tools in the application, the wall selected must be free of any existing glazed elements. A message will display in this case where glazing already exists on selected Surfaces. The function also may not operate if glazing on an adjacent wall is very close to the corner. If possible, temporarily move the glazing back away from the corner. There is also a tolerance value in Settings which may be adjusted an may help when using these tools.
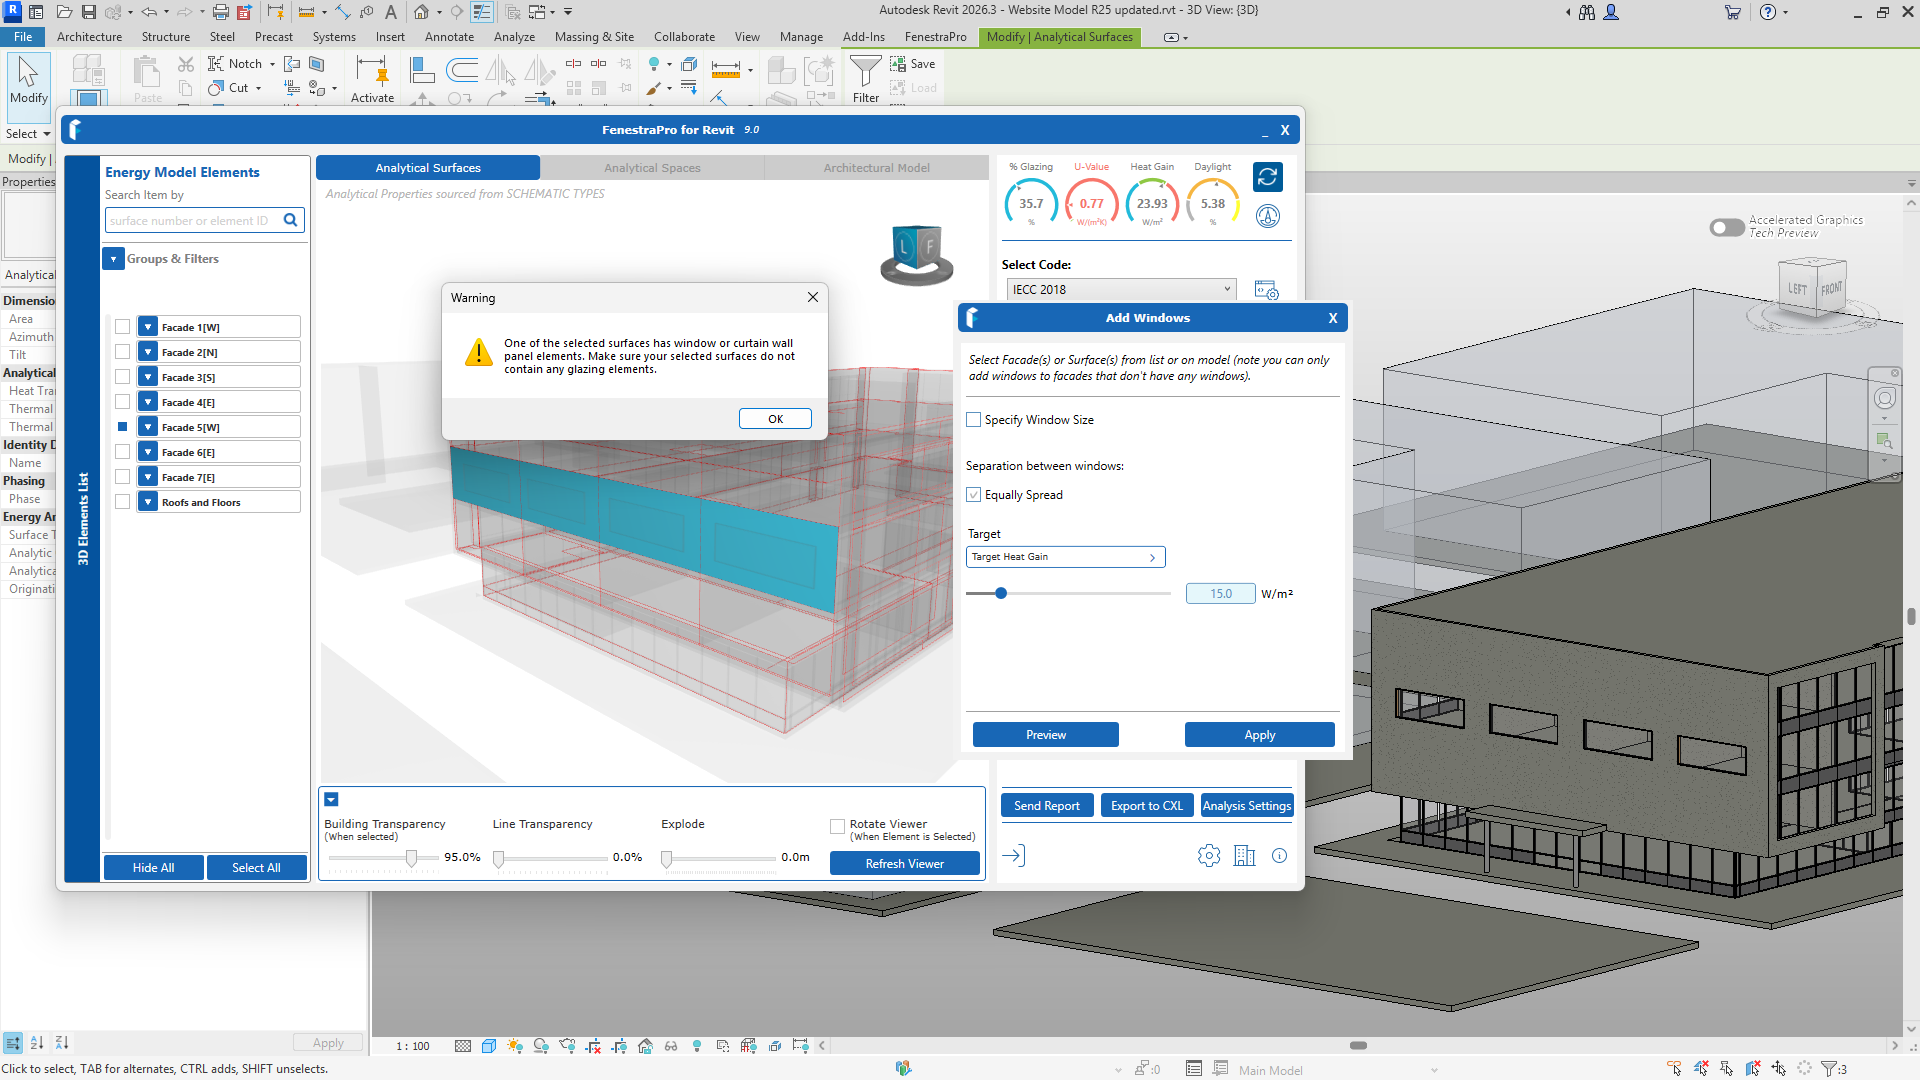
Where the Add Window function does not become available for a selected area, this may be due to adjacent glazing being too close to the solid wall. Glazing that abuts a solid wall where windows are to be added, may prevent placement of windows there as the joint condition cannot be verified. This should not be a common issue in the latest versions.
If this does happen, this may be overcome by moving the glazing away from the solid wall (eg. 3 feet / 1 metre). This may also occur where internal glazed partitions abut a solid exterior wall – the Add Window function may be disabled. You may temporarily move the internal glazed partitions back away from the exterior wall in order to place windows using FenestraPro and restore them when windows are placed.

The FenestraPro window family will also need to load into the Revit model and become active for use if you have not used this function before for this project. This may take a few minutes, please wait until this is complete. Note: The Project Browser in Revit should also be open when loading this FenestraPro window family to verify that the window families list has updated.
There is more information here in the Add Window Section.
You have forgotten your password or need to reset it. When you enter a new password, you are not able to sign in with this. You may check if you can sign into your FenestraPro Account in a browser window by using the Data Platform link on the Revit menu.

Please check that you are using the same email that is in the system for your Account (you may have different email addresses and signed up for a license with a separate email).
Also ensure that the password is correct and that case sensitivity is observed. Also ensure that your license subscription is active or has been renewed recently. If you or your company has an active license and your password seems correct, please contact us support@fenestrapro.com. We can advise if your license if currently active or can assign a temporary password to you if required.
If you had a Trial version of the software but then you company obtained a different license key, this may also cause an issue (perhaps you are signing in using your Trial License which has expired). The license serial key is verified with our system when the application launches. If this is the case, the license key on your computer would need to be modified. Please contact us for advice at support@fenestrapro.com There is advice on deleting an old license file on the installation page here.
This also may happen if you are using an older browser version (such as Internet Explorer 7 and older). Older browsers have a known issue that they may not send the updated password information to the system. Please use a more recent version, update your current version or try another browser.
You may also request that you be sent the reset password invitation link. From your email client, then you may click on this link to reset your password. Emails sent to you from our support system may sometimes go into your spam folder if you have filtering enabled. Please check this folder if you have not received any response.
From the sign-in window there an option if you have forgotten the password or if it is not working. Click on the Forgot Password? button. This will take you to a browser window where you may verify your email address. A link will be sent here to reset your password.

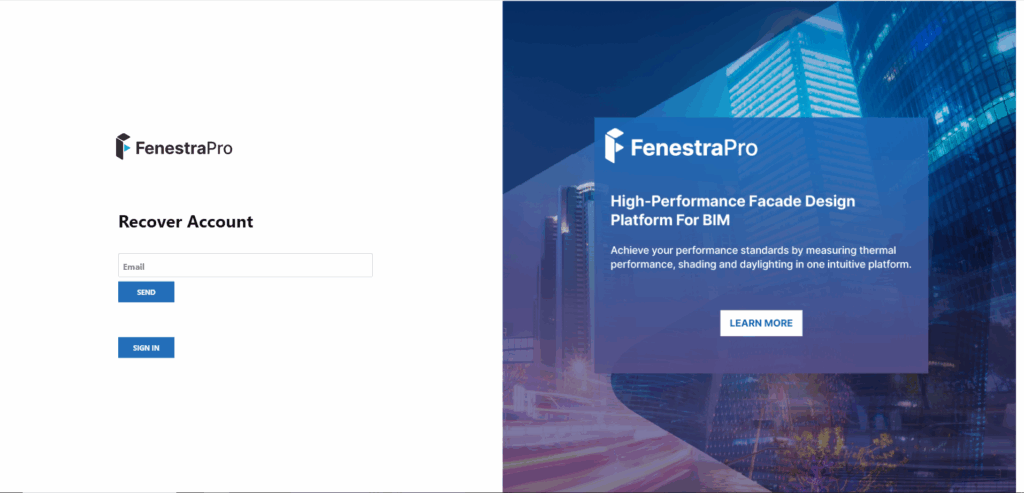
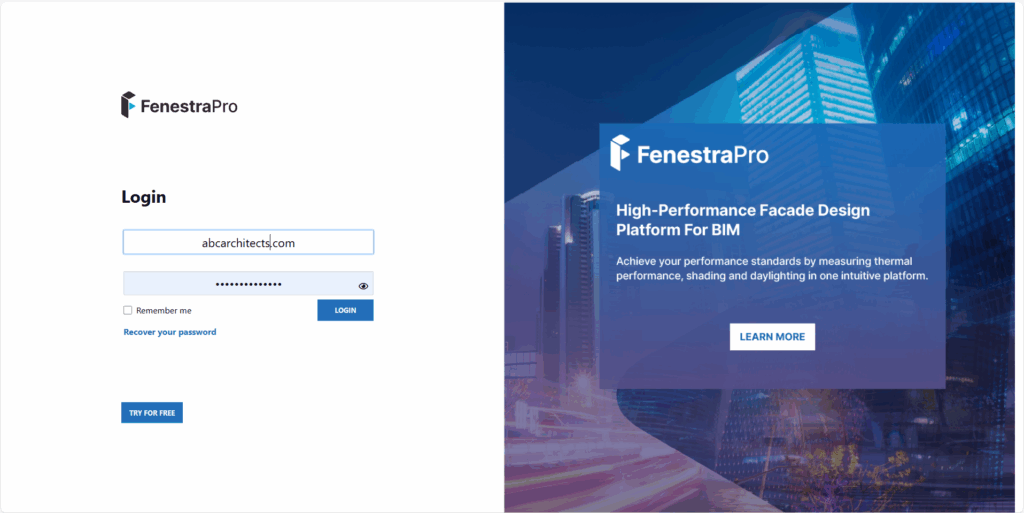
Reset your password and then sign into the FenestraPro Revit application (or to your online Account) using these credentials.
If you still have issues, please contact us at support@fenestrapro.com.
You open the Reports function but the browser window does not open with your report. In the Reports export window, a message will display if the export is successful or not.
For the HTML Report to work, Project Information must be filled in in Revit (under the 'Manage' tab). Please review these parameters and fill in all required fields. This is required to track and group multiple reports for the same project. More information is provided here.
This may also happen if there is a disconnect with the Account that you are signed into the application on and how you are signed into your online account area.
If you are using a hot-desk for example, another user may have signed into their Account on an open browser but you have signed into FenestraPro with a different Account. You may also have a personal Trial account and a company license with different email addresses etc.
If there are many open browsers where this might be the case, please sign out of any open online sessions. You may also check by clicking on Data Platform on the FenestraPro Menu in Revit. This will take you to a browser window to sign into the platform. It may also be useful to sign out of the application and relaunch by signing in again. This will refresh your license token.
A Report may also fail if permissions have not been granted to access Revit's Constructions.xml file. There may be restrictions in your office on users changing permissions for files on their machine. This permission should be set to Full Control (Read and Write). During installation, this will automatically be set by the application but it may happen in some instances that there are firm-wide restrictions or user profile restrictions on modifying file permissions. If this file has been replaced or permissions modified since the application was installed or if settings were inadvertently changed, it might cause an issue. Please contact your IT department or contact us for more information at support@fenestrapro.com
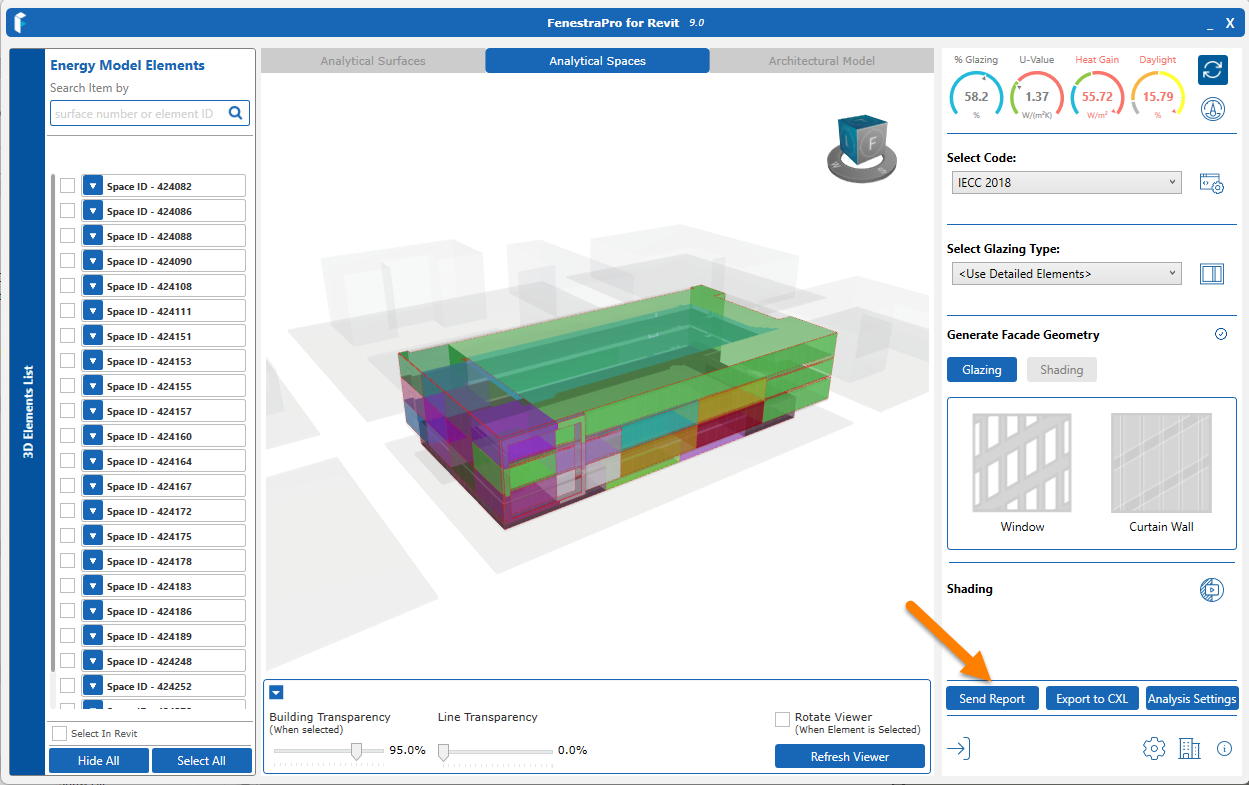
You may also send a report (log file) to us from your application. This will provide details of the event which caused an issue. This report may be accessed from Settings - Send Report. You may add a description if you wish (optional). This is explained in this Section.
Errors
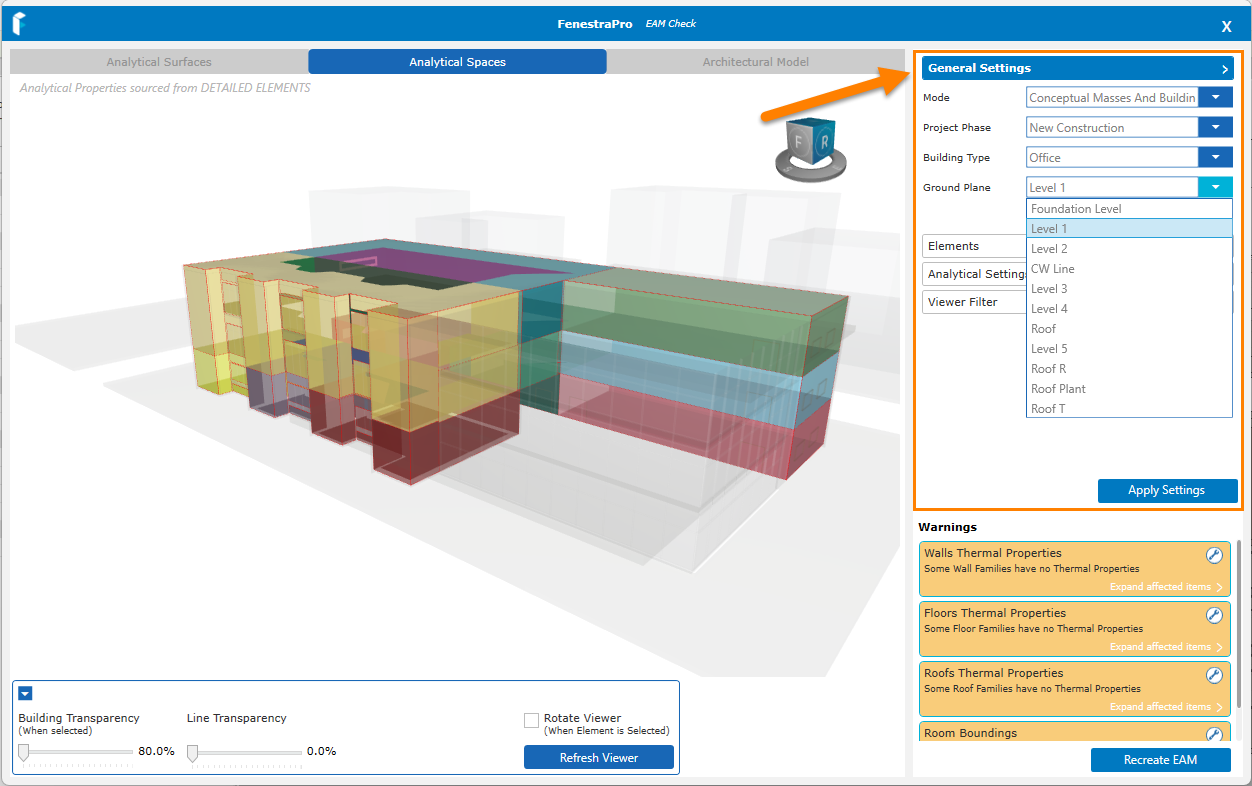
The Ground Floor element should be on the same level as that set under the Ground Plane setting in Revit. This can be found under the Energy Settings (Analyze - Energy Optimization tab). You may also have duplicate levels in your model with different names such as 'Ground Floor', 'Level 1', 'L1' etc. If the Floor element is set to one level but the Ground Plane setting in Revit is set to another level, you may get an error that there are no Ground Floors in the model.
This is easily resolved by checking this setting and matching both the level set for the Ground Floor and the Ground Plane in Revit's Energy Settings. This can also be done using the EAM Check tool which provides access to these Revit settings. Changing the setting here will also update Revit.

This may occur periodically if you have not signed into the application for a while. Periodically, a license token is refreshed and verified. If the application is open, you may see a message display that your token has expired. Simply close the application and you should see the sign in window again. You can also log out and log back into the application from the launch windows.

You can log out by clicking on the button as shown for the Detailed Design tool, then login again:
FenestraPro identifies previous versions of the application and will manage the database files which are stored on your machine (previous Solar Load Calculations, Custom Groups and Codes, and Log files etc). Once installed, FenestraPro will rename older folders and save this data.
If an error message appears, try clearing the cache files in the FenestraPro folder. This folder contains previous data and calculations from projects which have been analysed. If the project has been modified or was previously viewed in a different version of FenestraPro, this database may need to be deleted to start afresh.
The folder may be found in this location on your machine:
C:Users\< User Name>\AppData\Local\FenestraPro.
All the files may be deleted here (previous results and setting will be lost however). New files will be created when FenestraPro is opened again in Revit.
User Permissions / Firewall & Antivirus
You may also see an error message when you launch the application if you do not have user permissions to access certain folders (to create the license file) or if the web service connection that FenestraPro uses is being blocked by your firewall/antivirus protection. It may be necessary to get advice from your IT Department for these issues. Please contact us for advice first (support@fenestrapro.com) on instructions for testing our endpoint if required. It is also helpful for us if you can expand the error message fully to view the full message and email a screenshot to us for advice.
This means that there is a problem connecting to the internet or heavy traffic means that your request is queued. Please check your network connection and retry. FenestraPro requires an internet connection to calculate Solar Loads for the glazing. It may be helpful to wait a few minutes and try again.
There may be an issue accessing the web-service connection. If this is blocked, it may need to be explicitly allowed in your firewall or antivirus. You may require assistance from your IT Department to adjust your settings. Please contact us for assistance in this event at support@fenestrapro.com and we can send you our connection path to confirm that access is available.
This error message may display if you are launching the application.
In this event, it may be helpful please clear the cache files on your machine (previously stored results/settings).
This may be done by browsing to the FenestraPro folder on your machine if you have local permission. You may require IT help if user permissions are restricted.
This may be found at C:\Users\YOUR USERNAME\AppData\Local\FenestraPro. All files here may be safely deleted as they will be recreated when you launch the application again. Results and Settings for previous models will be removed however and will need to be calculated again.
Please then relaunch the application and sign in with your credentials.
FenestraPro usually supports the latest three versions of Revit. For example as of February 2026, FenestraPro Version 9.0 will currently install into Revit Versions 2025 and 2026 (this is due to recent uprgades of the API to .net 8 framework). Revit 2027 is to use .net 10.
If you have an earlier version of Revit, eg. 2021 or 2022, the Addin will not appear in your Revit Menu after installation. If you have multiple Revit versions, the application will install into all currently supported versions. Revit Lite is not supported since it does not produce an Energy Model. Please contact us if you have any questions.
Please check that your version of Revit is up to date. You may do this in the Revit Menu by clicking on About Autodesk Revit.


Please check if your Revit version has the latest update and patches/fixes from Autodesk. The Autodesk Desktop App/Autodesk Access is available for this purpose. It will suggest relevant updates for your applications.
It is important that whatever Revit version you are using has the most recent updates from Autodesk so that it will work well with FenestraPro. Your Revit version may be checked by navigating to the Help Menu and scrolling down to the About Revit section. Clicking on this will open a new window where you may view the current version number that is installed.
Please check regularly that any updates released by Autodesk are installed if required.
Access to FenestraPro’s web-service may also be blocked by your company firewall or anti-virus. Please check with your IT Department if this is the case.
Please contact us for assistance in this event at support@fenestrapro.com and we can send you our online paths to confirm that access is available.
This has been known to occur if an element in the Revit model has been modified or deleted and the Energy Model has not yet updated. You may need to click this message several times to close it. When the message has closed, please close the application and relaunch it to update to the current model condition.
This is may be due to the Energy Analytical Model (EAM) being out of date after changes have been made in Revit. Windows or Curtain Walls may have been created or deleted. The application will try to read the element in Revit but it may no longer exist in the previous condition. In this case, the Surfaces may need to be updated to include the recent changes.
If you try to run calculations but have recently changed the model, the objects may have moved or have been deleted. The changes may not be updated or Refresh may not have completed. In some cases, after major modifications to the Revit model, it may not be possible to continue without closing down the application and relaunching.
This may also happen if the number of Surfaces has now changed and need to be reassigned.
If major modifications are to be done to the model, it is best to close the application before you embark on these changes. You may relaunch when the model is ready for analysis once again.
When the Calculate Shading is turned on in Analysis Settings, the progress bar may run continuously without completing. This may occur if the distance between Revit's internal origin and the model or the distance between the Survey Point and Project Base Point is more than the maximum limit (16km or 10 miles allowed by Revit).
Please review this in your Revit project to ensure that the model is within the limits allowed by Revit. If necessary, relocate the model/Survey Point or Project Base Point to comply with the limit. If you stilll have isues,please contact us at support@fenestrapro.com.
Under Type Properties, Revit includes several options in the ‘Define Thermal Properties by’ parameter in the Analytical Construction area. You may access this by selecting an element in the Revit model and by then using Type Properties/Edit Type in the Properties Browser. The parameter should be set to Schematic Type for glazing properties to update correctly with new Glass Types from the application database. This setting provides access to the Revit list of Construction Types and the application can change glass types in Revit using this list.
Note: If this area has been set to User Defined or Building Type, where users specify custom values, the application will not be able to change the glass type for the Revit element, since these do not make use of the Construction Types list.. Please ensure that this setting defines thermal properties by Schematic Type unless there is a specific reason to customize or override.
o 
Another reason why the glass element does not update is if Type Properties has been left open in Revit. Please ensure that the Type Properties window in Revit is closed before applying a new glass type from the Glass Database in the application.
It is important that the Energy Settings (Phase/Energy Mode/Ground Plane etc) are correct as described here.
If these are changed in Revit after the application has loaded, it may not be able to generate a new Energy Model if required since incorrect settings were defined. The application may hang if you try to recalculate again with incorrect energy settings. There is no check for the validity of the energy settings inside the application after it has opened (there is a check for correct settings at the pre-launch stage).
In this case, relaunch the application so that it can check the energy settings again and advise.
With some models, loading elements may be affected by a non- 3D View is open or other views also being open in the background eg. Plan, Elevation or Section views open as well as a default 3D View. In this case, please close other views that are open or tiled views before launching the application.
Certain windows themes or personalizing your desktop may conflict with the graphics used in FenestraPro. If this occurs, please try changing the desktop theme to a simpler Microsoft Windows theme to see if this improves display of the application. Please report any issues to us at support@fenestrapro.com
FenestraPro supports Microsoft Windows 11, 10 and Windows 8.1. Older Windows versions may not have full functionality or enjoy all the features of the latest release.
If some elements such as Roofs and Floors are contained in linked files, the application may advise that there are no Roofs or Floors etc.
Setting the link to Room Bounding in Revit may not fix this issue. You may need to open the linked file (close the host model or unload the link temporarily in order to edit the linked file). Then set each element (Roof/Floor/Wall etc) to Room Bounding separately. The application should then open without any warning.
This may be due to various factors such as modeling issues in Revit such as gaps in the enclosure, element functions (interior/exterior), room separation lines around the buidling perimeter, room bounding conditions etc. Incorrect or unsuitable Revit Settings can also cause issues (Ground Plane, Phase, Resolutions, Energy Settings etc). There is more information to help diagnose issues here.
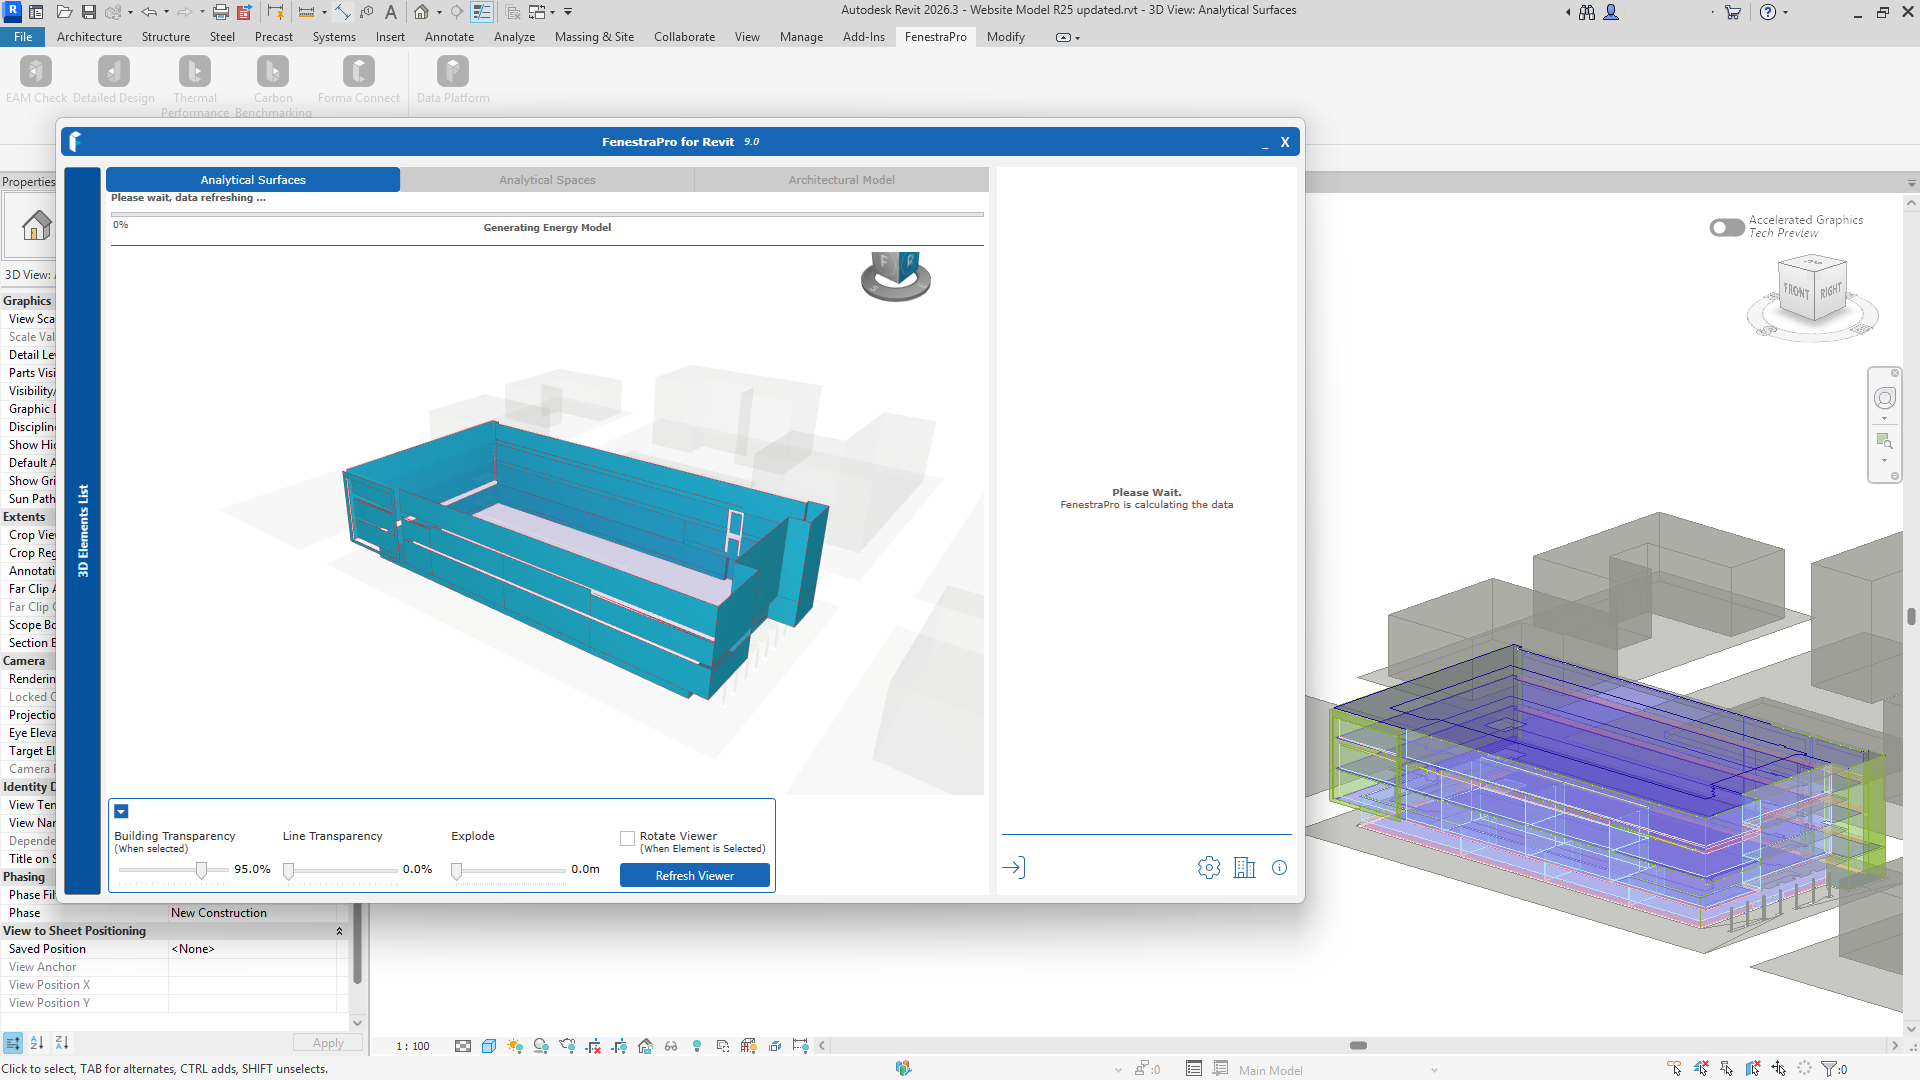
If you have launched the application using the Analytical Surfaces view in Revit, the application will not be able to get the required data to proceed. The message 'Generating Energy Model' is will display but progress is not made. In this case, close the application and change the Revit View to a default 3D View. Then launch the application again. Using the Analytical Spaces View may not always cause an issue.

This should not be an issue in recent versions but may occur with older versions. It is recommended to upgrade to the latest release to have the latest functions and updates. The latest installer can be found here
A message may appear if an element in the Revit model has been modified or deleted and the Energy Model has not yet updated but you are trying to access data for that Surface/Space which has already been modified in Revit. You may need to click this message several times to close it. When the message has closed, please close the application and relaunch to generate a new energy model and bring the application up to date.
If you use a non-default 3D View in Revit and start the application, the glazing elements may not be read in this View. (eg. if you use an Analytical Surfaces View). Please use only a default 3D View in Revit (click on the house icon in Revit) and close any other open Views or tiled views. A message may display that the application is Generating Energy Model but this does not progress. In this case, close the application, go to Revit and change the current view to a default 3D View and relaunch the application.
Use of the Analytical Spaces view in Revit may be successful but the Analytical Surfaces view may fail.
Missing model elements may also be due to imported geometry such as facadaes designed and modeled in other software and imported as generic geometry into Revit. These typically do not have the parameters required to provide data (thermal properties, structure, materials etc). If all elements are set to non-Room Bounding, have interior functions or there are modeling issues such as separation lines around the perimeter, this can cause issues. Please see the Model Preparation article and the Energy Model article here for guidance.
This issue may occur with older versions of the application.
This is due to the Energy Analytical Model (EAM) being out of date after the model is modified in Revit. A typical message displayed is ‘The referenced object is not valid, possibly because it has been deleted from the database or its creation was undone’. Attempting to apply a new glass type to an element that has been deleted may also display an error message such as 'the selected glazing has been updated...'. Highlighting may also fail on the model.
Windows or Curtain Walls may have been created or deleted or the geometry changed in some way. In this case, the Surfaces may need to be updated to include the recent changes. Objects may no longer be in the previous location. This may also happen if the number of Surfaces has now changed and need to be re-assigned.
The changes may not be updated to the Energy Model or Refresh may not have completed. If major modifications are to be done to the model, it is best to close FenestraPro before you embark on these changes. You may relaunch when the model is ready for analysis once again.
A Revit message may display as shown:
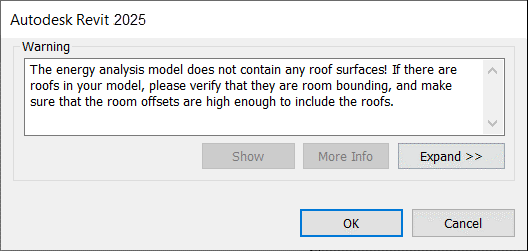
This message may display, even though there are Roofs and the Room Bounding setting is correct. If you click OK and continue, FenestraPro will launch but Roof properties may not display in the Performance area.
This may be resolved by closing FenestraPro and going to the Properties Palette in Revit. Select the Roof element(s) and check the settings for Upper Limit and Limit Offset. The Upper Limit may need to be set to the storey level above the base level of the room. The Limit Offset may also need to be adjusted so that the Room Upper Extent touches or extends past the Roof.
Where the Upper Limit is set the same as the Room base level, this message has been seen to display. A Section View can help to visualize and understand the Room extents in the model. When adjustments are made, delete the existing Energy Model in Revit, create a new Energy Model and review the warnings again under Revit's Manage tab, they should be improved now. You may need to repeat this with any remaining areas.


