
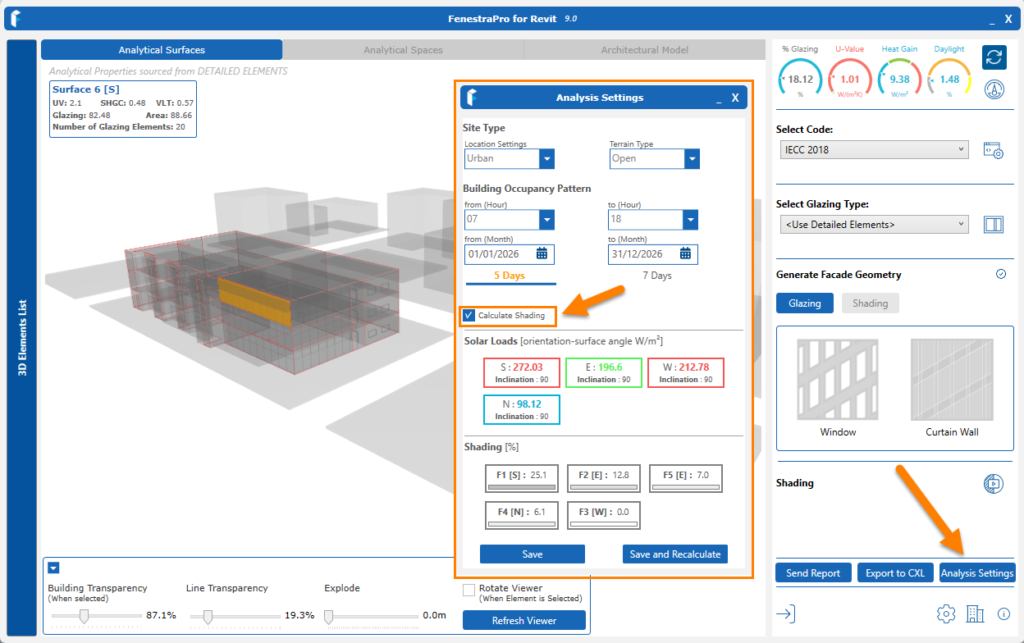
A Shading Animation viewer is provided to review shadows on the model for selected dates and times. This feature allows shading effects to be visualized on the model in the application viewer. These are displayed as shadows for selected dates and times during the year. display the shading effects of objects on or around the model as well as self-shading. The animation may be run, paused or specific days may be selected and reviewed. The main viewer will change to display shadows. Note: If you adjust the Building Transparency or Line Transparency settings, the shadows view may change and you will need to relaunch the Shading function to reset the viewer.
Shadows and sunlight hours will be calculated once results are completed in the Analysis Settings area (even if ‘Calculate Shading’ is turned off). Shading results however must be included in the calculations by turning this on in the Analysis Settings area to get the most shaded surfaces/shading results.
You may navigate around the model in the Viewer as normal (pan, zoom and orbit) as required. Play the animation using the controls provided. You may pause or speed up the display if required (clicking on the fast forward button will progressively speed up the display). You may also drag the arrow on the slider gauge to a position if required or use the dropdown list of dates and times to make a selection. Typically shadows are displayed for every 2 hours during the day with sunlight hours and every 10 days.
Note: If dates are modified in the Analysis Settings so that specific months are to be used (e.g. March to September), this Shading Animation function will also reflect only these dates.
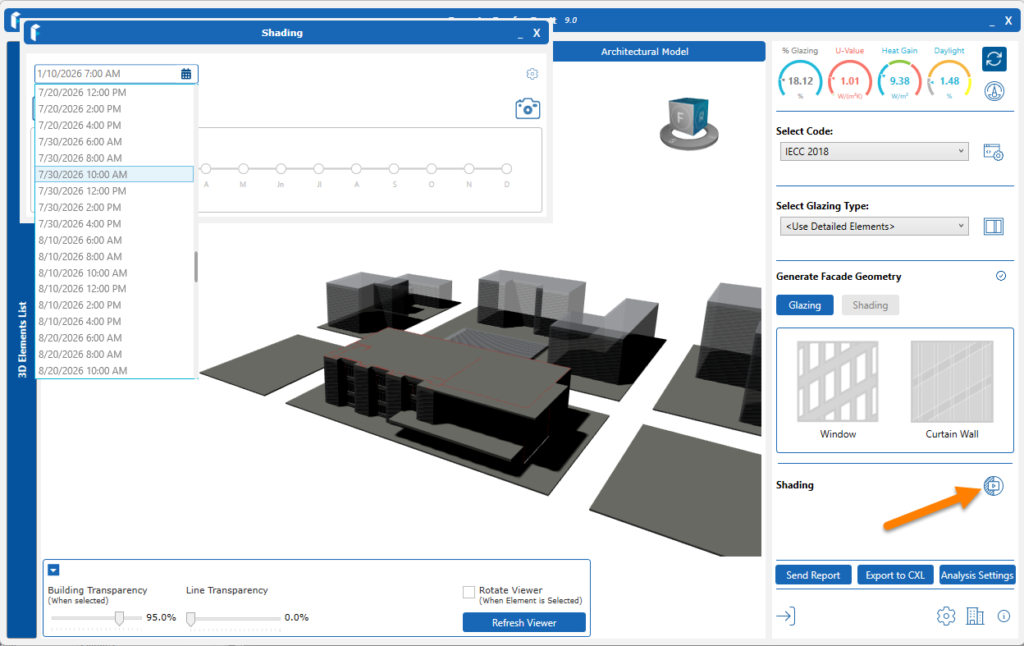
You may also place the cursor in the date box and using the forward and back arrow keys on your keyboard, you may advance forward and back to the next time setting.
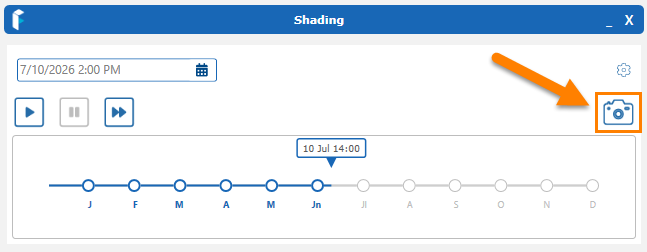
A camera button is also provided to take a screenshot of the animation while it plays or when it is paused. You may save this capture (.bmp) to your computer.
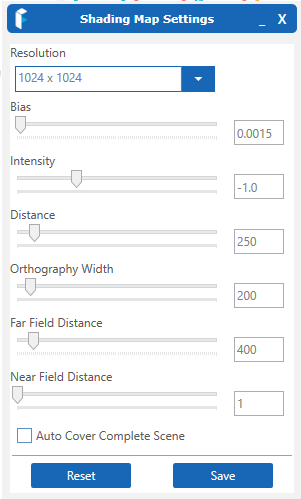
If you not seeing any difference in the results when shading is on or off, you can check the Shading Animations to review shadow effects from objects. It could be that some objects are not casting any shadows or creating any shading effect (e.g. generic/imported objects). You may also check the values in the settings panel (wheel icon). Sample values are shown below that should be suitable for most models. The Charts will also include a Shading Chart once shading has been included in the calculations.
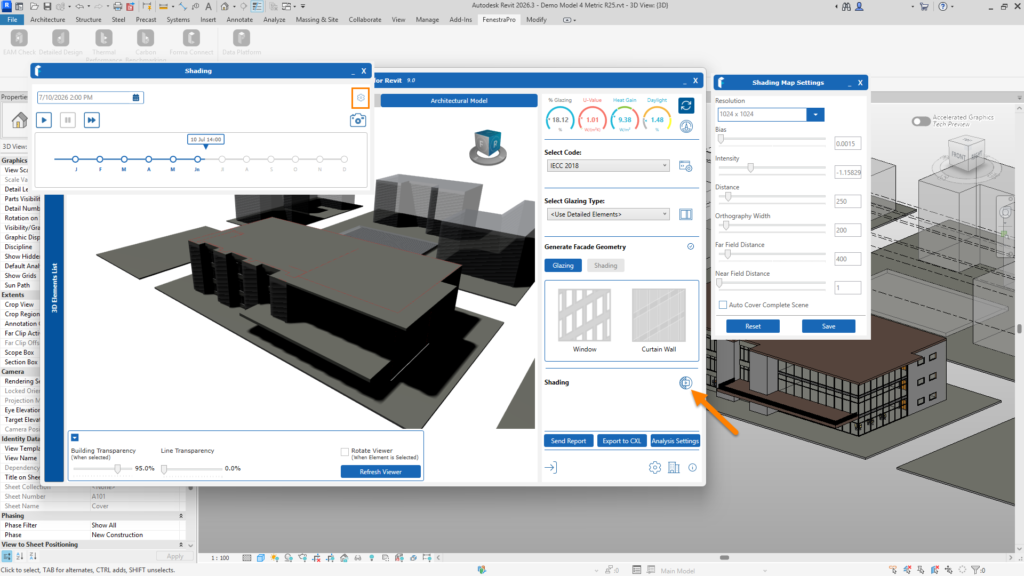
suggested settings
A tutorial is provided below for Outputs which includes Shading Animations and Reports (this currently relates to version 7.0 and is to be updated).
Shading for very high altitudes
For very tall buildings, FenestraPro can also support shading at high altitudes. A panel with slider settings has been added to allow adjustments to support suit taller models and support shading effects. It is advised to have a ground plane element in the model (topography or exterior floor to better visualise shadows).
If you find that you are not getting smooth shadows, you may adjust parameters such as distance, orthography width, far field or resolution.
Shading settings are located in the Shading Animations. A window will open where you can play the shadow animations. Specific dates may be selected from the dropdown list or by dragging the date indicator over the monthly slider bar. For tall models, you may need to adjust these for shading effects to display. You may adjust these values and when shadows display correctly, save the new values.
If shadows are not displaying, the slider values may be adjusted:
Intensity: try -1 (if this value is too high , the shadows may disappear from view)
Distance: try 250 (if this value is too or too high, shadows may disappear from view)
Orthography Width: try 200 (this value should be high enough so the shadows appear but if the value is set too high, the rendering may become coarse. Adjusting ‘Far Field Distance’ can also improve coarseness)
Far Field Distance: try 400 (this value should be low enough so shadows start appearing but if the value is too high, they may disappear)
To check if shadows are displaying, select a time in the afternoon from the dropdown list (shadows typically appear longer in the afternoon).
If shadows start to display, please recalculate results with the new settings (since previous results may not have included any shading effect).
A Reset button is also provided to revert to the application default settings for all sliders. After using ‘Reset’, please close the settings window and reopen to view the default application settings.
In the Settings area, you may adjust parameters if required to get smoother shadows if the shadow rendering on the model is rough. Note: adjustments will affect the results slightly.


