
Thermal Performance tool
- Where curtain panels are at an angle to the Curtain Wall plane, there is a slightly different workflow.

In this case, it is necessary to get the exposed surface area of the panel elements relative to the elevation. The Thermal Performance tool will not identify such surfaces without some input from the user.

It is necessary to add an extrusion to the panel family to represent the surface areas on a plane parallel to the Curtain Wall. ‘Edit Family’ may be used in Revit for this purpose.

- The lowest Panels may also have a Floor Surface which will need to be represented on the same plane. Creating surfaces parallel to the Curtain Wall plane will then be read and properties may be assigned and modified.

- For the new extrusions that represent the original panel surfaces, existing materials should be duplicated and a new name used with the prefix ‘fpro…..’. This material will then be used by the Tool.
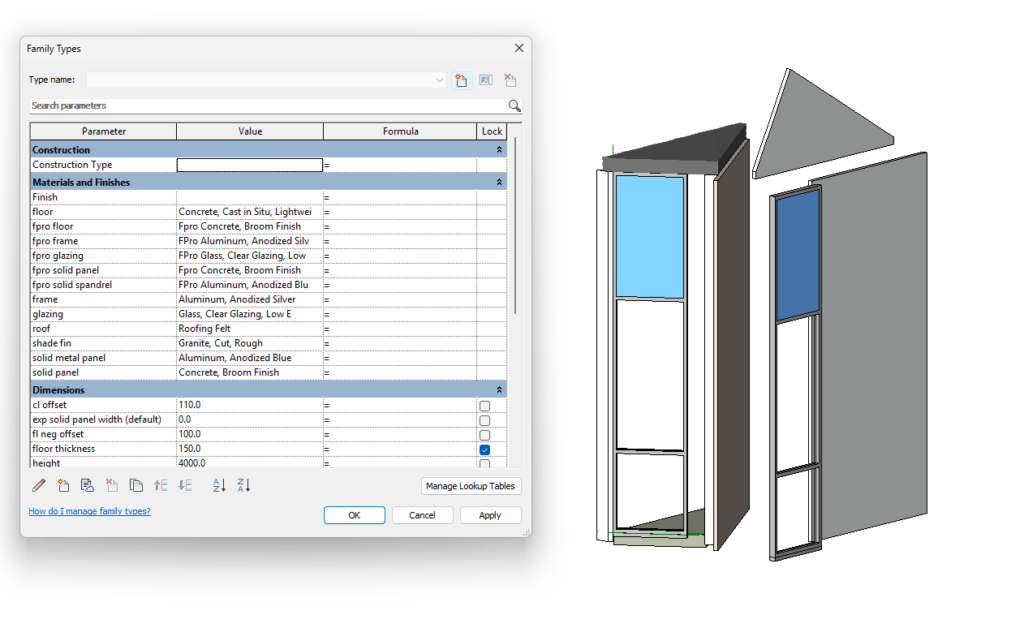
Once the panel is selected on the Model, the materials there will load in the Thermal Performance tool. Any materials which are picked up but are not relevant may be excluded eg. Edge of Sills which do not have a large enough surface to affect the results. Excluded materials are ignored (even if they have a value displayed).
Glazed Units may make use of the Glass Database to select a Glass Type with associated thermal properties.
Where R-values display in the dialog window but are not realistic, these may be edited (input a realistic value).
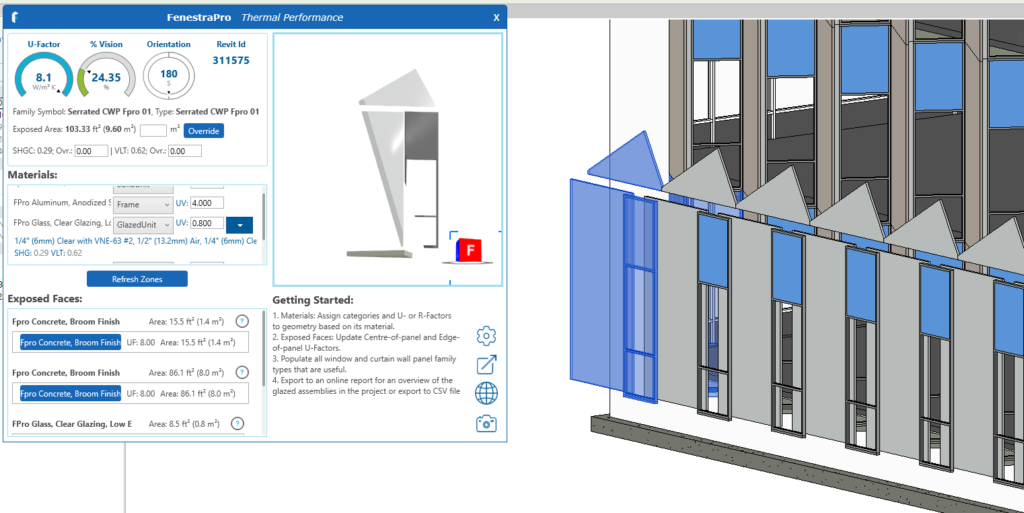
Set values for materials as normal, then use Refresh Zones to update.
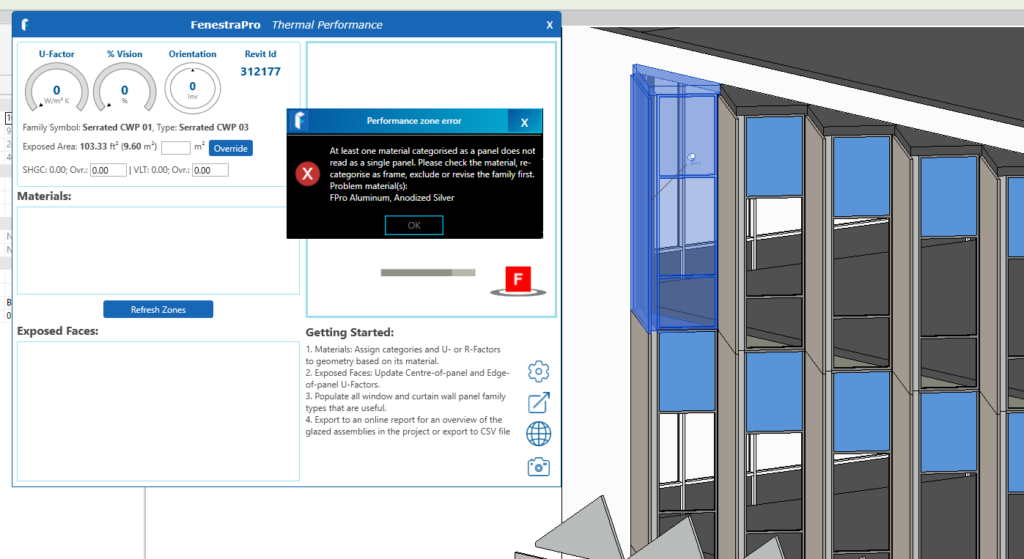
If a panel does read correctly, a message will display. Please adjust the settings or review the model geometry and modify if required.
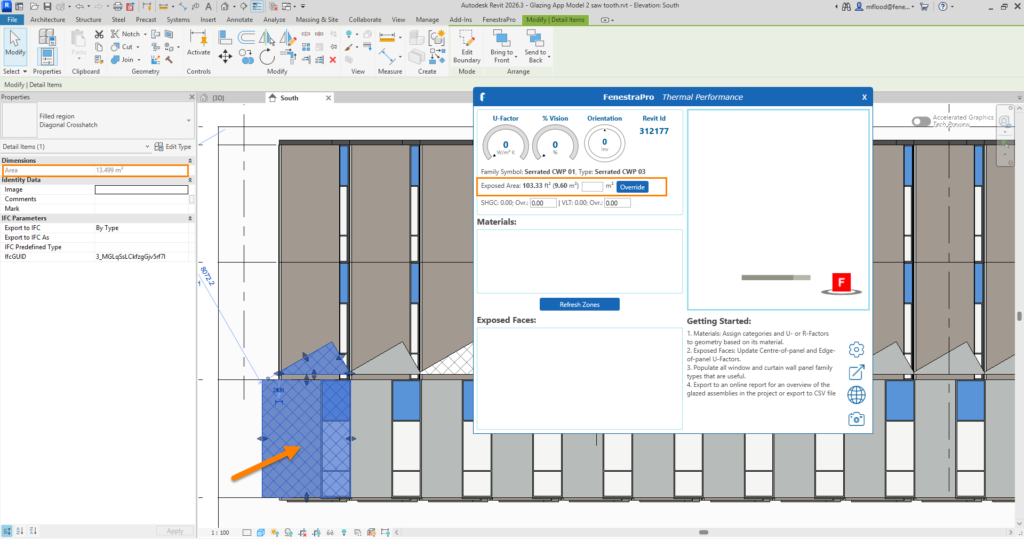
You may check exposed areas of surfaces by going to an Elevation View in Revit and creating a region area. The area of this region may then be compared with the value in the Thermal Performance Tool. You may override this value if required.
Sometimes the area displayed is the opening area within the panel grid instead of the actual material area and this will act as a check for angled panels. Zero % Frame value on the Dashboard may also indicate that an override is required.
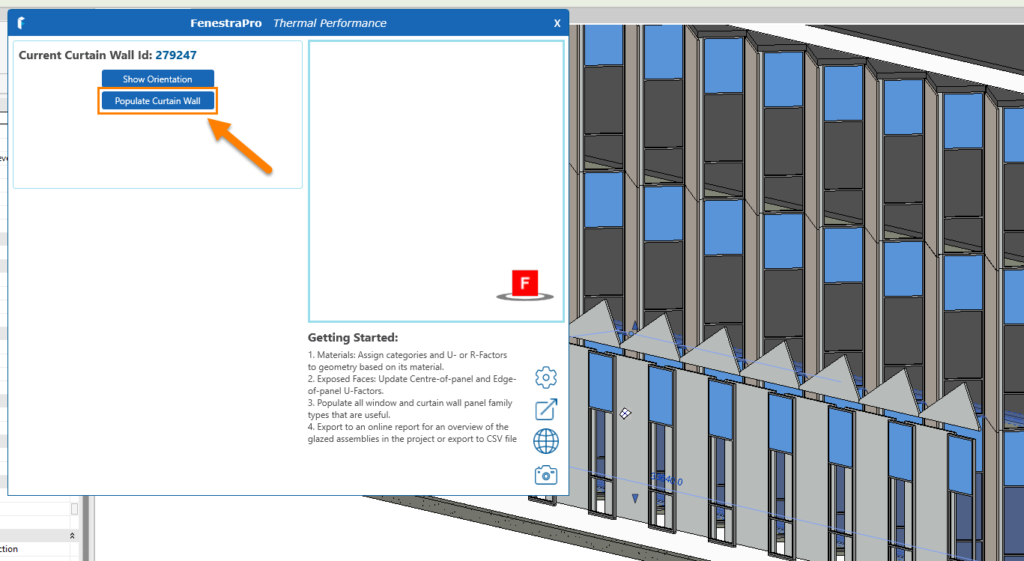
When all materials have been set, select the Curtain Wall and click on the Populate Curtain Wall button. This will then provide details on the area, percentage glazed, percentage frame and Overall U-factor.
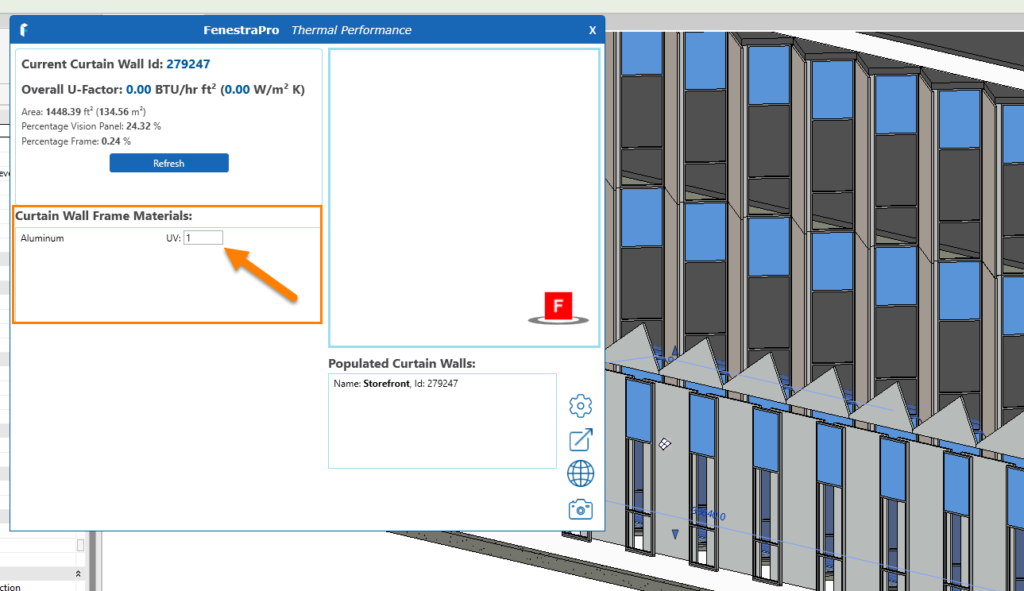
You can also then define the curtain wall frame value.
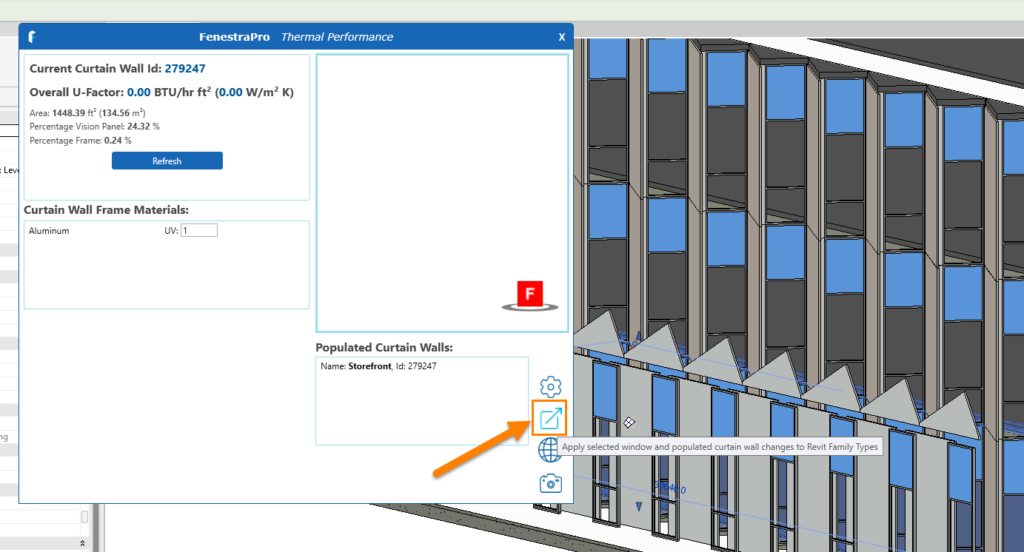
Use the Export button to send the calculated values to Revit which will update the family values in Type Properties / Edit Type.
Note: the tutorial video below relates to version 7.0 and is to be updated soon.

