Version 9.0 features a new user interface to group functions and optimize the workspace.
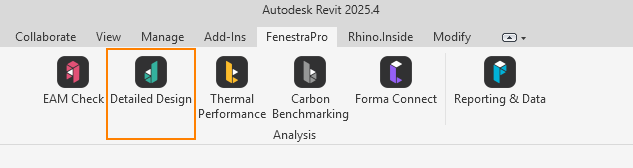
FenestraPro v9.0 menu in Revit 2025
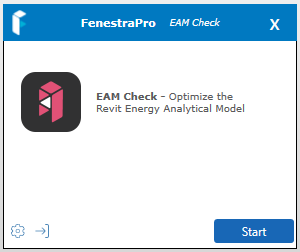
EAM Check tool
This will provide a means to review element properties, settings and issues before launching the Detailed Design. Simply click the Start button to proceed.
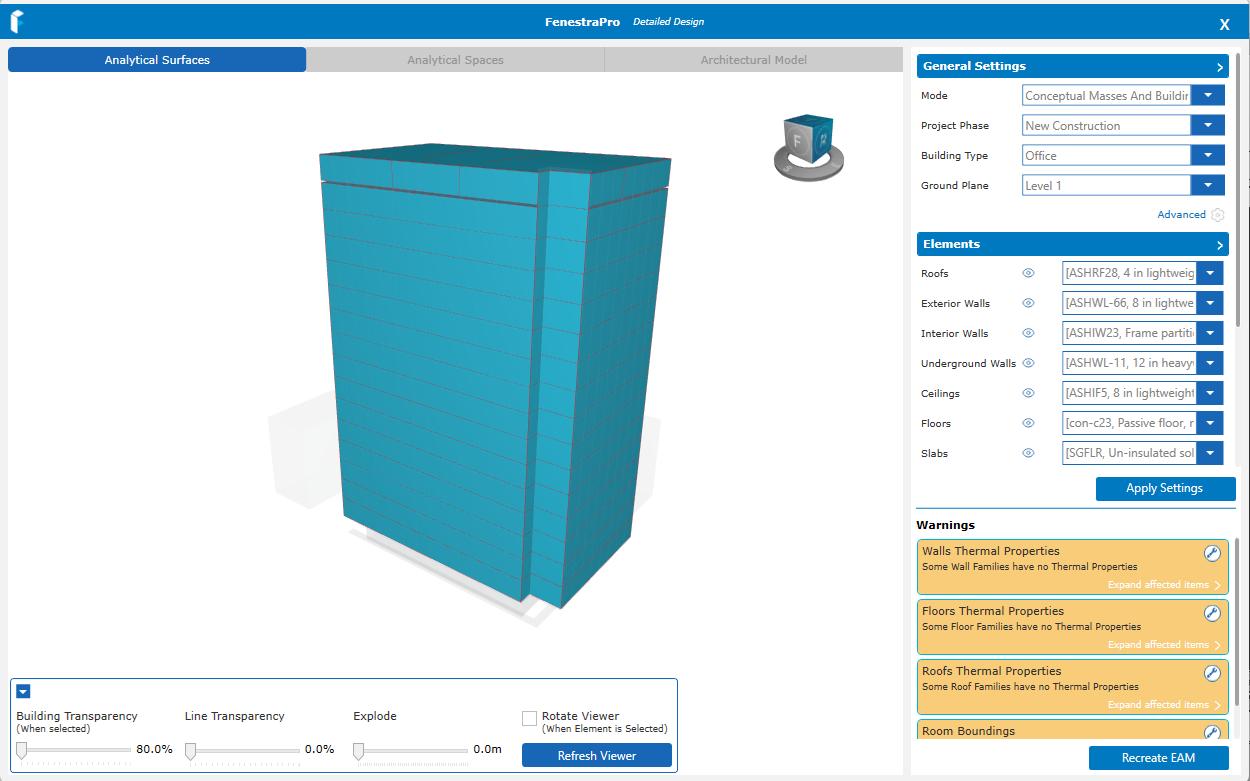
Detailed Design
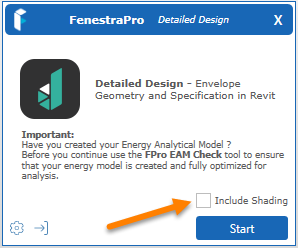
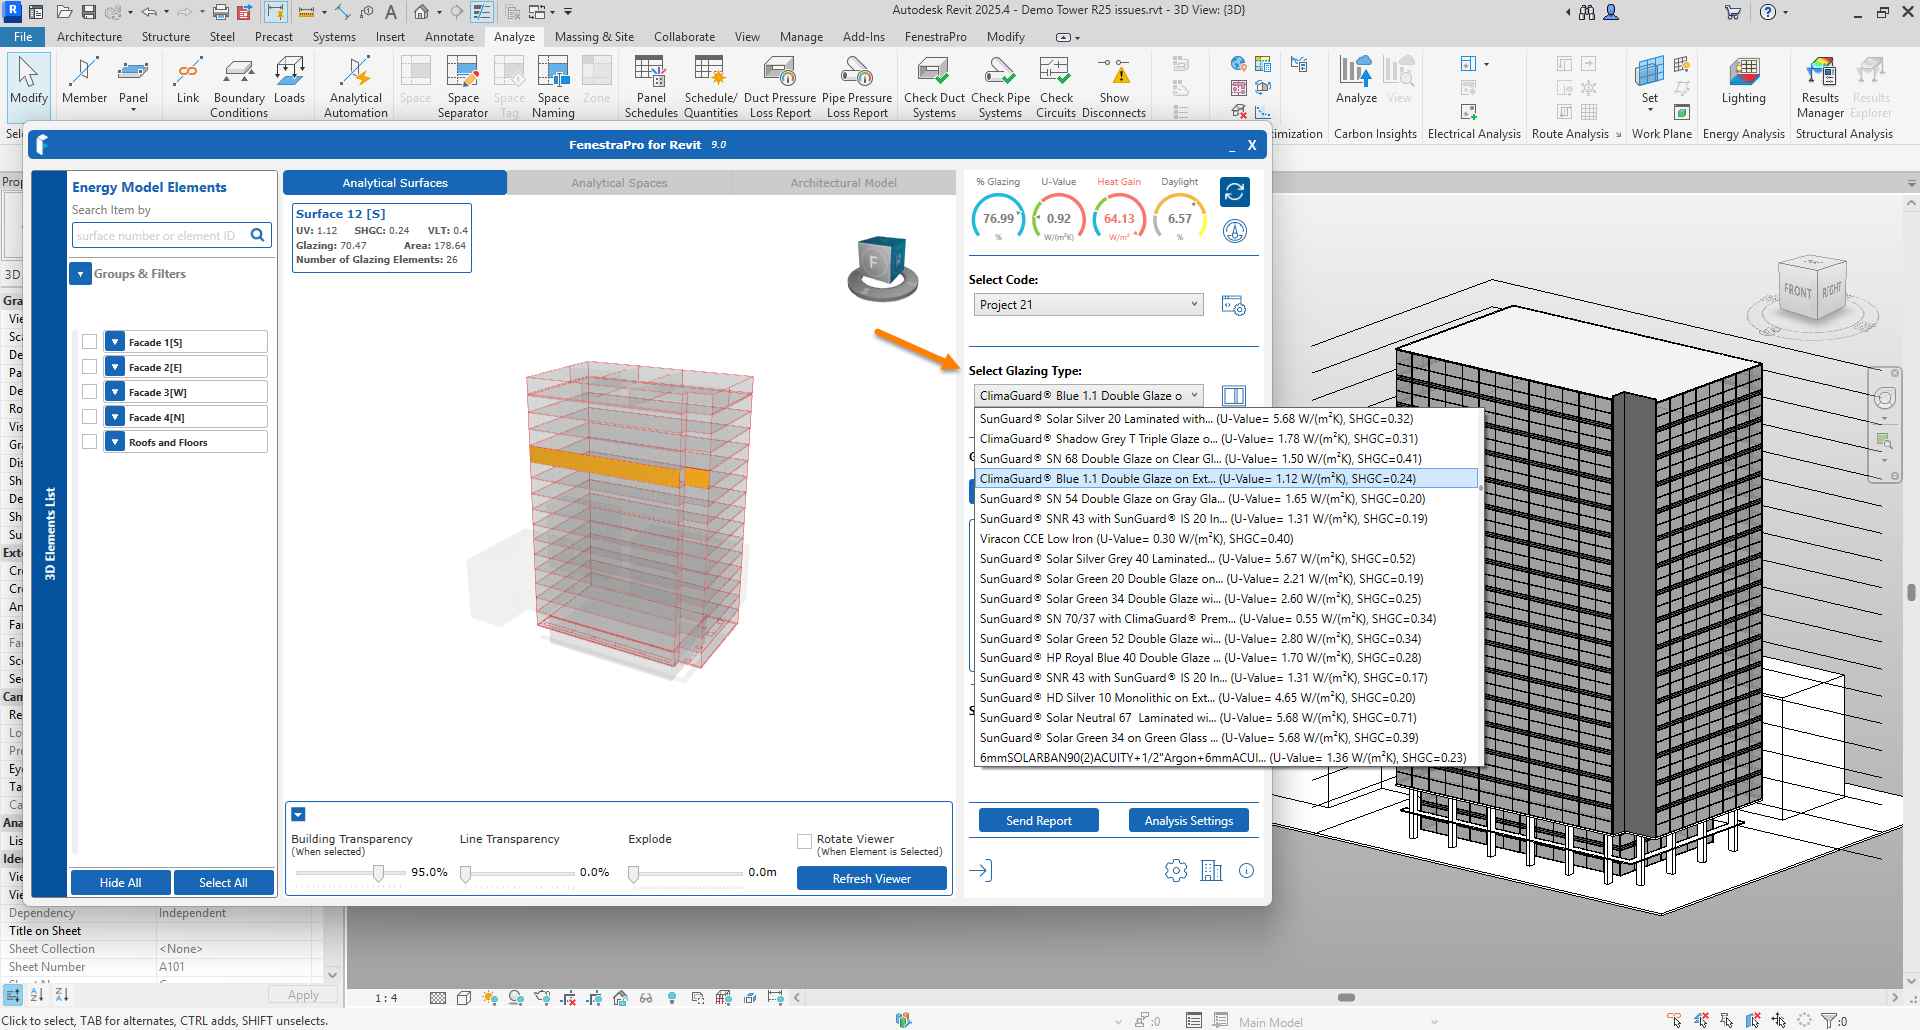
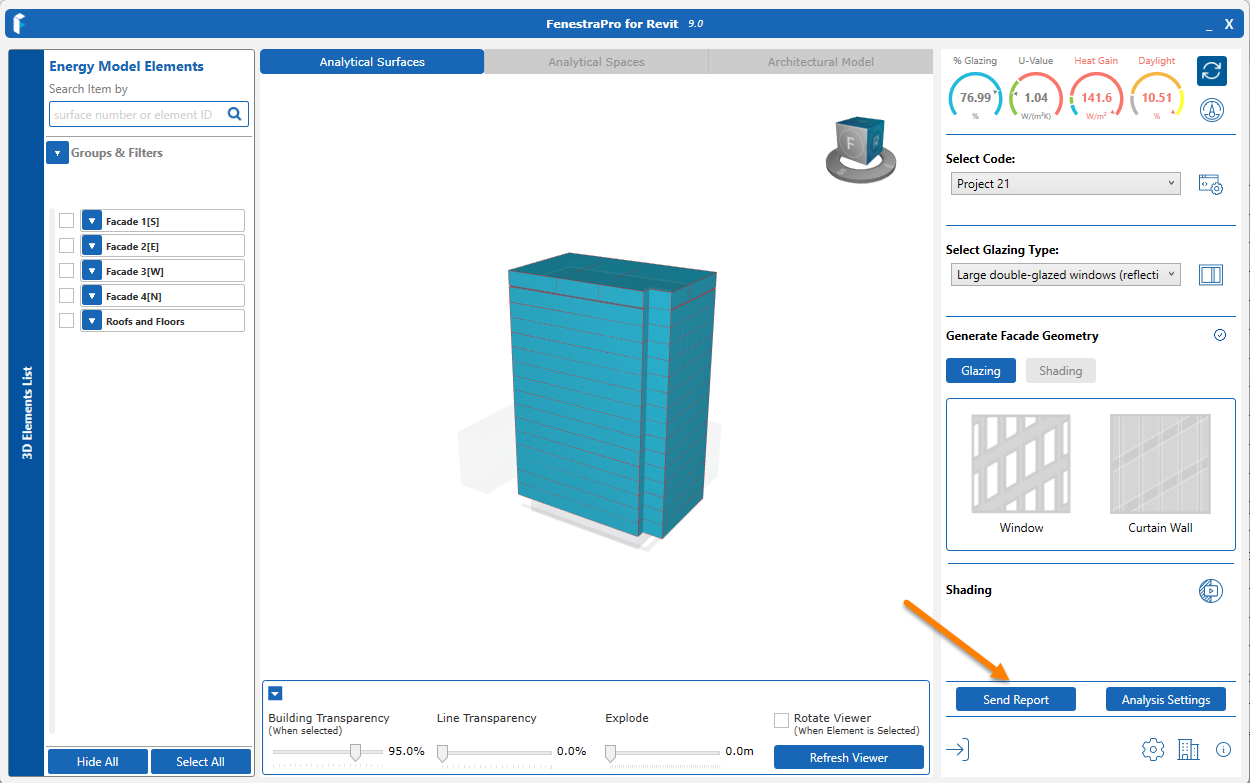
This is the main application for model analysis. When you click this on the Revit menu, a window will display before you proceed. There is an option to include shading calculations if you wish. This will take more time but is recommended if you have signifcant shading factors in your project (surrounding buildings, self-shading or shade devices). There are also options to log out or to open application settings. There is an advisory message to use the EAM Check tool first.
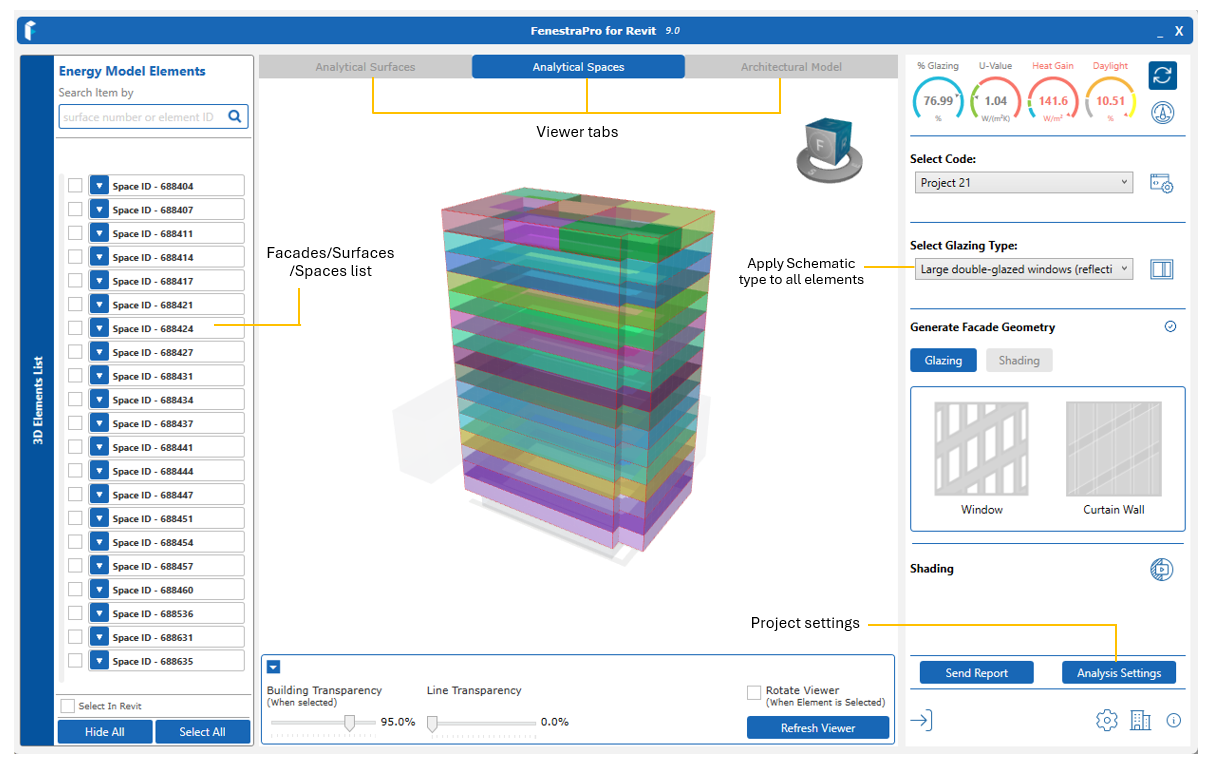
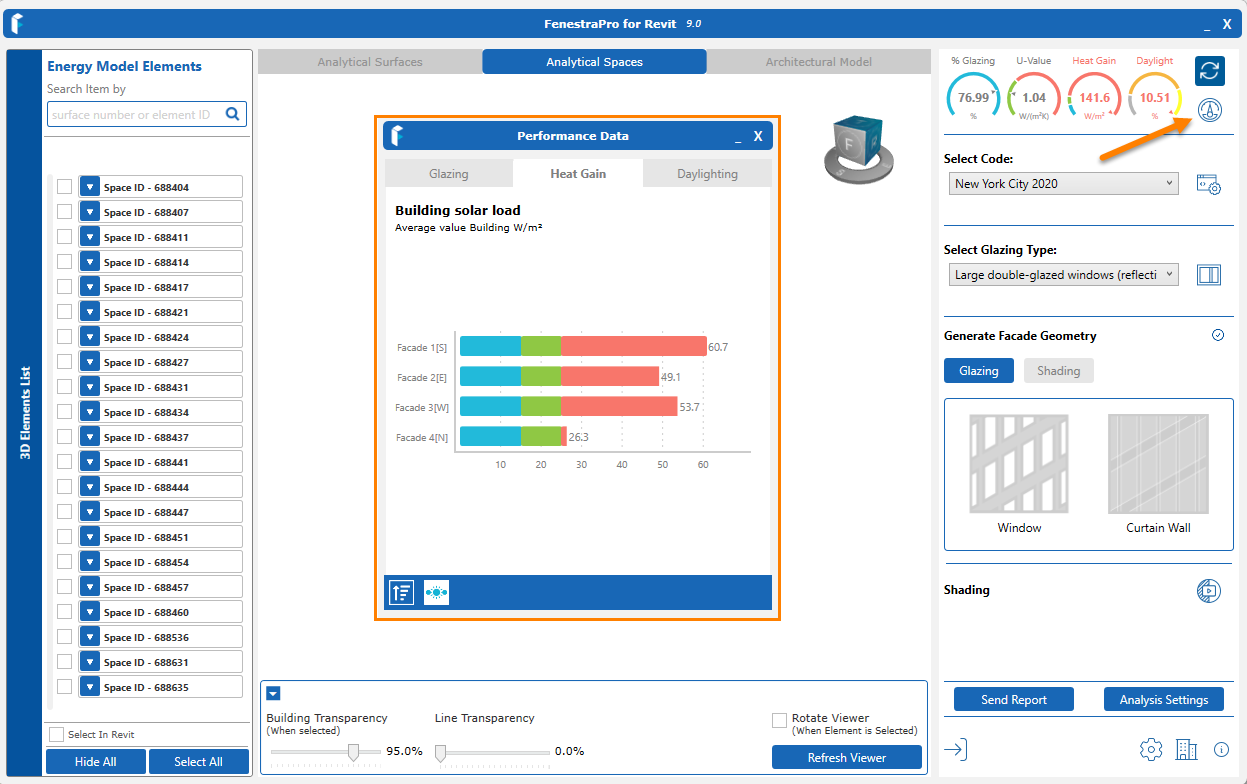
Charts
This button will open the Charts for Glazing %, Heat Gain, Daylighting and Shading (if calculated). You may also select into Facades/Surfaces using these Charts. The buttons at the base are for reversing back out from a single Surface to all Facades and to switch from Average to Peak values.
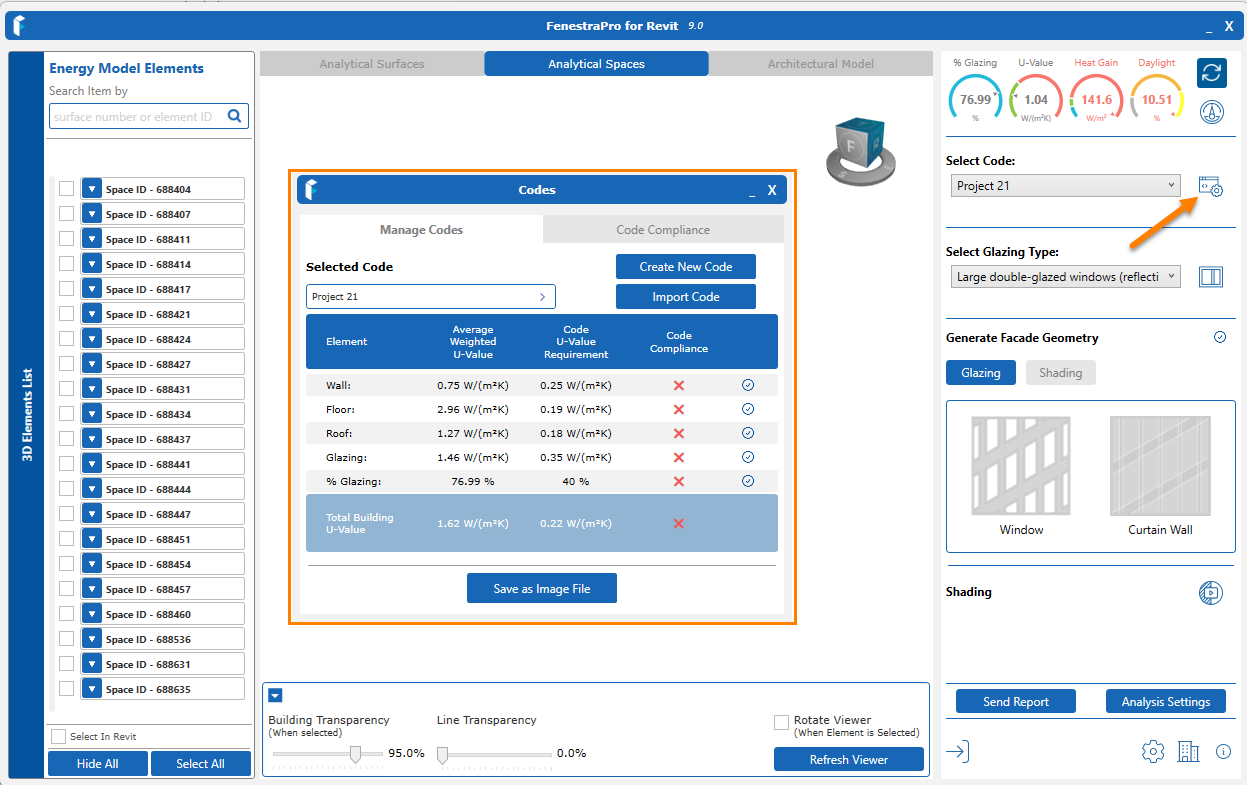
Codes & Compliance
This button will open the Energy Codes window, where you can:
- select a code for comparison with actual U-values in use for your project
- create an Energy Code in your Account area and import it
- Save the current Compliance conditions as an image file
- a report on model element areas and performances is to be added soon
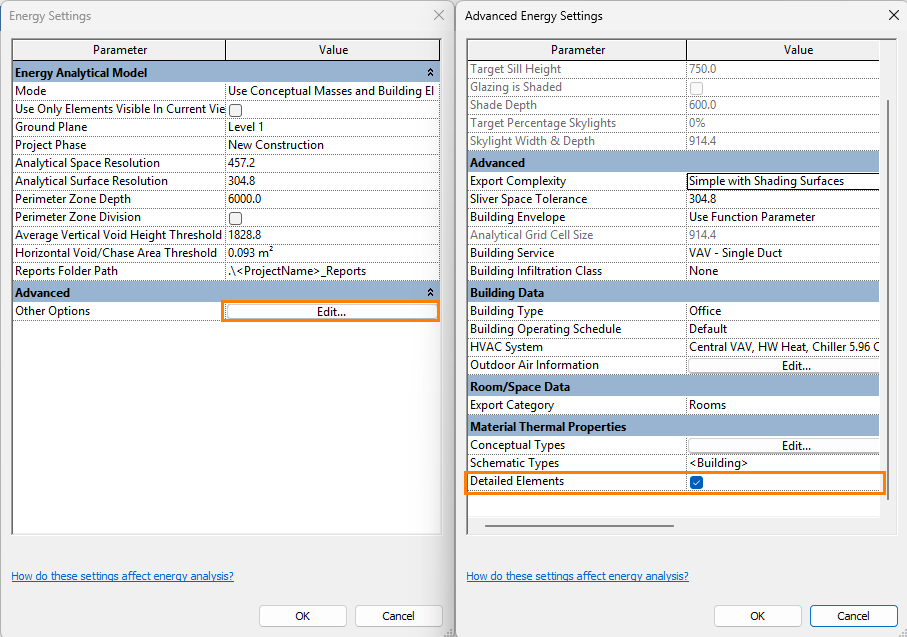
Note: Depending on the settings in Revit, the application may use schematic values for compliance checking (instead of analytical properties). Revit windows will need to be closed before you can Refresh the application to update after any changes are made to Revit’s Energy Settings.
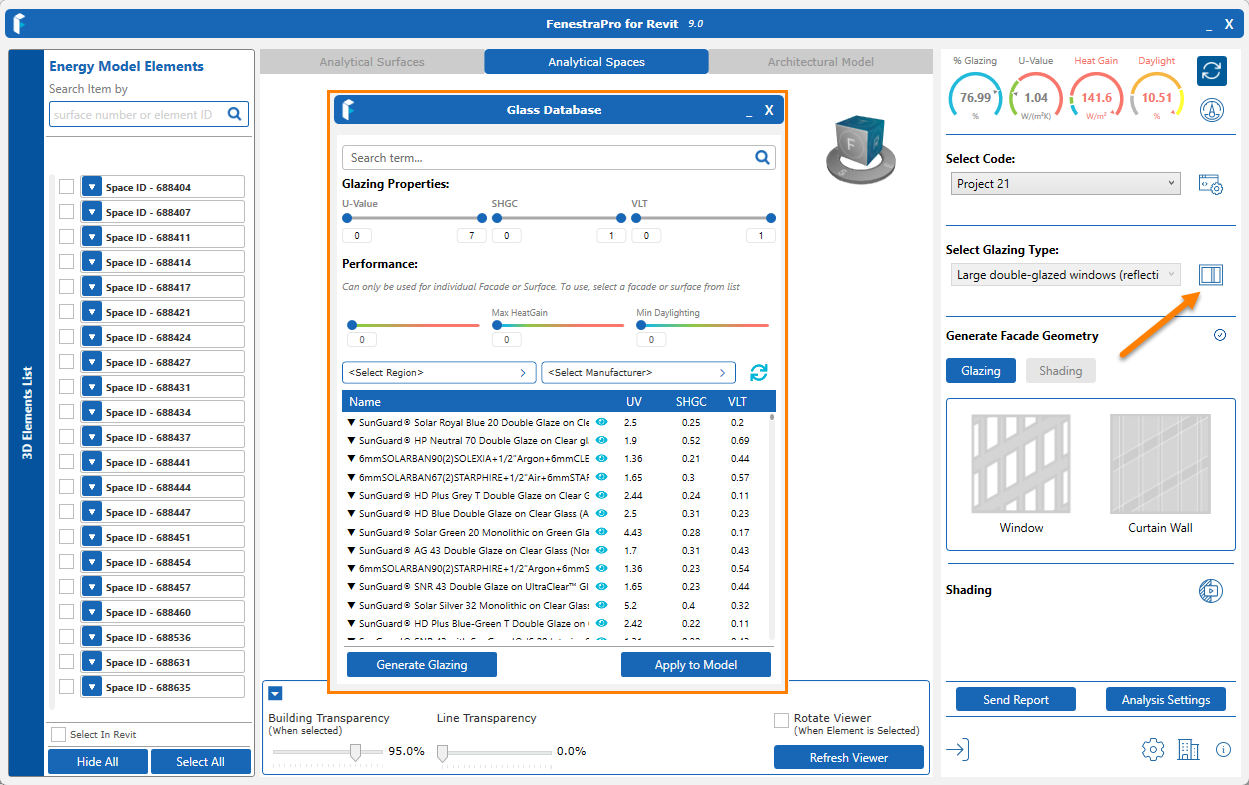
Glass Database
This button opens the glass database where you may filter the list to find glasses with specific paramters and values, configure custom glass and apply these to selected Surfaces.
Select Glazing Type
This option will apply a selected schematic type to all glazed elements in the model to compare results. Usin this will uncheck ‘Detailed Elements‘ in Revit’s Energy Settings so that the schematic type will override any analytical properties for glass elements. You may revert to detailed elements by going to Revit’s Energy Settings and checking again this setting and using the Refresh button in the application.
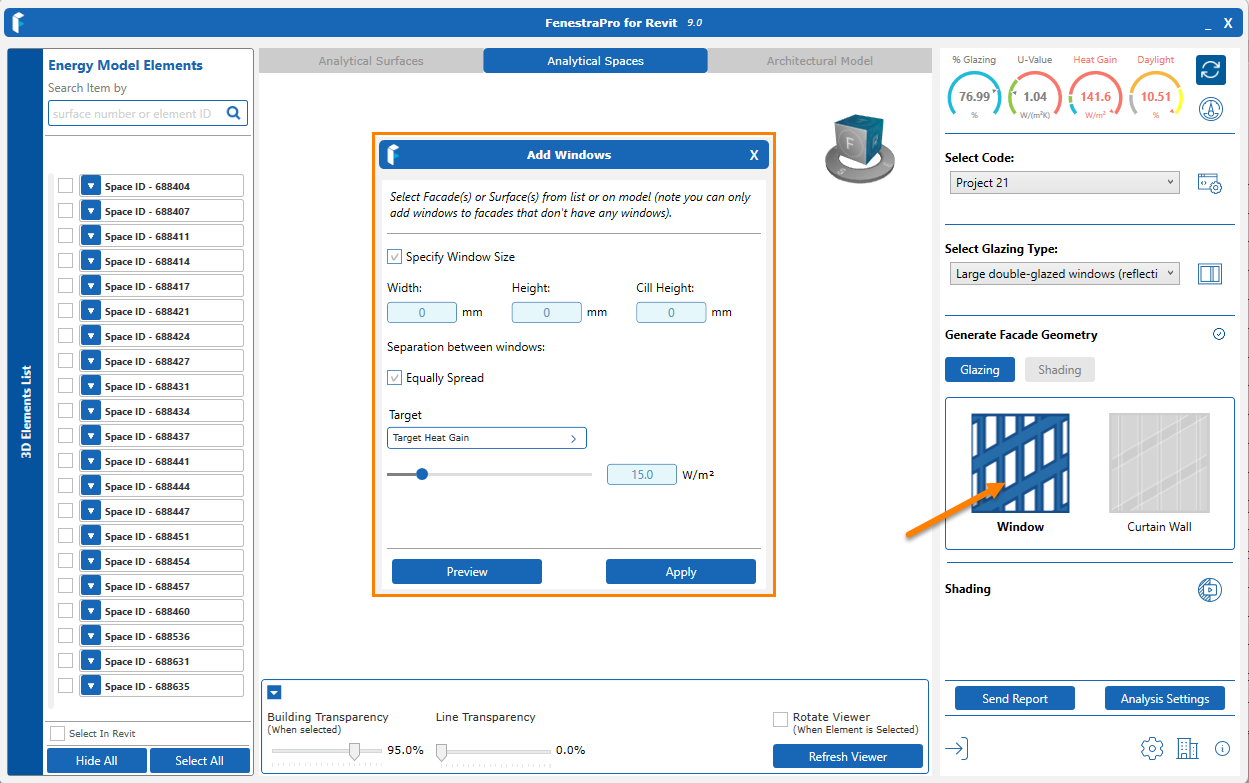
Add Windows or Curtain Walls
These buttons will open controls for defining settings for Windows or Curtain Walls to add to your model. The Shading function is to be added here soon. A default Revit glass will be used for this function (Low-E double glazing metric U-value=1.9773 / imperial U-value=0.35 , SHGC=0.65, VLT=0.76).
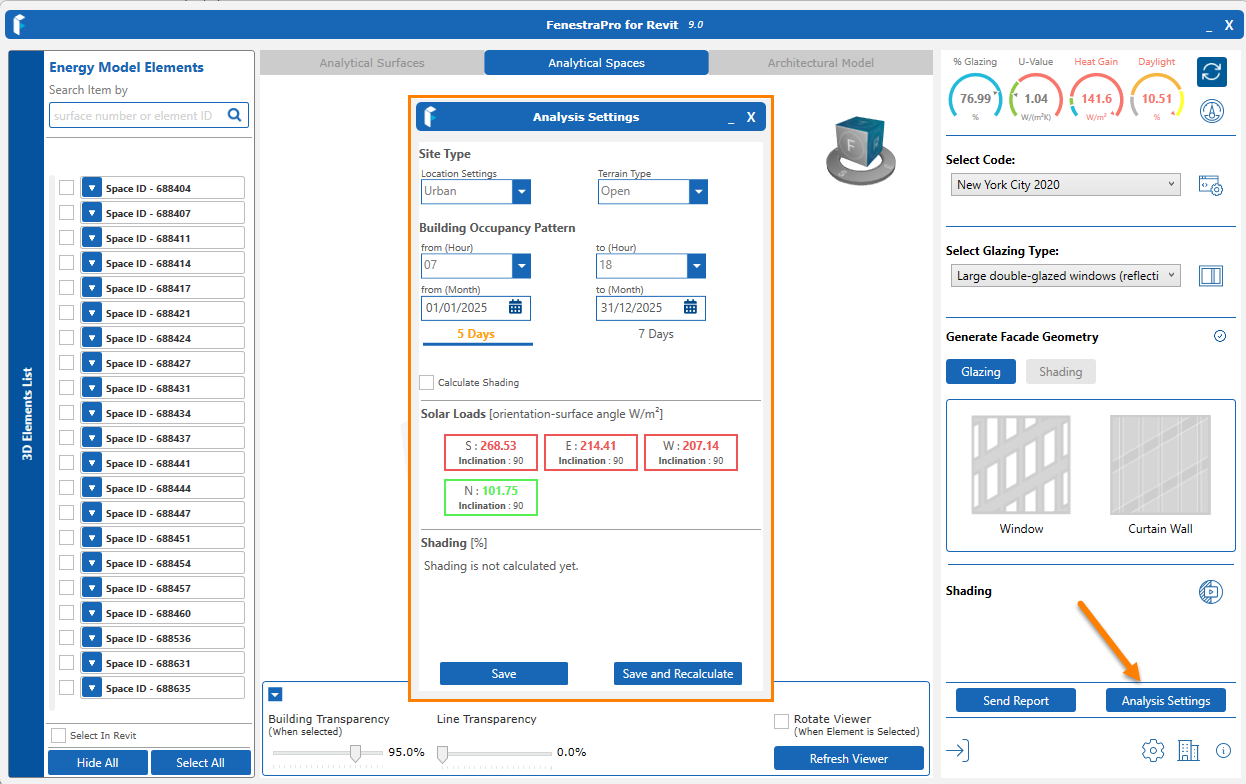
Analysis Settings
This will open project settings where you may adjust location, terrain and occupancy preferences.
Reports
This button will send results and settings to your Account to create a HTML report.
![]()
