
The Add Window feature allows windows to be generated on the Revit model directly from FenestraPro. Performance targets are used to define the number of windows on a Surface and dimensions may also be automatically calculated if required. The following refers to the version 9.0 application.
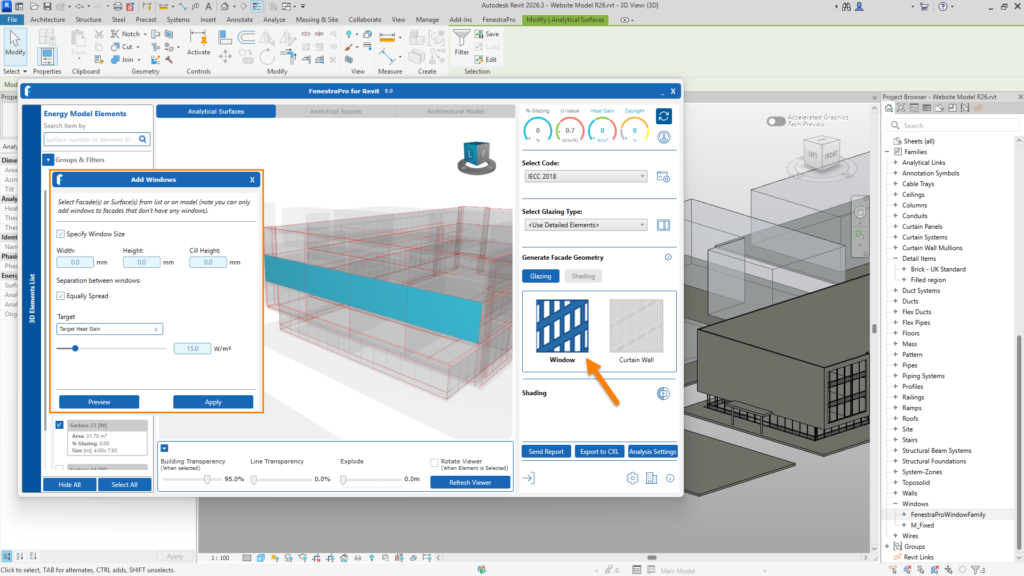
These windows can have custom dimensions and glazing specifications and will use a FenestraPro window family but this may be later changed for other window types in Revit with similar properties and dimensions if required.
The Add Window feature only becomes available when a blank solid wall is selected from the Revit model (with no existing glazing). If there is glazing present on this Surface already, this feature may not be available.
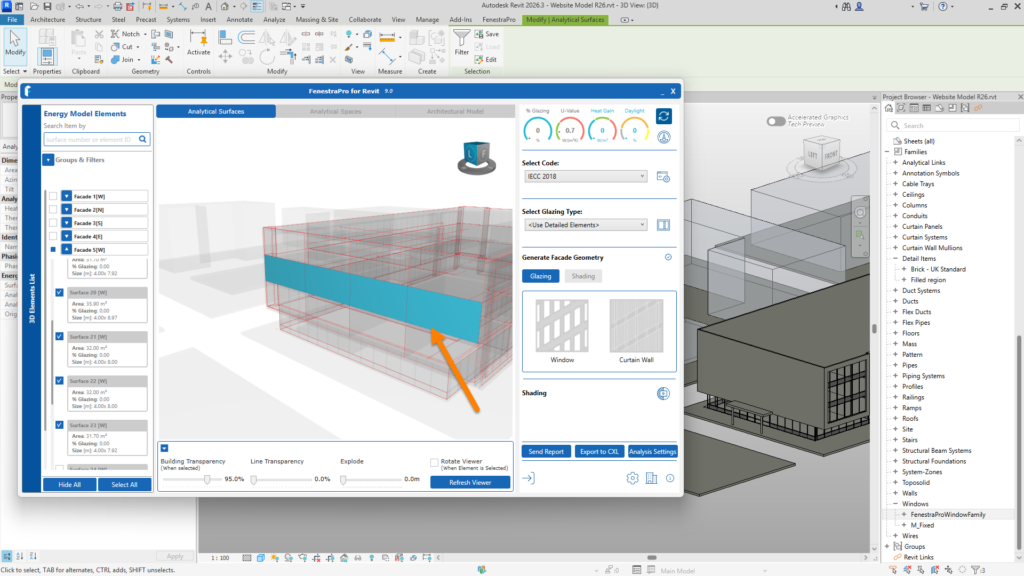
A suitable Façade/Surface should be selected on the Revit model where windows are to be created. This Façade may be selected in the model viewer by highlighting the wall or by selecting from the Façade Navigator. When you select a Facade from the list, all Surfaces on that model face will be selected. You may also only wish to select one or two Surfaces. If this is the case, uncheck some Surfaces in the Façades List if required.
The Add Windows button is availble under the Glazing section on the right-hand side of the application.
Note: this tool is designed to be used for a room/space where new glazing is being added. The target results are for the contributing selected wall(s) that will receive new glazing. If the space includes several walls on different orientations and these already have existing glazing (which contribute to the same space), these adjacent elements are not factored in when calculating the results for the selected surface(s).
Workflow
1. Select Surfaces on the model (you may select a single or multiple Surfaces).
2. Once you have selected Surfaces on the model, click on the Windows button.
3. The FenestraPro window family will load into the model (if you have not used this function before). Please give this time to upgrade and load into Revit as a family (a message may display while this is happening but this can be ignored). You may check Revit’s list of families to confirm if the window has loaded.
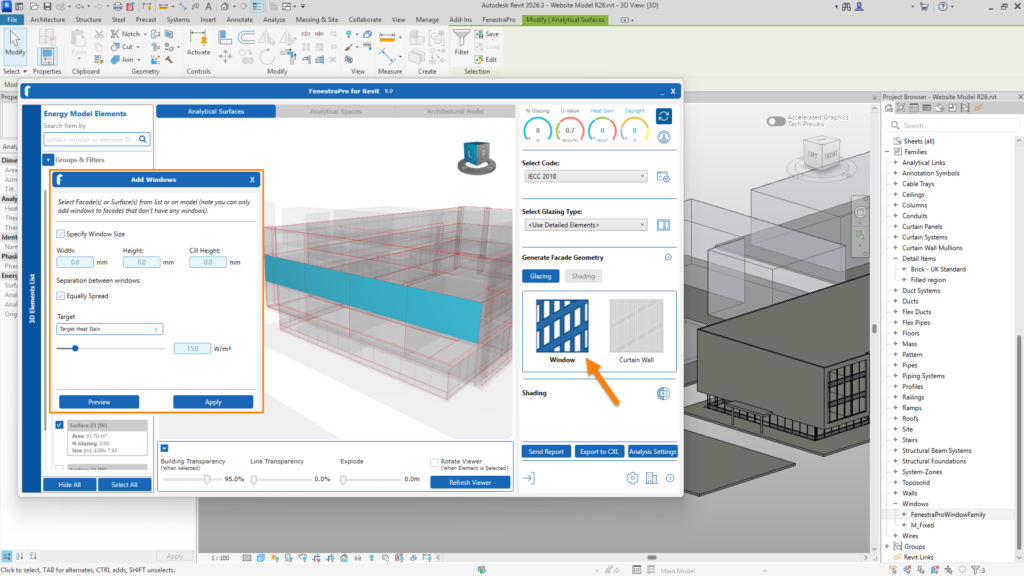
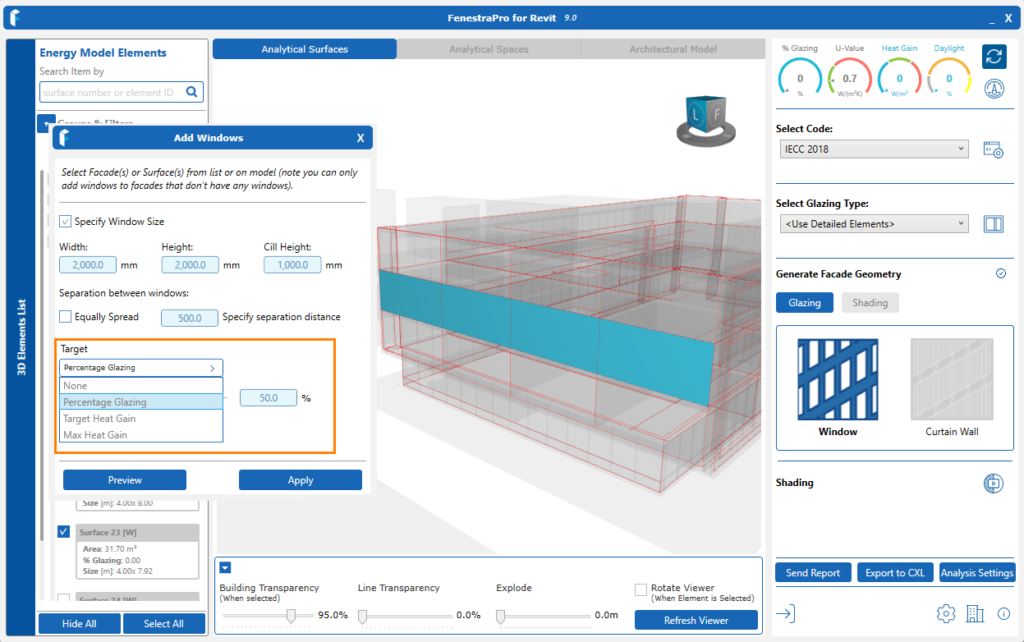
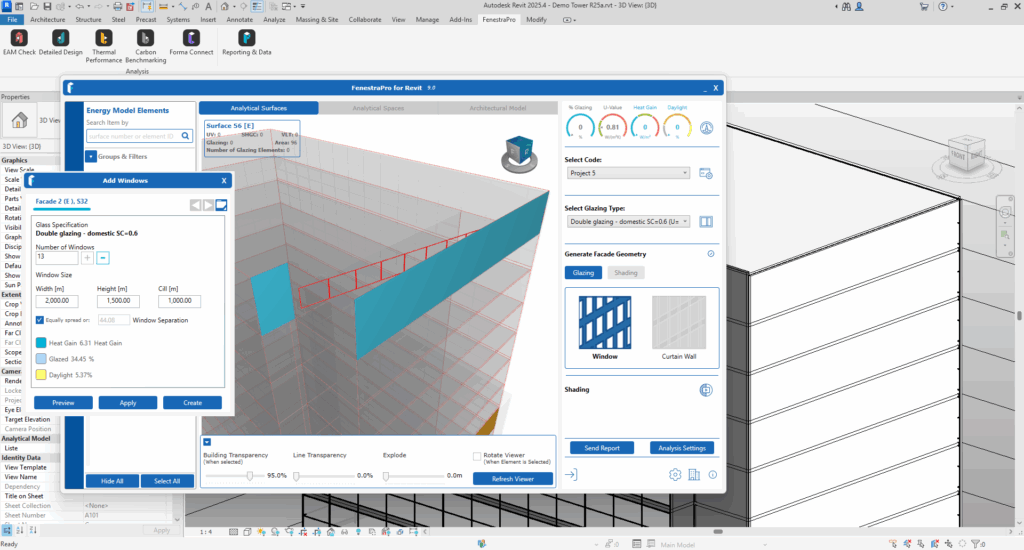
4. The Add Windows panel has settings for selecting the window size, choosing if elements are to be equally spread and target performance values.
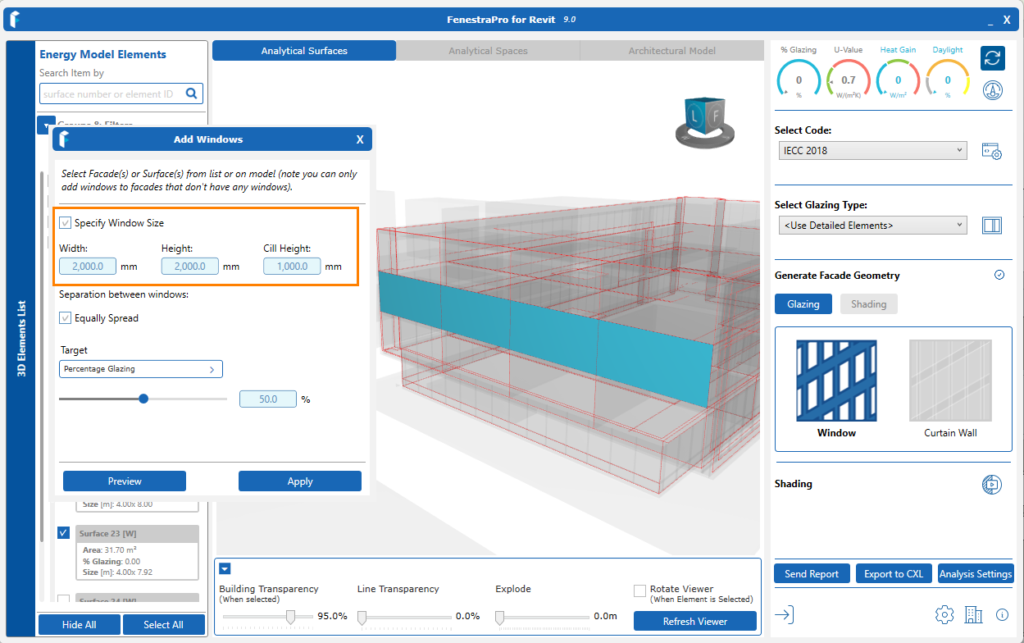
5. Window Size – This is checked by default and you may enter values if you wish. If you uncheck this setting, the application will calculate dimensions. Units for windows displayed (for dimensions and performance) will match the Revit model units (metric or imperial).
6. Equally Spread -You may check this setting if you wish the elements to be placed automatically at equal distances. If this setting is unchecked, you may define a value here for the separation distance.
7. Target -Here you may select one of these options to define the outcome that you wish to achieve. You may only use one method to create the windows (target heat gain, maximum heat gain or percentage glazing). For performance targets, enter a value for your target. You may also select ‘None’ if you do not wish to define a target.
8. If detailed properties are currently being read, the glass type used will be a default Revit glass (Low-E double glazing 1/4 in +1/4 in) with the following properties: metric U-value 2.1 /imperial U-value 0.37, 0.65 SHGC, VLT 0.76. Note: ff detailed properties are not currently being read, the current default schematic type will be used to create the new window(s) on the model. This type will be added as the analytical type to the window family in Revit.
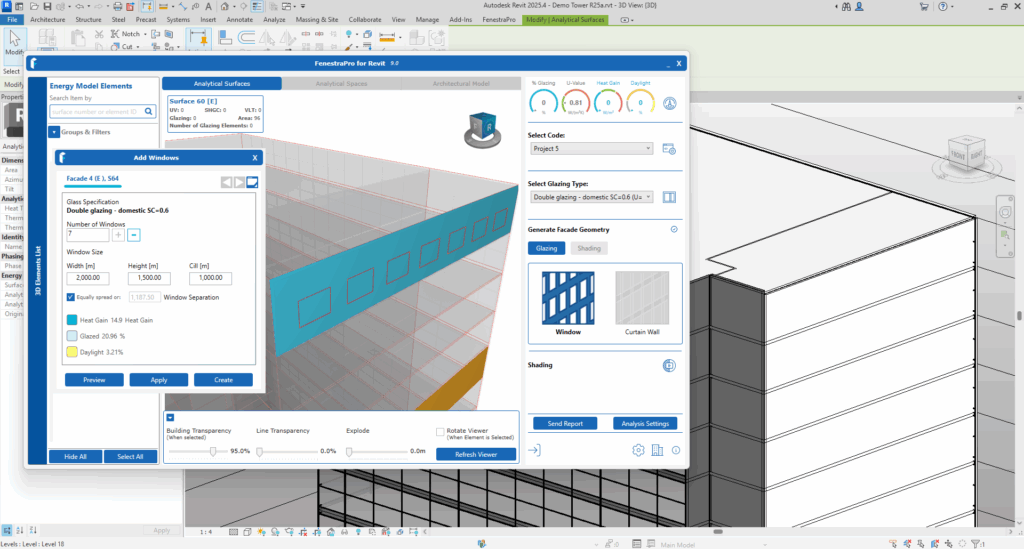
9. Click on Preview to see an outline of the glazing on the model in the Viewer. The Glass Type, the current settings and projected results are displayed.
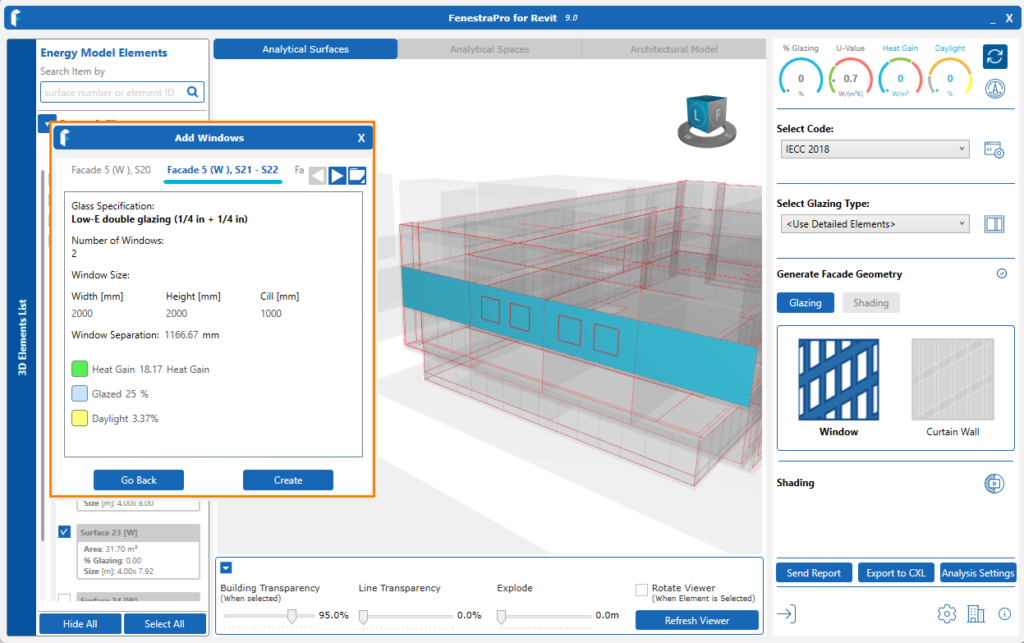
10. You may return to the settings area (using the Back button)to review or adjust the values before committing to write these windows to the Revit model.
11. There are tabs at the top of the Preview area to review the windows for each Surface (each Surface has a tab).
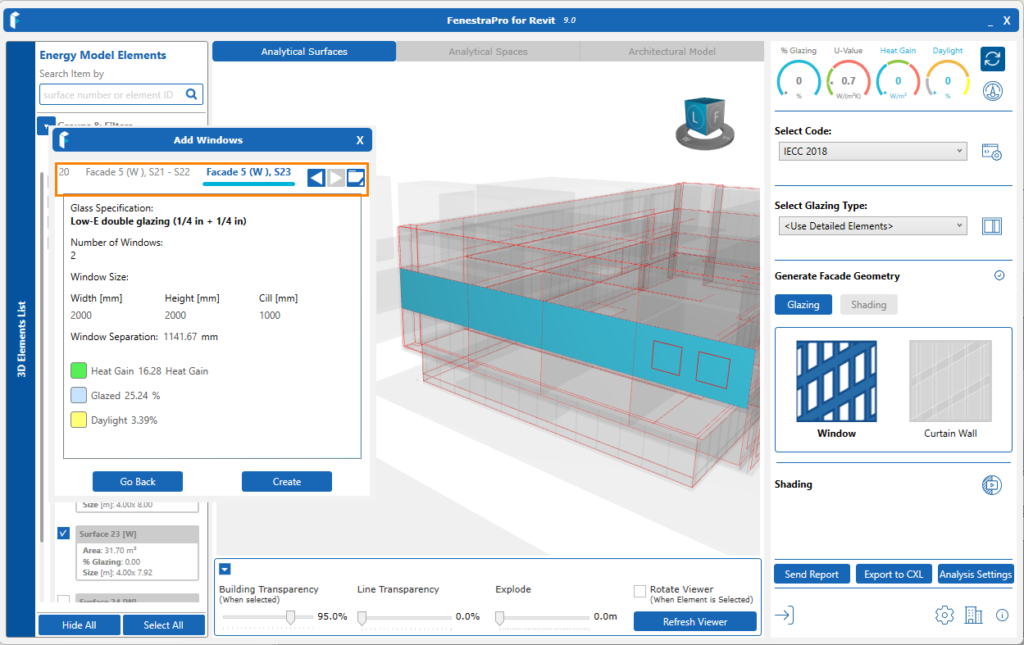
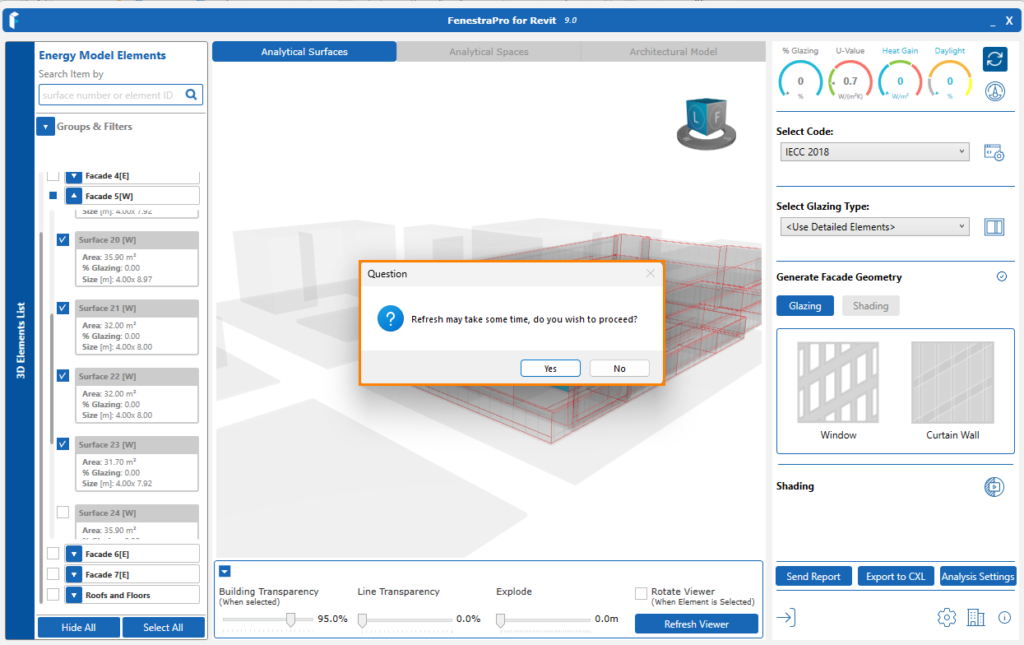
12. Click on the Create button to write the windows to the Revit model. A confirmation window will display – click OK to close this dialog window. Another message will give you an option to trigger Refresh, continue to make further updates to the model and Refresh later. Note: If you have shading turned on, calculations will take longer, please be patient. Please do not open Revit’s Energy Settings while the Refresh calculation is ongoing since this will interrupt the process, please wait until the update has completed.
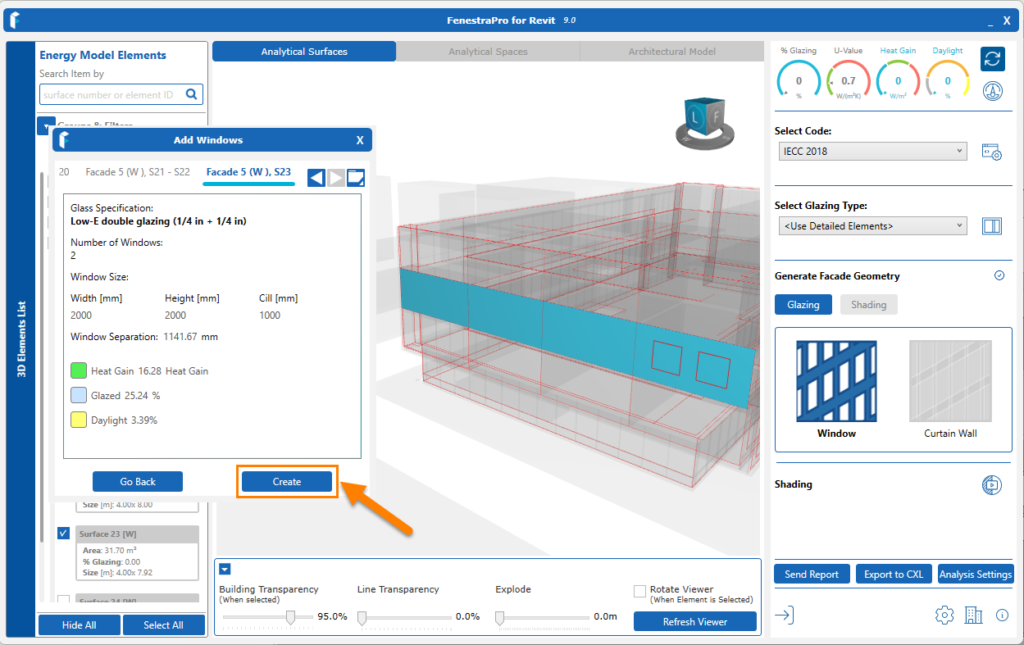

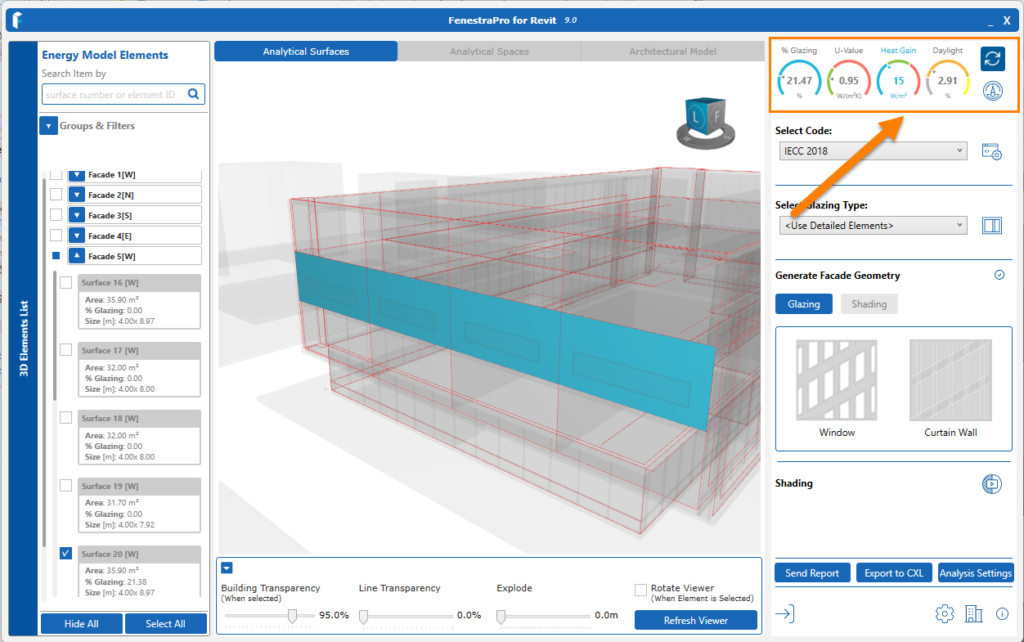
13. After the results are recalculated, the relevant surfaces will receive results and Charts will also reflect the update.

This video refers to Version 7.0 and is to be updated soon.
Note: the number of windows on the Surface may prevent your input for Window Separation being used if it is too wide. For example, if you have 5 windows on the Surface and you wish to have a separation between each window of 3 feet, this may not be possible and the value will adjust in the input box to one which can be realistically accommodated.
The windows generated are FenestraPro window types. These windows can be modified as normal in Revit’s Properties Palette. The windows may also be replaced by other window types that are loaded in Revit. Note: results may change if different window types are used which have a different size or glass type. Any replacement windows should contain similar dimensions and analytical properties to satisfy the target goals of window creation.
You may reverse the window creation by clicking on the Undo button in Revit which will return the model to the previous state. You will need to use Refresh again in the application to restore the older Energy Model to the previous state (without the windows). If this does not update the results, restart the application.
Note: If adjacent Curtain Walls are very close to the solid wall (abutting) or an internal wall is closely abutting the solid wall, the ‘Add Window’ function may not work. These curtain walls should be moved at least 1 foot / 300mm away from the solid wall to allow this function to operate. This is due to the edges of the solid wall (where windows are to be placed) being too close to existing glazing and avoids the two adjacent walls joining incorrectly.

Possible Issue
Where two or more separate walls are part of one Facade and there are no internal wall divisions/rooms (open plan arrangement), if you Add Windows here using the application, the windows preview may show the windows at an angle, attempting to place them on a plane that joins the two separate walls. This can easily be resolved by placing internal walls in the model temporarily to separate the associated spaces. These internal walls can be then adjusted/removed as required later.

Glazing Specification
Note: If you select a glazing type which Revit does not yet have in its internal list (e.g. if you have not restarted Revit to synce the Glass Database or have imported a custom imported glass that has not yet been synced with Revit), refreshing after this process will not immediately provide results on the Dashboard or in the Charts. Revit may need to be restarted to write one of the additional glass types from FenestraPro to Revit’s internal list or to add a newly imported glass type.
FenestraPro will then query Revit to ask for the current glazing specification and receive data which can be used to calculate results. Revit needs to be restarrted after you first launch the application to sync the Glass Database and each time you import a new glass from a supplier’s configurator.
It is possible to set different glass types if windows are created in separate sessions for separate Surfaces (Select one Surface only and assign windows there. Open another session for the Add Window function and select another Surface to control settings there separately). If you select one Facade with several Surfaces included, all selected Surfaces will receive the same glass type (it is currently not possible to assign different glass types when using one operation of the Add Window function).

