
Note: There are 2 options in Forma for use with a model (Site Design and Building Design). Please use the ‘Site Design‘ option to create models and for use with our extension. Models created in the ‘Building Design‘ option are not currently supported by our extension.
To prepare the modeling canvas, you may need to remove some context/surrounding buildings. To do this, once you have imported contextual data, you may click on part of the context (these objects will typically have a purple outline when clicked). You will then get an option to ‘Edit base to make changes‘, where you may remove some buildings to clear the site for your design proposal.
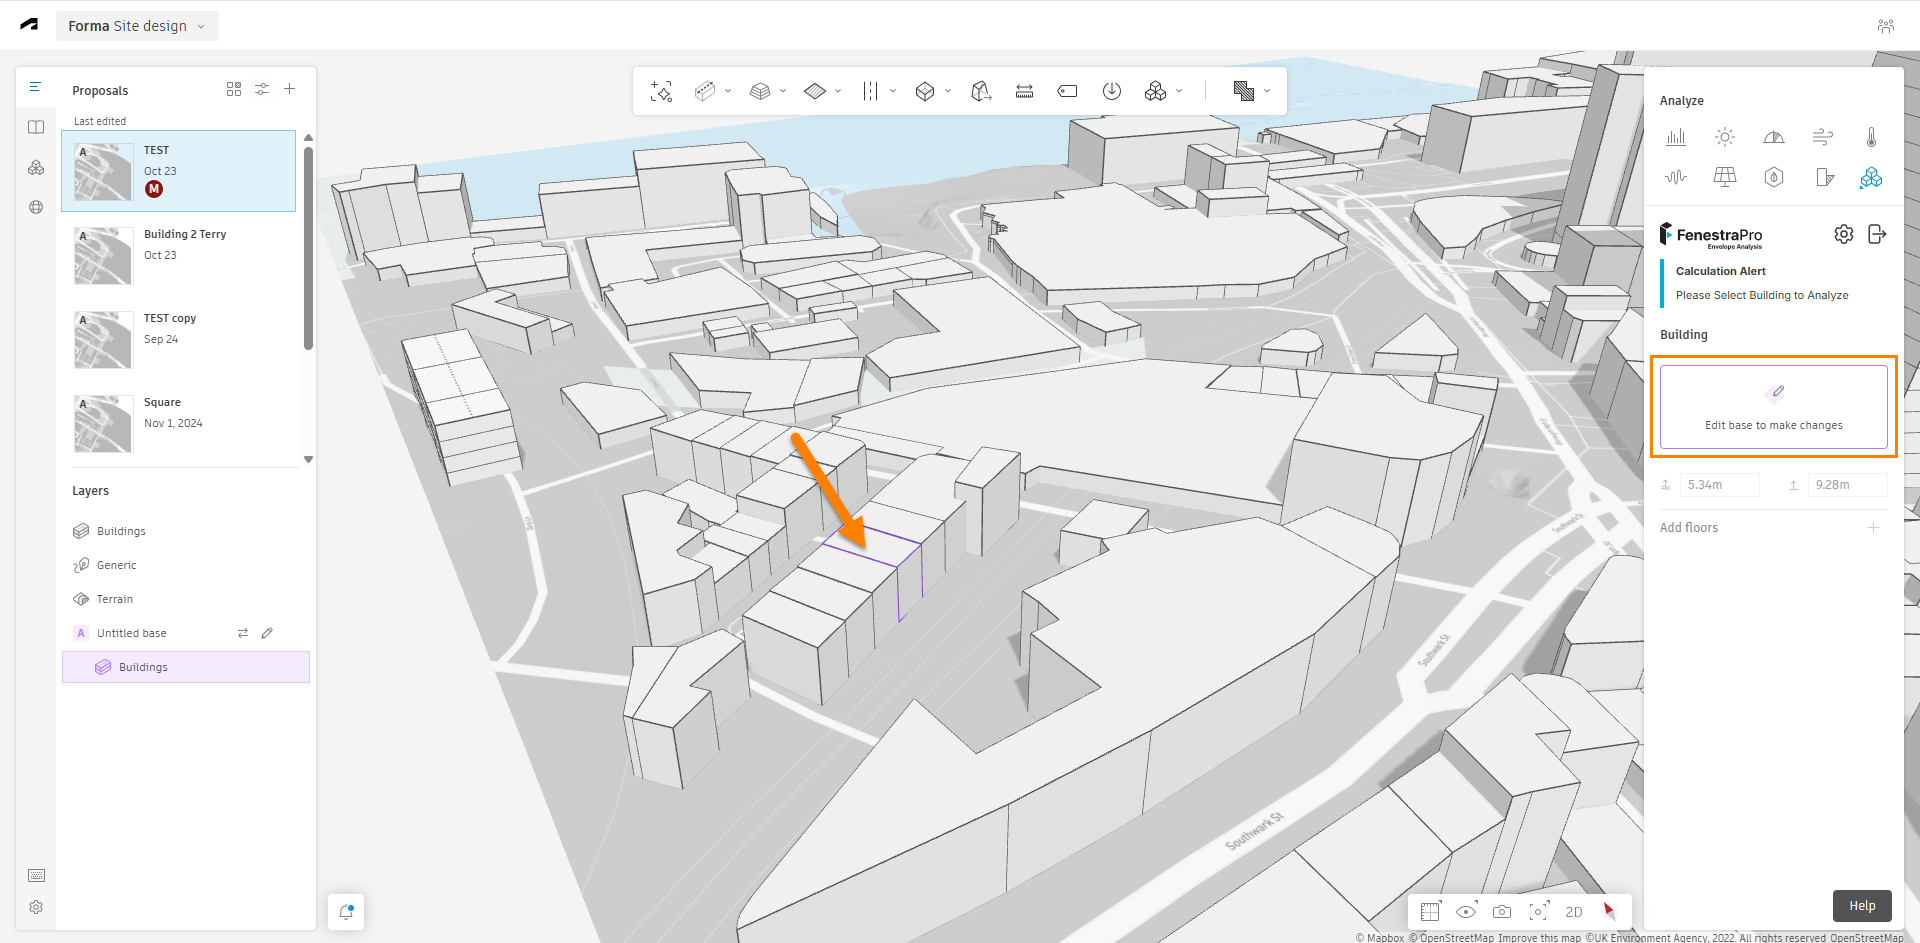
 You may select and delete some objects if required. Once this is done, you should exit this option by clicking on ‘Done‘. This will exit this option and you can return to the design space.
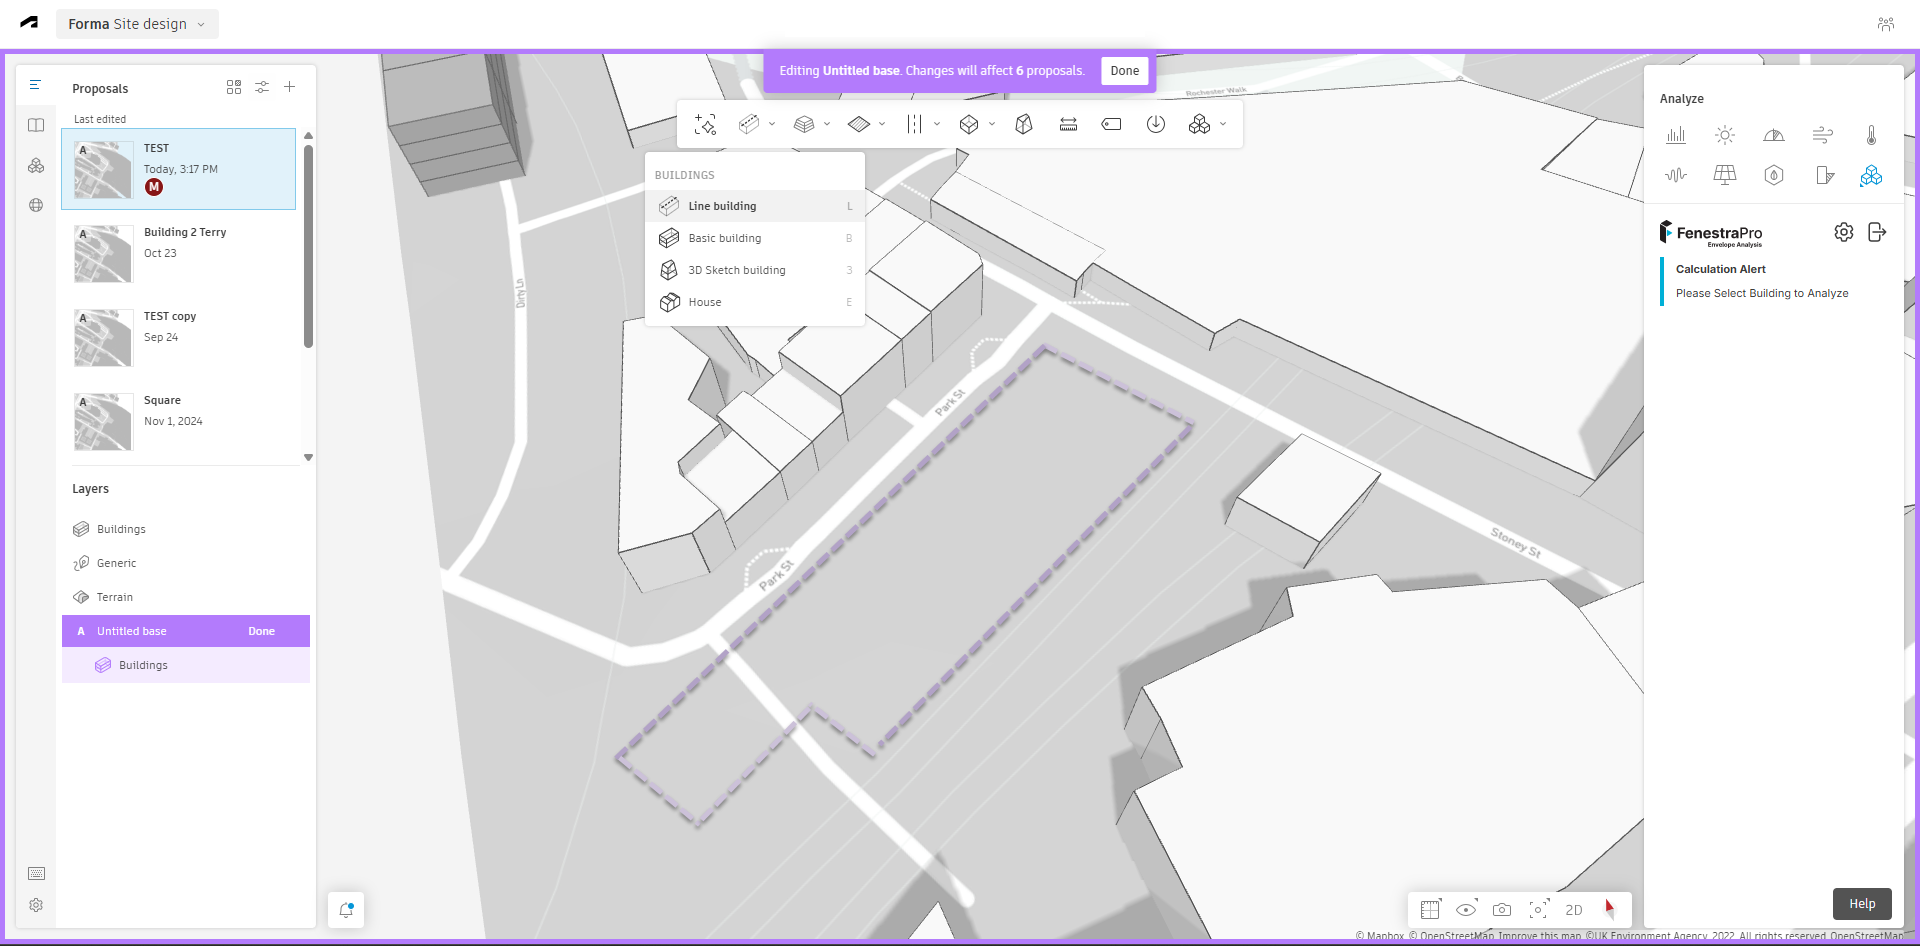
Here (in the design space), you can create a footprint for your proposal and extrude it. Note: If you remain in the ‘Base’ option and start creating new buildings, these objects will become part of the context and cannot be analyzed by the Envelope Analysis extension. You can also adjust context objects if they have recently changed by adjusting the shapes or by removing objects if they have been demolished. You can also clear a site to make space for your design proposal. The design proposal however must be modeled in the correct space so that it can be analyzed (the space where you edit the context must first be closed). This space for editing context, will have a purple outline and there will be messages visible that this space is now active. Once adjustments are made to the context, click ‘Done‘ to return to the correct modeling area.
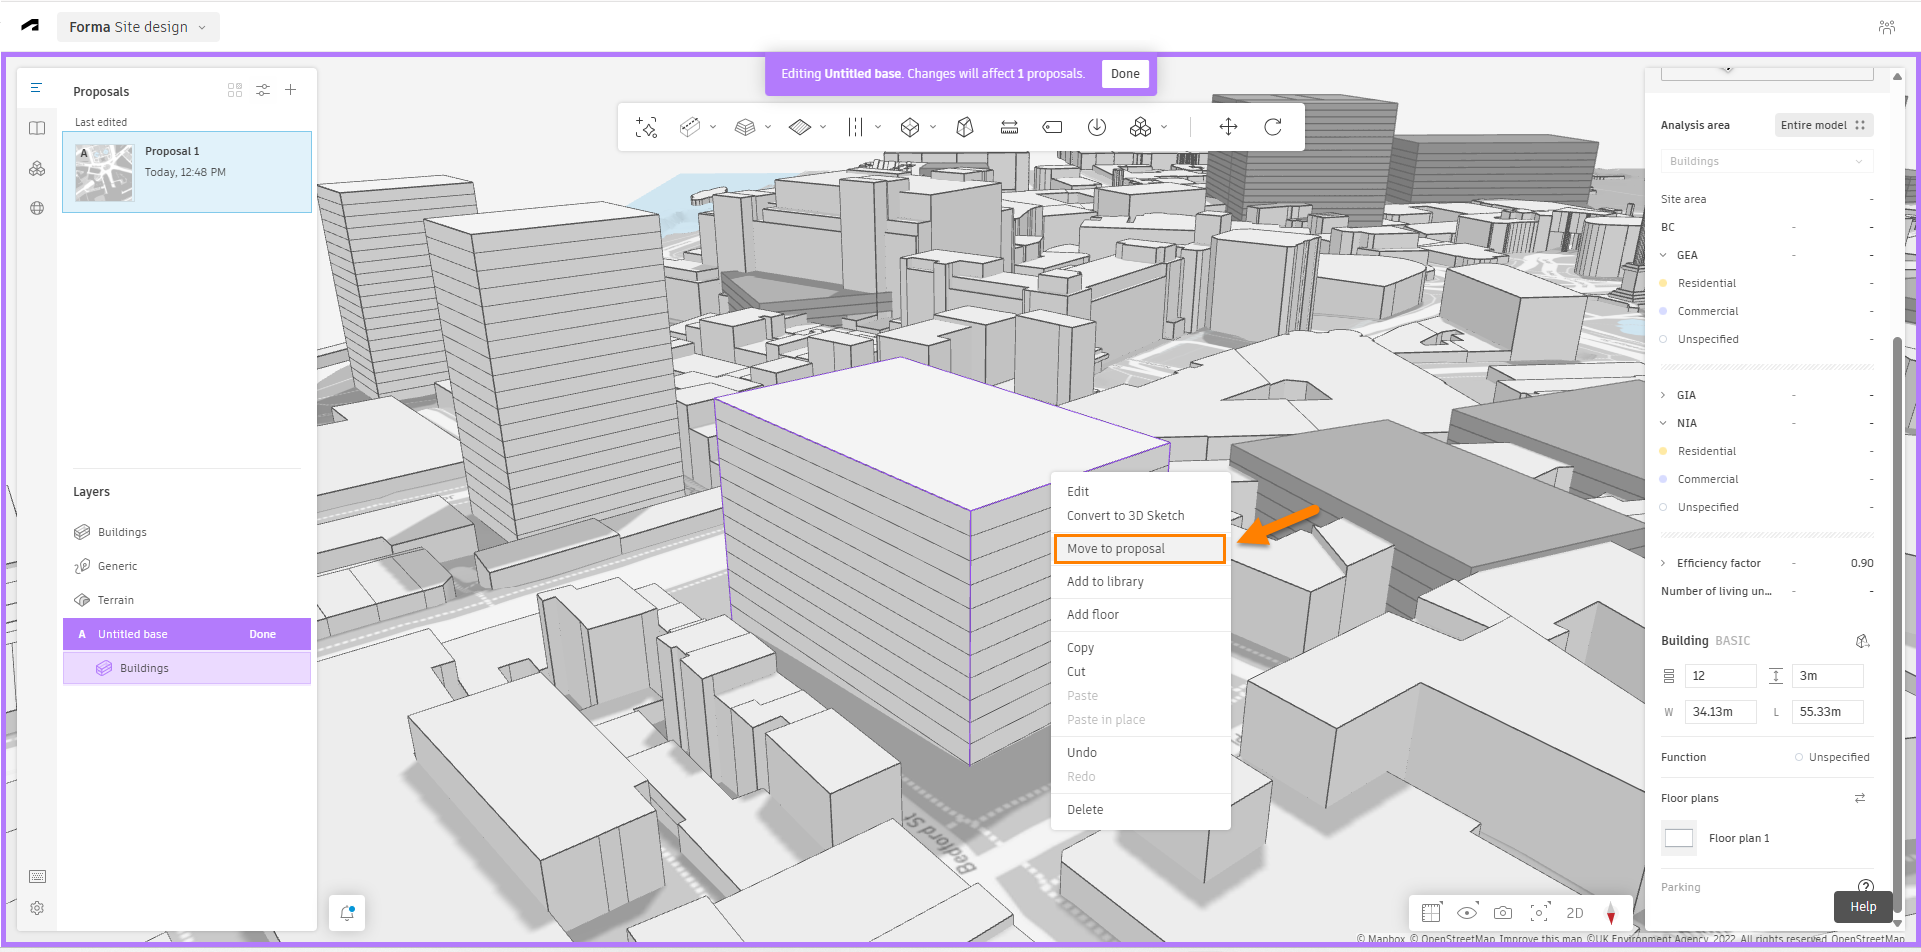
If you have modeled you proposal in the ‘Base’ area, you can move it to the proposal/design area. Select one of the context objects and click on ‘Edit base to make changes‘ – here, you can select the building and right click on it. You can then ‘Move to Proposal’. This will locate your building in the correct space for analysis. Then click on ‘Done’ to exit the context space and enter the Proposal/Design space. Here you can analyze your building.
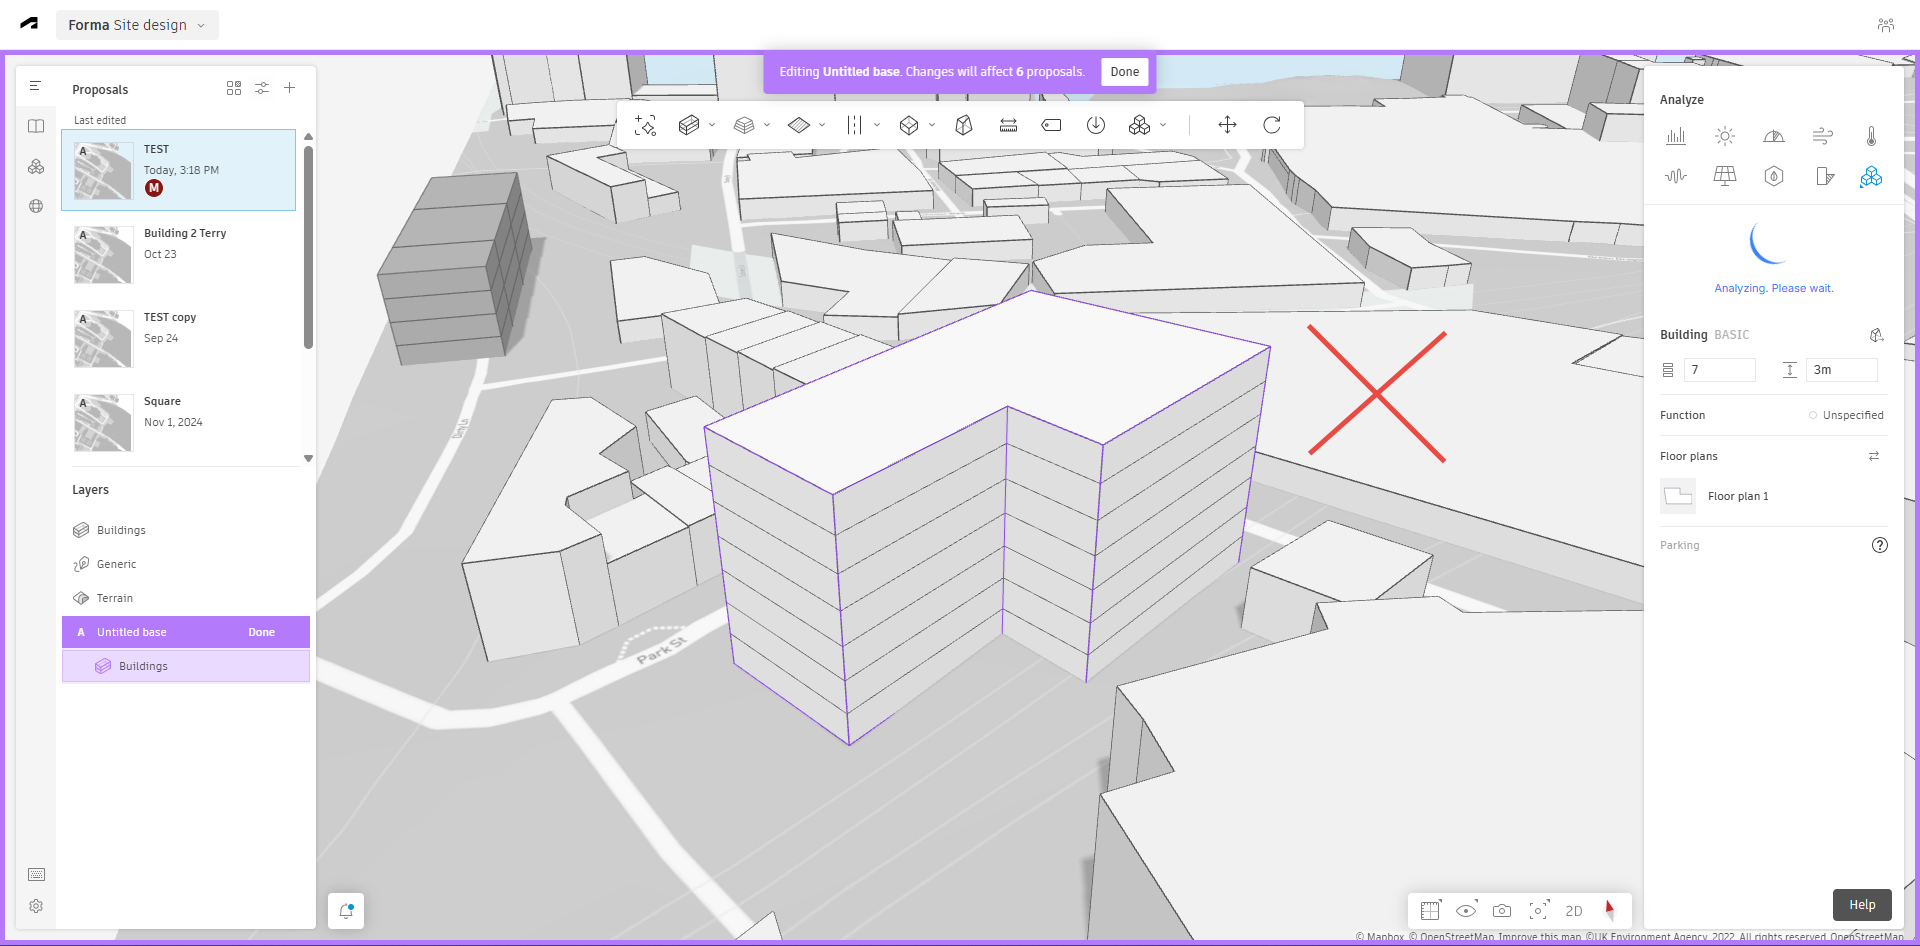
The Design/Proposal Space is the correct space to create a design proposal and using the ‘Basic Building‘ tool in Forma, you may draw a footprint and extrude it to the number of levels required. Your floor plans can always be adjusted later.

Importing Models
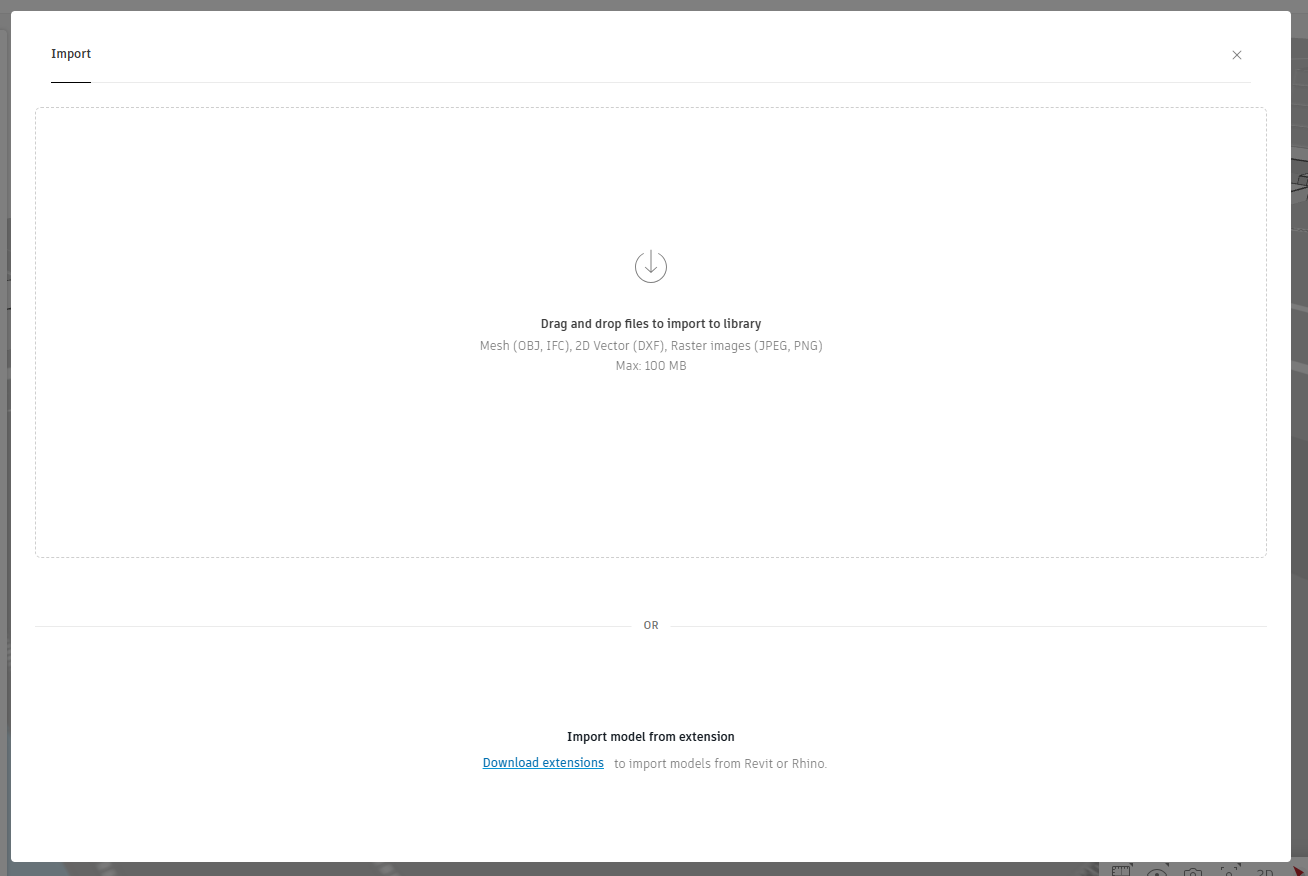
Models from other platforms (Rhino, Revit etc) may be imported to Forma but typically they will need to be modelled up again (using the ‘Basic Building’ tool). Files can be saved as .OBJ, .IFC or .DXF and imported to Forma. Other files such as .JPG and .PNG can also be imported to assist. There is currently a maximum file size of 100MB for imports.
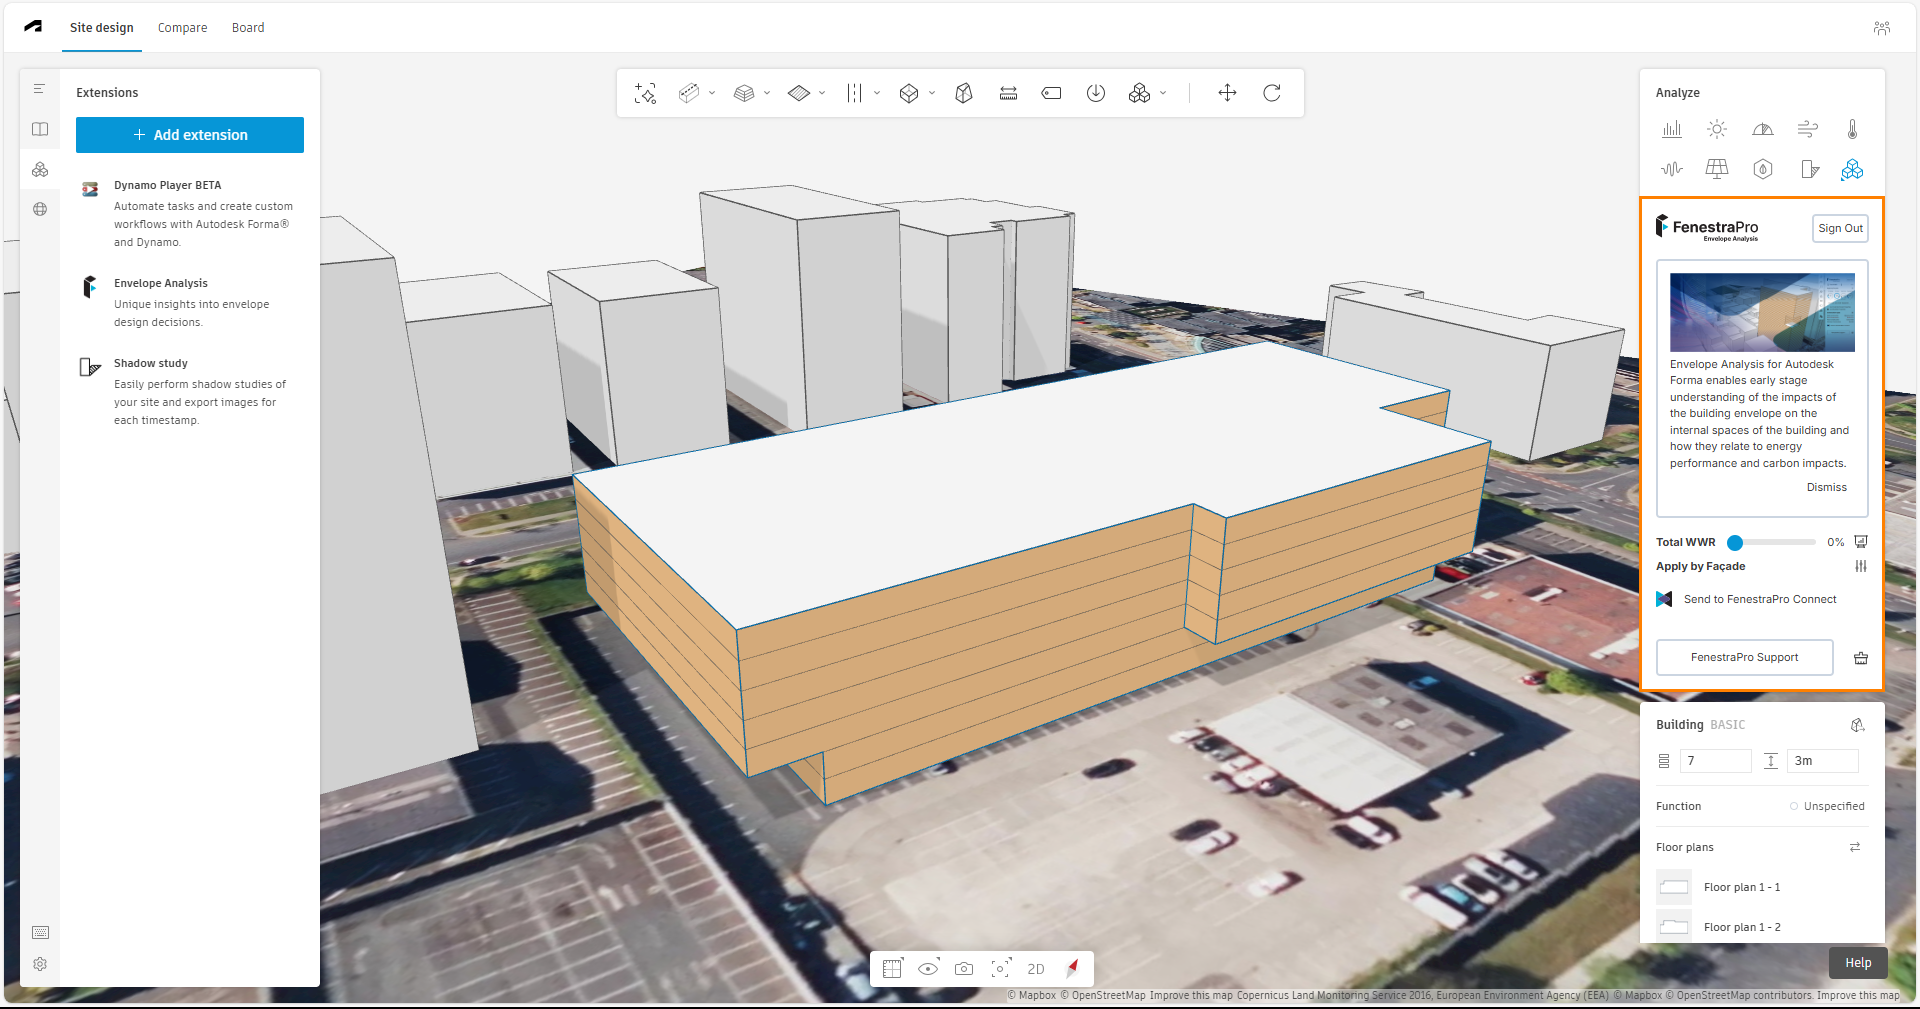
Select the Model
The model should be created using the ‘Basic Building‘ tool in Forma rather than the Line Building/House or 3D Sketching tool (which may produce separate volumes). Selecting an individual story or including the site context/surroundings should be avoided. Selecting only parts of the building will not produce expected results and the calculations may not complete. The model should be carefully created and modifying floor level outlines separately may create issues (where model surfaces do not exist exactly on the same plane). It may be good practice to select all levels in Forma when adjusting the footprint/outline. Imported geometry is not currently supported (.obj files etc) as they do not have floor levels etc. These can be used as footprints from which to model the project in Forma. Work is ongoing to explore whether imported geometry can be supported.
You may need to hover over a corner or roof edge to assist in selecting the entire proposed design. If you are not able to select the proposal, check the ‘lock buildings’ padlock setting in Forma on the left hand side (this will disable user selection unless the padlock icon is open).
It is best to finalize your design before using the extension, rather than starting analysis and then adjusting the building height/shape etc. If the model is modified while the already extension has launched, refresh your browser to reset and select the entire model again (otherwise results for the original design will still be displayed). Then allow the application to calculate the overall results again. Then adjust the glazing percentage that you wish to apply. Note: the less storeys that the building has, the faster it will be to process calculations. You can select the roof of a building and push or pull in Forma to adjust the height or use the inputs on the right hand side panel to define storeys and storey heights.
Note: The Dials and Energy Code suggestions will not display until the model has some Glazing Percentage applied.
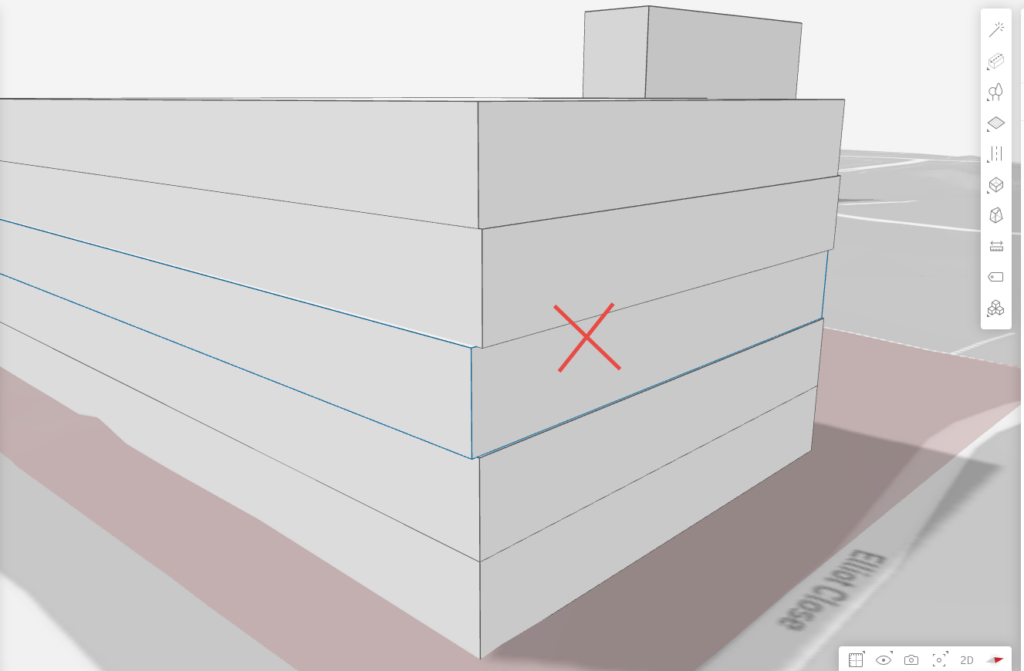
Note: When modeling in Forma, please check your proposal carefully to avoid lines off axis or misaligned walls etc. This can affect the success of the application and ability to analyze the model. When modifying floor plans, lines can sometimes jump/snap to another gridline so that the walls do not align exactly. This can cause issues when analyzing later.
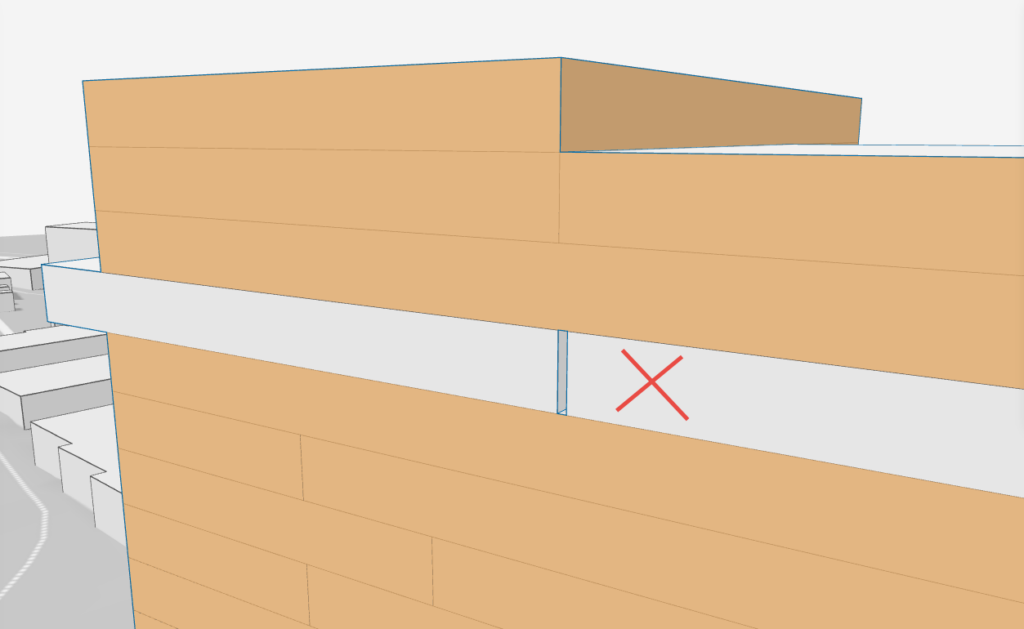
Gaps between geometry can currently also cause issues (these surfaces may not be included in the Facade), please see the image below. Please ensure that gaps are not left between spaces when creating the model (adjacent spaces must physically touch each other). This issue is to be addressed soon.
If you are using multiple proposals and switch between them while the FenestraPro extension is open, you may see ghost surfaces relating to a previous model version. Simply select the current active model on screen and it will be analyzed. It is currently recommended to create your proposal with the correct orientation at the start since rotating a model will not generate new surfaces in the new location (the original coordinates are used for analysis). This issue is being explored. Moving the proposal to a new location is however supported as new surfaces will be generated.
You may also need to coordinate with other project members who may have editing permissions to change the model while your session is active. It is not recommended to rotate your proposal after creating it as the new set of coordinates may not be read and original surfaces display. Attempting to analyze a model version which has been updated in another project member’s session may not be successful (refresh your browser window to update to the current model condition). More complex models will take longer to process, please be patient (spaces and surfaces need to be identified and Facades assigned). If results do not display in a reasonable time, please refresh your browser and select the model again.
You may have different proposals in Forma (design options). If the geometry is largely the same in each proposal but only surroundings or shade devices differ, then the settings made in FenestraPro will apply to all proposals. If the geometry changes in each proposal, then settings may be applied in FenestraPro separately to each proposal since the number of Facades and configurations may differ. If you want to change the geometry of a proposal, it is advised to deactivate the extension by going to Forma’s Area Metrics area etc. Then you can adjust the design and when complete, open the extension again. This will prevent the extension constantly recalculating each time a change is made. Note: You will also need to refresh your browser window to update, after any changes to geometry are made. Otherwise, the extension may attempt to recalculate and render elements such as windows/shades etc based on the previous settings but since surfaces have now changed and may not exist anymore, this may cause issues.
Please Note: The application does not currently support some project designs such as slanted walls, curves, organic shapes using 3D Sketch or designs where there are large open spaces between geometry (or separate buildings as one model). Support for these model conditions is currently in development. If you need advice on your project, please use the feedback form HERE or contact us by email support@fenestrapro.com.

