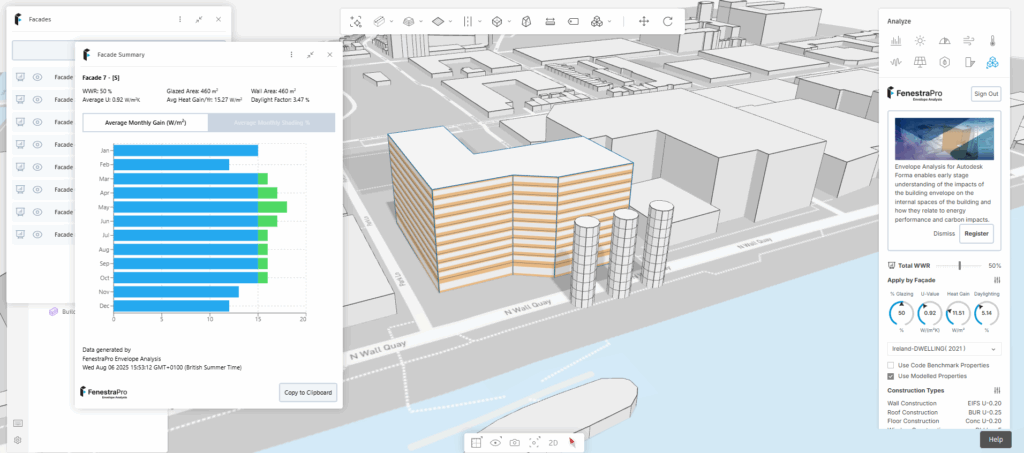
Shading Effects are calculated in the Forma extension. This will factor in:
- shading effects from other parts of the building (self-shading)
- shading effects from surrounding buildings and from other geometries created in Forma (if they are close to the model)
- shade devices created separately on the model (using the recommended method as described below)
Shading Simulations
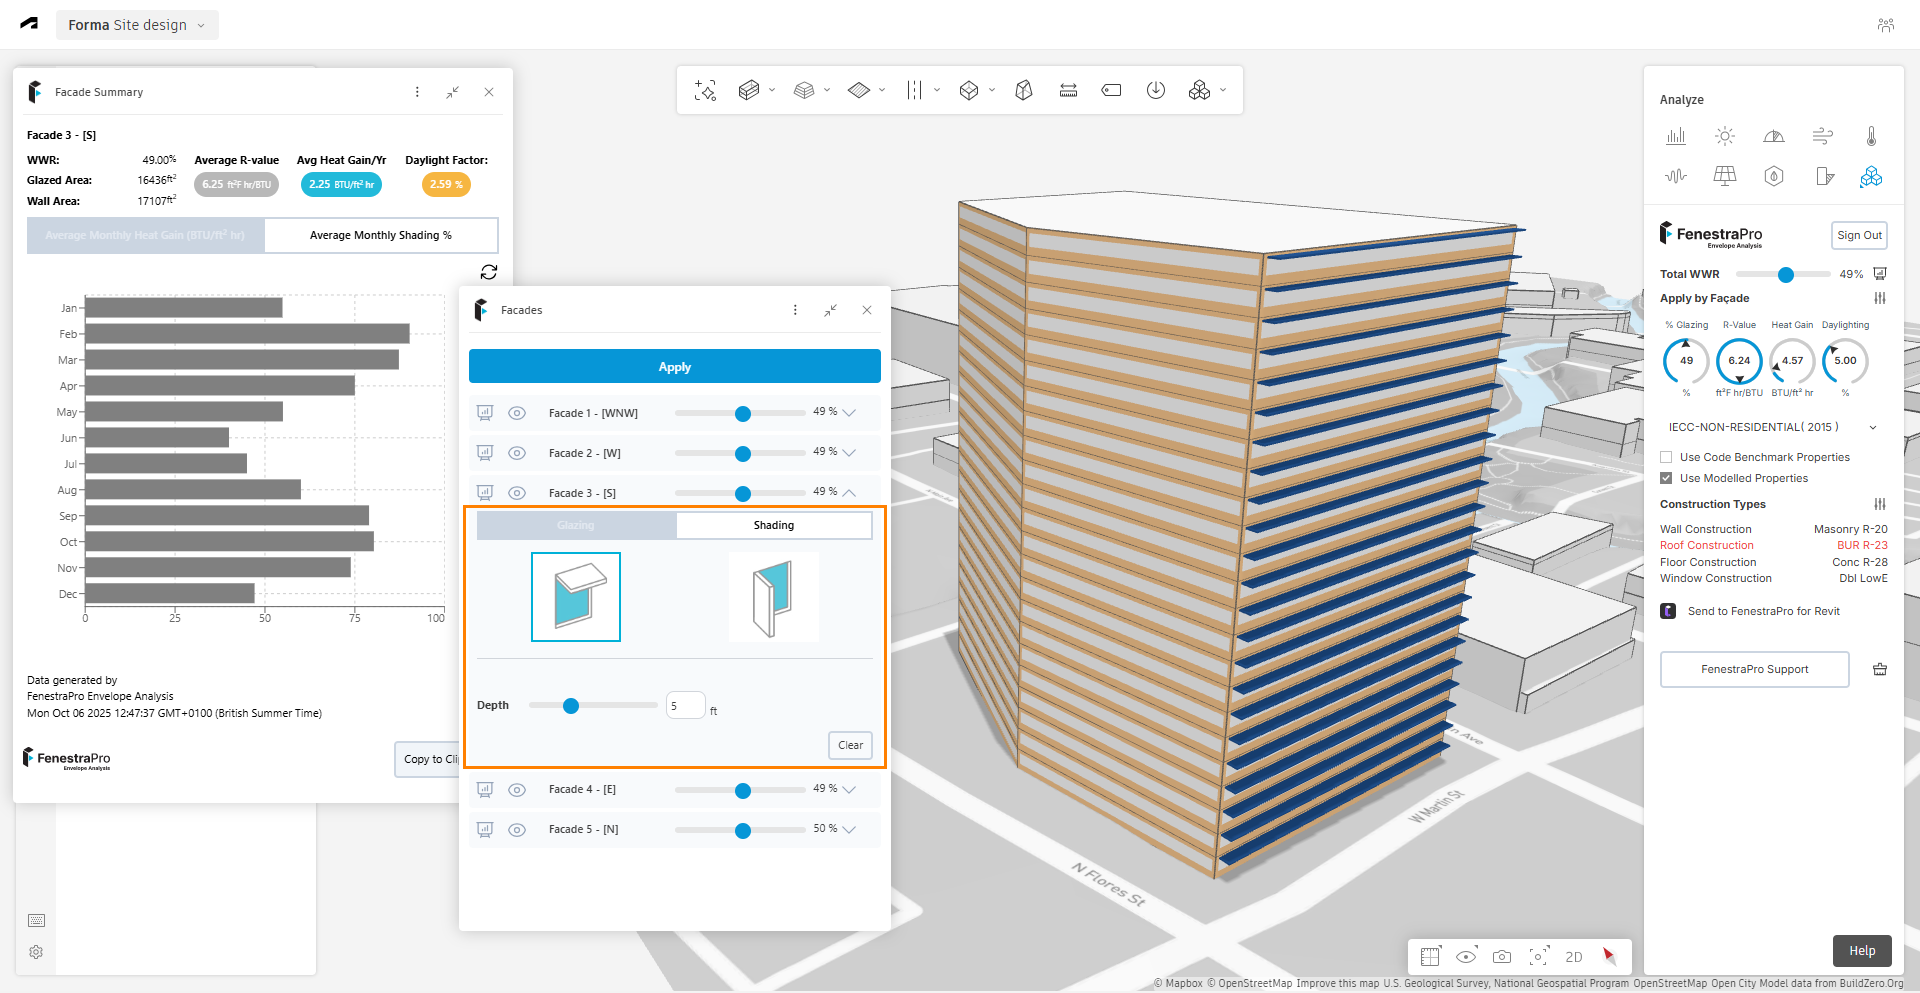
Under the Facade controls, you may configure shade devices on your project such as a canopy or vertical fin. There are tabs for Glazing (configure windows) and Shading (configure shade devices). You can also set the depth of the shade device and if you have windows, shades can be assigned separately for each window or over all glazing on that level. For canopies, all glazing will get a shade over it. For vertical fins, if you have notional glazing, you may define the quantity. If you have windows defined, a fin will be placed for each instance.
Glazing must be first configured (either notional glazing or windows), you may then use the Shading tab (under the Facade controls) to add shade devices. Select the relevant Facade, then the tab for Shading. There are options for a Horizontal Canopy or Vertical Fin (select the relevant image to start the process). Define the shade depth and quantity (for fins only).
Canopies
For canopies, you may set the shade depth. If windows are present, you may choose to have the devices either:
- ‘Full Length’ (across all windows)
- ‘To Window Opening’ (separate canopies for each window).
You must also set the ‘Depth’ of the shade device. You may use the slider or input a value to define this. The maximum depth is currently 5 meters or 16.4 feet.
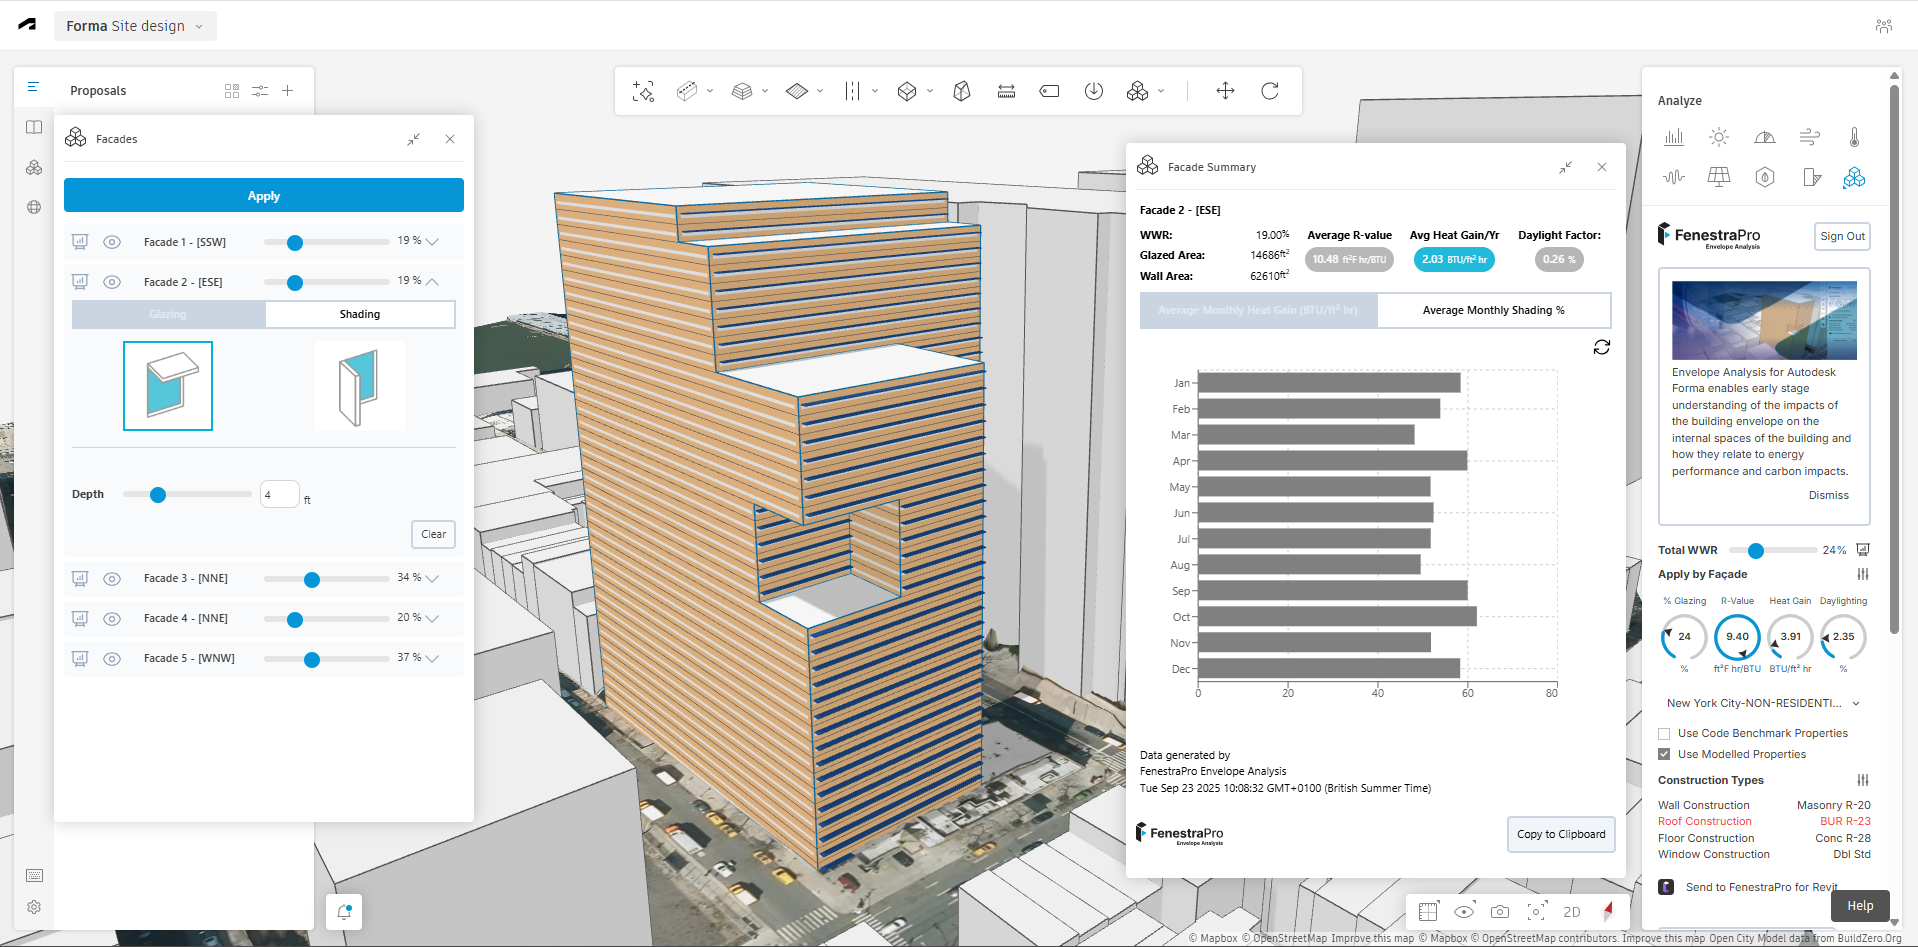
Once these settings are complete, you may use ‘Apply’ button. Shades will get added to your project for that Facade.
Vertical Fins
For Vertical Fins, you must set the ‘Depth’ and if you have notional glazing, the number of devices ‘Devices’. Both odd and even numbers of fins are supported. If windows are configured on the relevant Facade, a fin will be placed for each window (in this case there will be no input to define the number of shade devices). Use the ‘Apply’ button to place the shade geometry and recalculate the results.
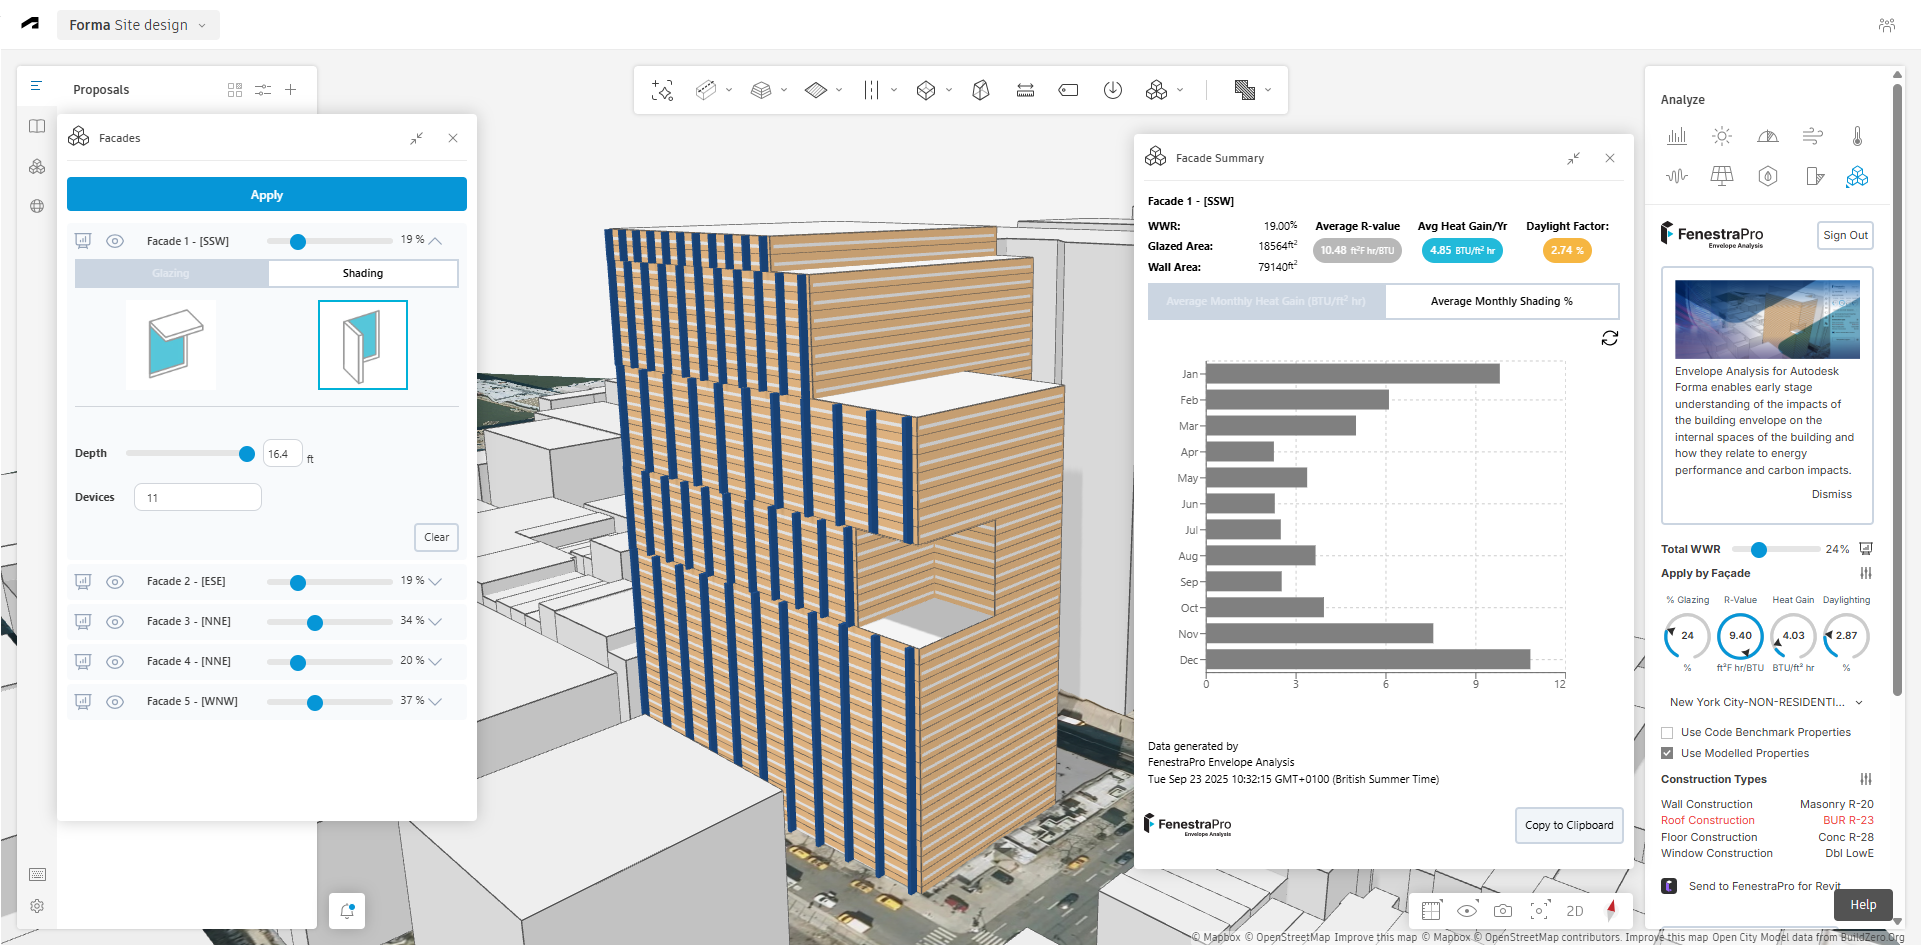
Please Note: Vertical Fins will change the Heat Gain results but currently not the Daylighting results (they will remain as before, without shade devices). This will be supported in a future release soon.
Once the recalculations have completed, the Charts will update automatically (using refresh is not required). You may change the glazing after shading has been configured and it will update according to the new conditions.
To remove any shade devices, use the ‘Clear’ button and then ‘Apply‘. It does not matter which device type is highlighted (canopy or fin), any shade devices on that Facade will be removed. Shade devices created using the application are not Forma geometry and cannot be selected, repositioned or rotated. You may configure windows and shades and then ‘Apply‘ both together or ‘Clear’ both windows and shades and then ‘Apply‘ both settings.
Note: If you add windows to the Facade, you will get a separate vertical fin for each window. If you remove the window and return to notional glazing (glazed zones only), the number of vertical fins will remain as they were (one per window). You can always adjust this value in the settings.
New shading settings will always override any previous ones. For example, if you have a shading Canopy on a Facade and then configure Vertical Fins on the same Facade, the previous shading configuration will be overridden by the new settings (you do not need to clear the previous settings first). This also applies for Window settings.
If you have several Surfaces on one Facade (due to splitting of the Facade by lines representing internal walls), each Surface will get the shading configuration defined. For example, if you define 4 Vertical Fins on a Facade and it has 2 Surfaces, each Surface will get 4 Shade devices. Please allow for this when inputting settings.

If you have the FenestraPro for Revit Add-in (version 9.0 beta), these shade devices in Forma can also be exported along with your proposal to Revit.
Modeling Shade Geometry in Forma
As an alternative, you may also manually model shade devices on the project using the Forma Volume – ‘Cube’ tool or freeform function. Shade canopies will affect both Heat Gain and Daylight results. Vertical fins currently will currently only affect Heat Gain results.
Note: modeling these devices using other methods such as the surface or line tool in Forma is currently not supported and these geometries may therefore have no effect on results. Creating shades by extruding existing floors or roofs is not recommended as they may also get assigned glazing zones when the model is analyzed.
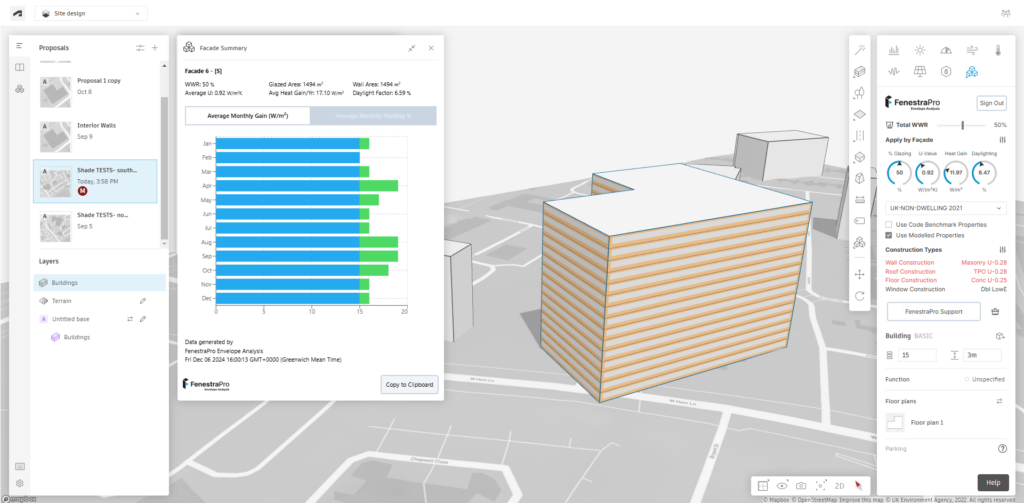
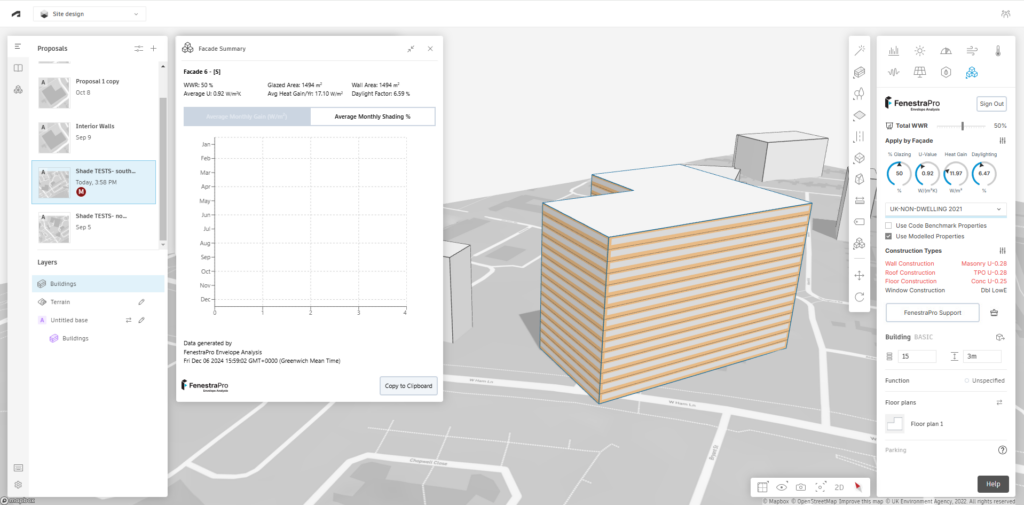
Model without Shading:
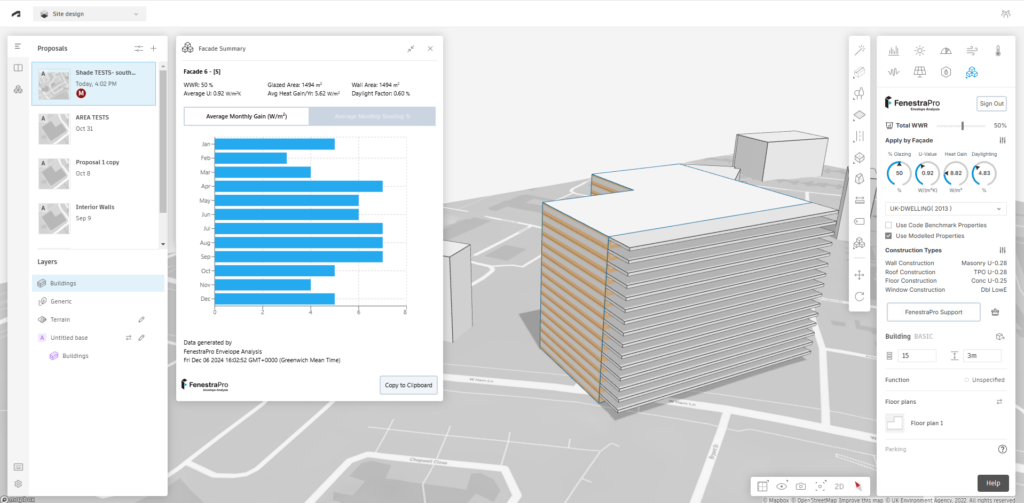
Model with shading:

To create a shade device (horizontal canopy or vertical fin)
- Select the Volume tool and Cube/Freeform option in Forma.
- First define the length of the shade device over the glazing, then extend to define the depth out from the building envelope, then extrude upwards to create the thickness.
- You may adjust these dimensions and exact location later by clicking onto edge surfaces and using the point handle to push/pull.
- For multiple canopies, you may copy a ‘shade device’ by selecting the geometry and using the move tool in Forma while holding the control key on your keyboard.
- Drag the geometry to another location by selecting a corner point and it will snap to a new point location.
Please see the video HERE for this workflow.
It is good practice after any changes to the model or surroundings, to refresh your browser to update the model conditions before recalculating and re-select the model. This applies when you add a shade device, change the depth, alter the model geometry or move the surroundings etc. You may also use another tool in Forma such as the Area Metrics feature on the toolbar to exit the FenestraPro extension and avoid any modifications being analyzed until you have fully completed the changes.
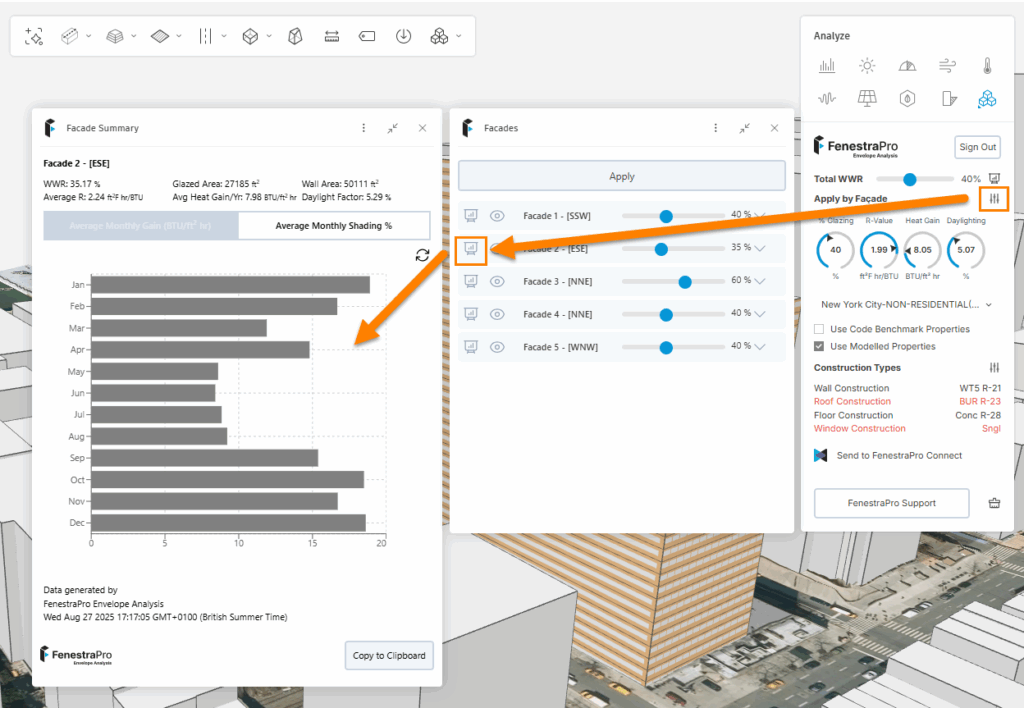
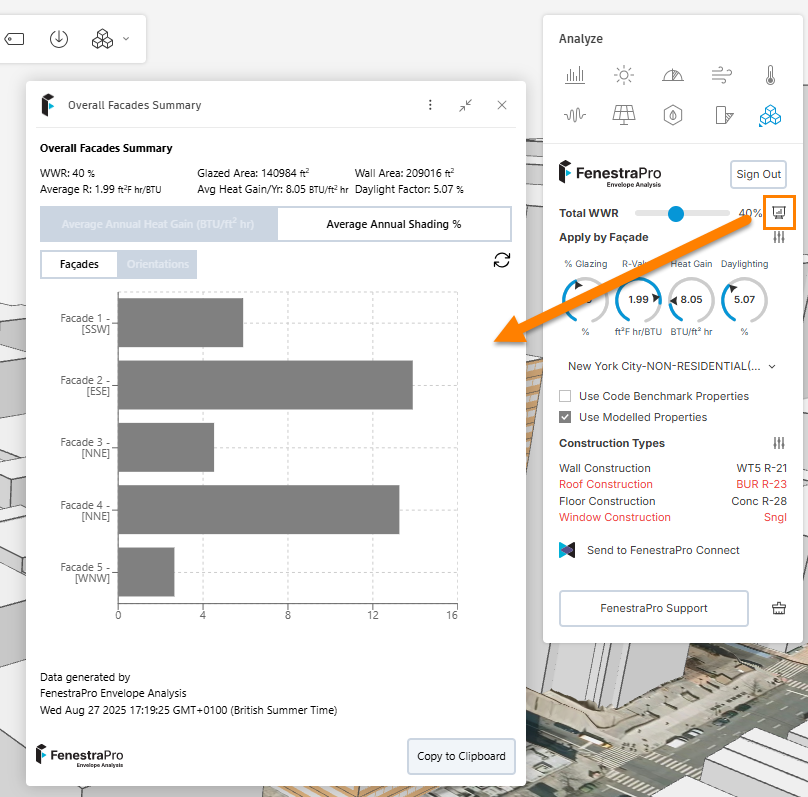
Shading Charts are also provided for each Façade and you can toggle between Heat Gain and Shading Charts using the tabs provided (these can be accessed by opening the details for Facades. Shading Charts are also provided for the overall model (this can be accessed from the icon beside the Total WWR slider). These provide the weighted average percentage of the relevant glazed area(s) that is shaded during exposed sun hours for the month/year.
Notes: If you find that recalculation is taking a long time, please refresh your browser and re-select the model to restart the analysis. If the analysis progress continues to spin and does not complete, the current model condition may not be suitable for analysis (it may be too complex). Calculations may take a few minutes depending on model complexity and shading conditions. Simplifying the model may improve success. Projects that have imported geometry, were created using 3D Sketch etc may not currently be suitable for analysis. Models must have Floor Levels before analysis is started. It may be possible to ‘Add Floors’ to the existing model (if they have none) and try selecting again. Remodeling using the ‘Basic Building‘ method in Forma may also be an option.
- Projecting a floor as shade geometry may not work in some cases since currently the extension is attempting to collect all surfaces on the same plane to create Facades. This is to be improved shortly.
- Shade devices modeled using surfaces or line geometry will not create shading effects or affect the results. For the moment, please model shade devices as described above (using ‘volume – cube/freeform’ method).
- Shading effects are always included in the results and there is currently no option to calculate without this feature. This ensures that the results reflect realistic site and model conditions.
- Shade effects from Forma trees are not yet supported due to the calculation method currently employed. If required, significant large trees on site can be modeled as similar size building blocks as a workaround (using rectangle or circular footprints and extruded), by defining the story height and dimensions, similar to the planting.