
Comcheck Support
FenestraPro version 9.0.5 has a feature that will send all Revit envelope element data to the COMCheck web application where compliance with US Energy Codes can be reviewed (COMcheck does not support citeies outside the USA).
Building element areas and thermal properties are sent to the application and can be checked against US Energy Code values for compliance. Values can also be adjusted or overridden if required.
The application can be accessed here: COMcheck-Web: Home Page
You will need to register for a free account and accept the terms and conditions to use this tool; COMcheck-Web: New User Registration
Workflow
Use the COMcheck tool in FenestraPro to save a .cxl file of project data. This file can then be imported into COMcheck-web. Element families used in Revit will map to similar wall, roof, floor and glazing types in the COMCheck application. These types and properties can also be edited if needed.
Revit element properties (schematic or detailed) will be exported to COMcheck-web but values may also be edited there if required.
An Envelope Compliance certificate can then be produced if elements comply with the selected Energy Code.
Elements that do not comply may be adjusted in Revit by improving thermal performance values or by testing schematic types in the first instance using FenestraPro and then applying these changes to Revit families using Type Properties.
- Click on the Export to CXL button. FenestraPro will create a .cxl file using data from Revit’s Energy model. This can then be imported to Comcheck web.

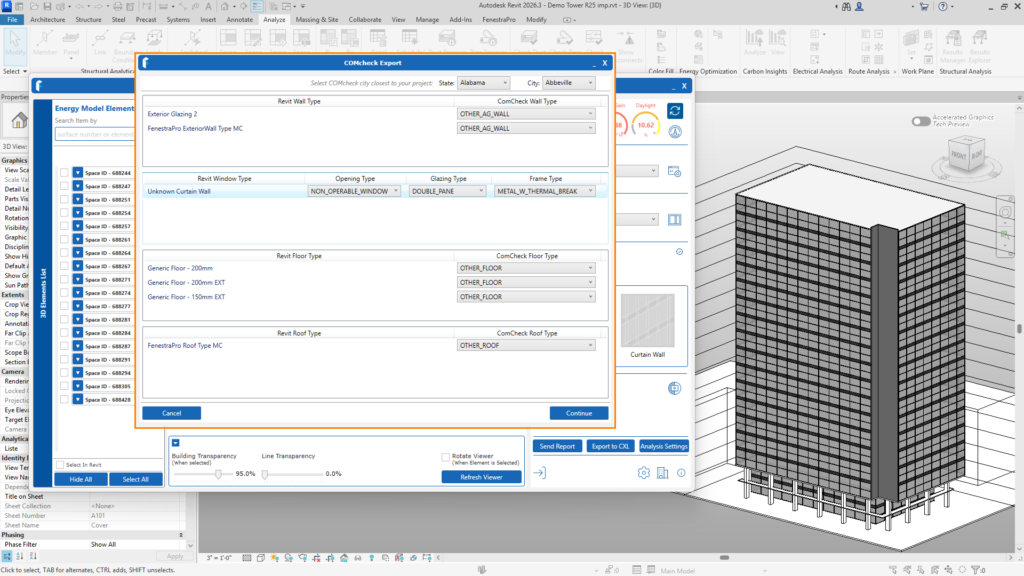
2. A window will appear with details to review. First ensure that the project location is set correctly by choosing a State and City. If the location is not listed, select the nearest City to the project location. The COMcheck element types to which Revit families are being mapped are also listed if you wish to review or change them. The defaults are set to ‘Other’ but you may adjust these types before creating the file. Then click Continue to proceed.
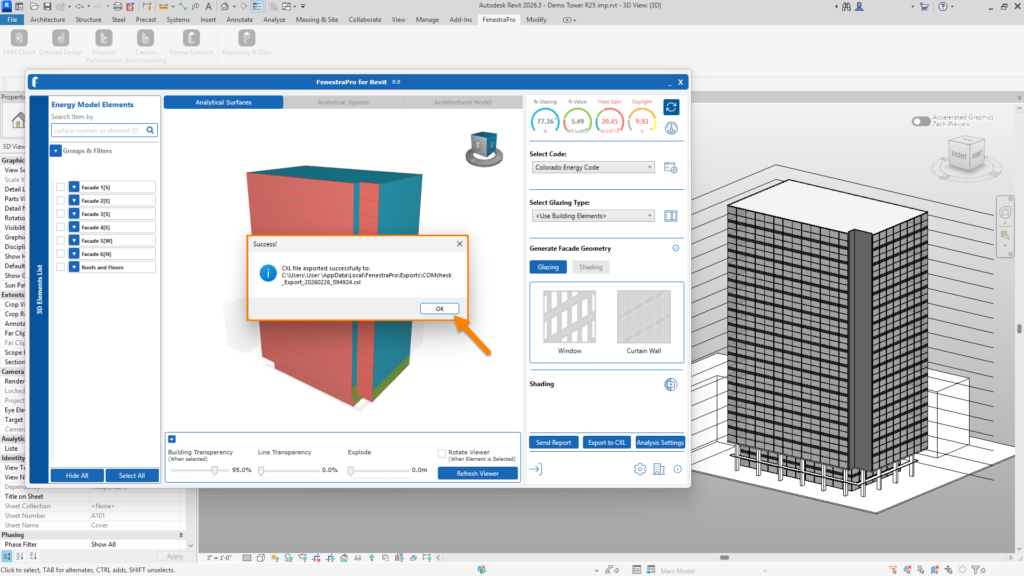
3. A confirmation message will appear to verify that the file was created successfully. This file is saved to the ‘Exports’ folder here: C:Users\User\AppData\Local\FenestraPro\Exports
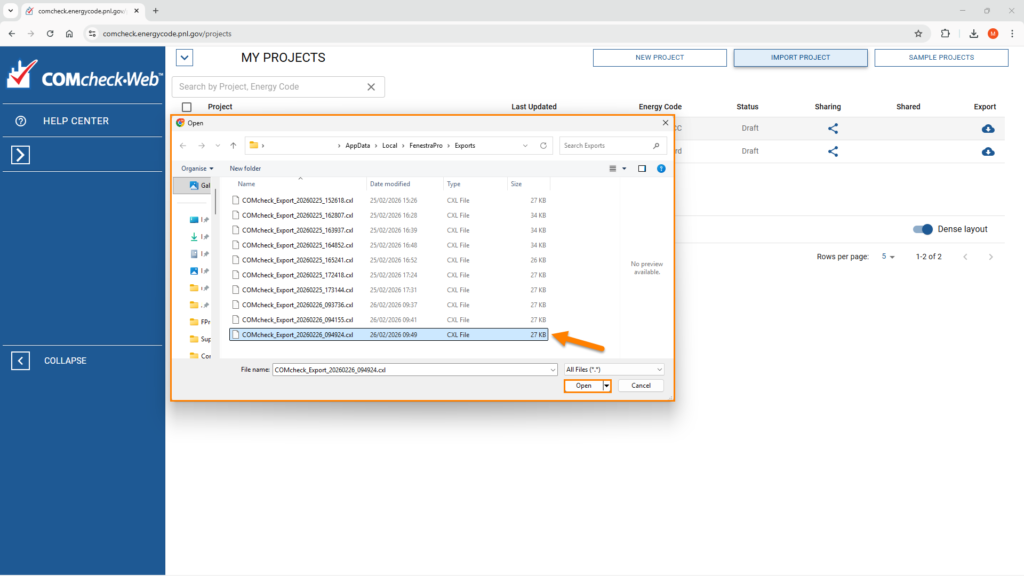
4. On the COMcheck webpage, you may import a project by browsing to the .cxl file location and clicking on Open.
5. The project will appear in the list of projects at the top of the screen. Click on the imported project to open it. The project details will display.

Note: The Energy Code used is that recommended by COMcheck and may be changed by clicking into this field.

6. On the left-hand sidebar;
1. click on Envelope to display the elements in the project.
2. Then click on the heading to expand the assemblies.
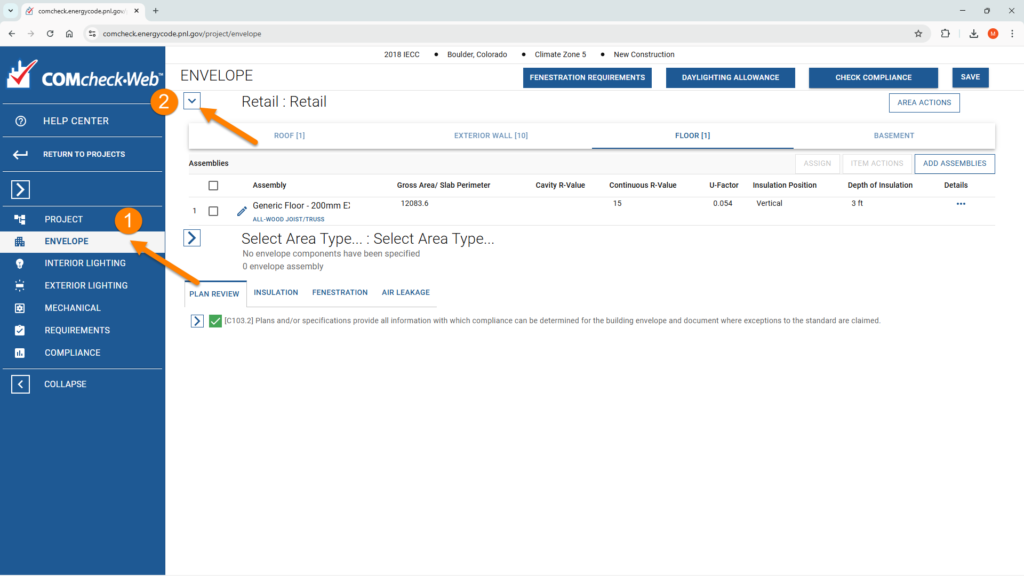
7. Tabs will display for envelope categories (Roof, Exterior Wall, Floor etc).

Click on one of these tabs to reveal details of the assemblies.

You may also click on each assembly to edit the name, type or override values if required.
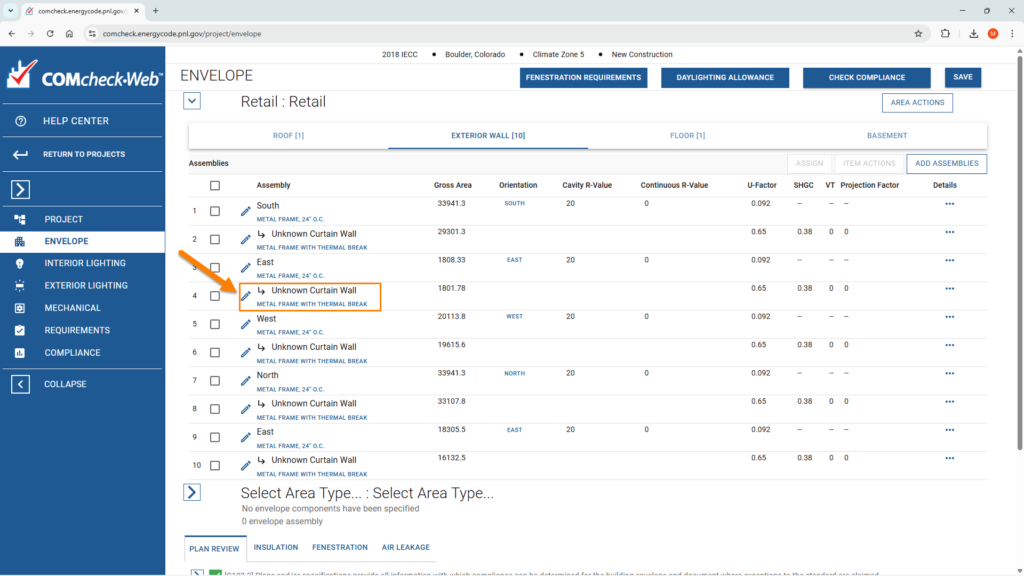

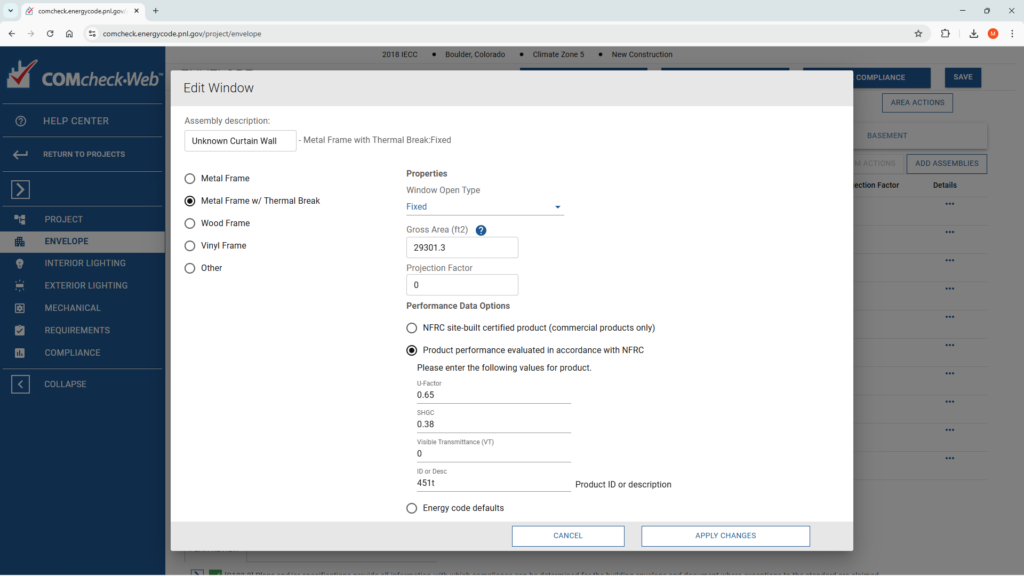
Use the Check Compliance button to review status.
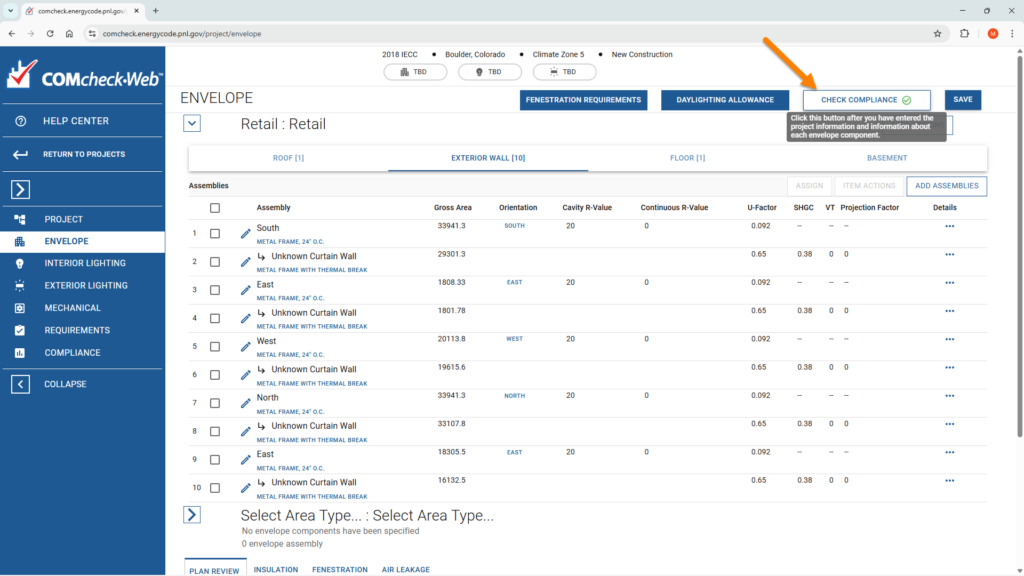
By clicking on the orientation for each entry, you can edit this if required. For guidance on using the COMcheck web tool, please see relevant resources from the application provider.

