
This area is where you select a reference Energy Code to use for your project and also check compliance with existing model elements.

Suggested Energy Codes
FenestraPro has a database of selected Energy Codes/Regulations for some regions (North America ASHRAE 90.1 / IECC, UK Part L, Ireland Part L, Canada and Australia). These Codes are based on typical values recommended but may be simplified where complex building conditions are defined. Various editions of the Energy Code may also be displayed if there are multiple versions. Codes suggested may be specific to a city or state where available.
Note: If the location is changed in Revit, please restart the application to update the location settings.
The site location of the Revit model is used to suggest possible relevant Energy Codes that may be used for your project. These are displayed in a list and if they are helpful, you may select one for use. The user should check that the Code values provided are correct and match project targets (if known).

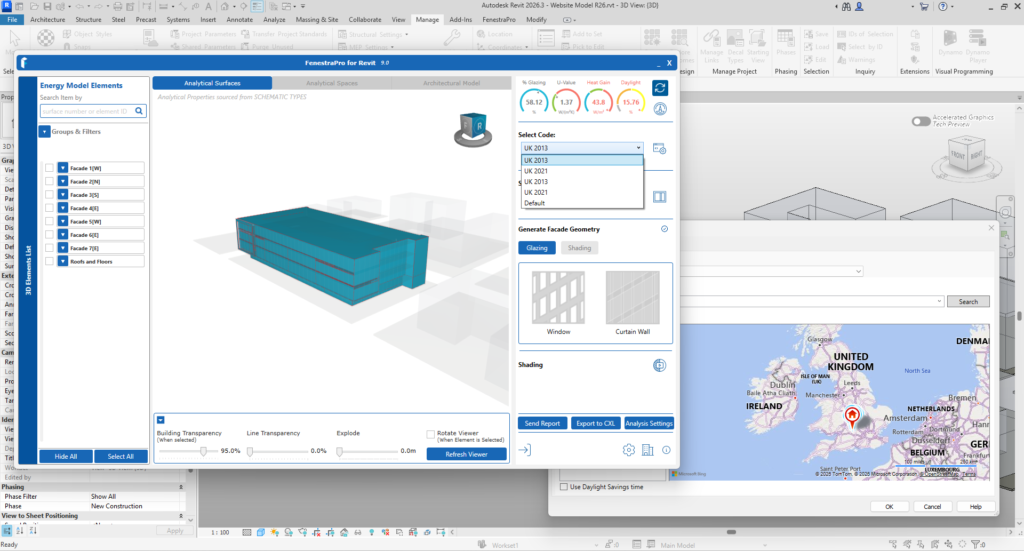
In some cases where specific Energy Codes are not mandated by an authority, all possible Codes may be displayed for that Country/Region/State.
Custom Codes may always be created with specific values for your project and imported as shown below. Currently ASHRAE 2007 -2019, IECC 2006 – 2021, Title 24 (California Standards), selected US State Energy Codes, Ireland Part L , UK Part L, as well as codes for Canada and Australia are provided. Other regions may be added soon or on request. Zone maps are used in the background in an effort to provide the correct Code values but these may not always be precise. Please confirm that the values displayed are suitable for your project or create a project Code.
Default Code
If you do not yet have data for specific Energy Code values for your project, there is a default code provided in the list which may be used temporarily or to understand the compliance process. You may always return to this area at a later stage to change the reference code or create one.
Note: Default Code values are not intended to be used as a definitive reference for a project and are provided only so that you may continue and later return to review these values when more information becomes available. For some site locations where Energy Code information is not yet provided, the default code may be the only entry listed.
The Default Code values used are shown in the table below. The values highlighted in green are used in the application.
If the model uses metric units, Code units used for all elements are metric U-values.
If the model uses imperial units, Code values used for Roof/Floor and Wall are imperial R-values. For glazing, units are imperial U-values.

Create a Code
You may also create an Energy Code for your project if you know the target reference values. This is explained below.
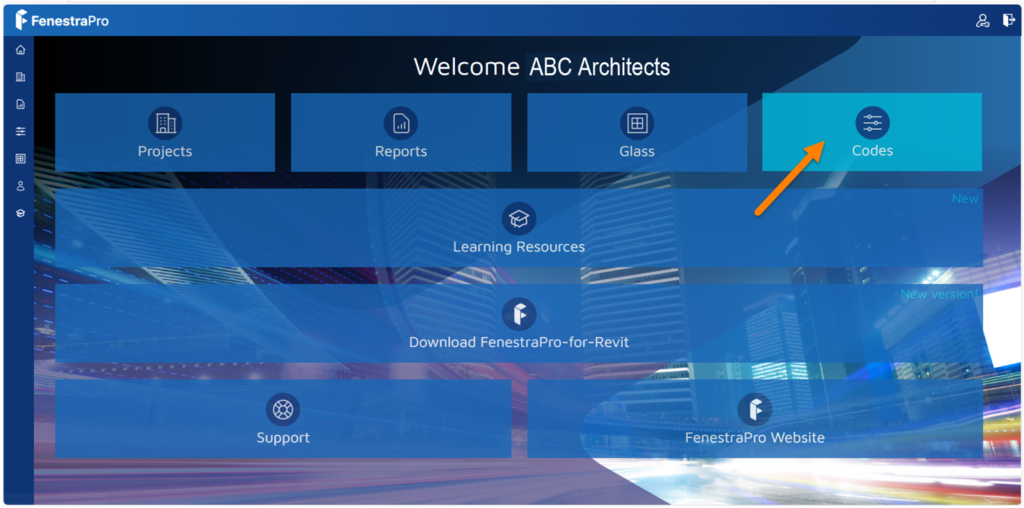
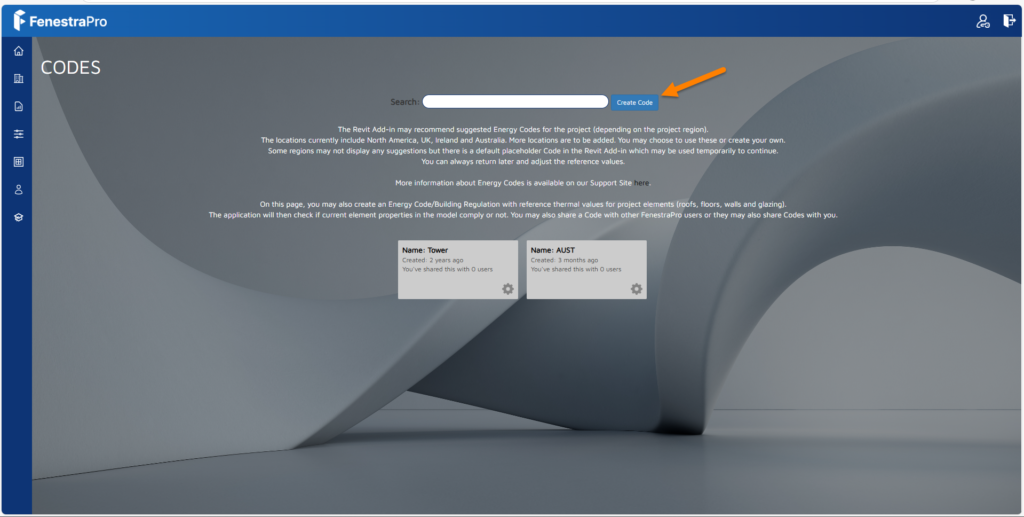
Click on the Create Code button a new window will open.
You may enter a name for the Code and values for each element category (Roof, Floor, Wall and Glazing). These values may be based on a suitable reference Energy Code for your project such as a specific relevant Code recommended by your Regional Authorities. Maximum Glazing Percentage Allowed may also be entered (Glazing %).

Note: The units displayed are based on your User Preferences in your Account. Unit preferences may always be modified by going to your profile area. Units may be changed in the dropdown list.
Once the new Energy Code is saved, it will appear in the list of Codes in your online account. You may always click on the code to open and edit the name or values.
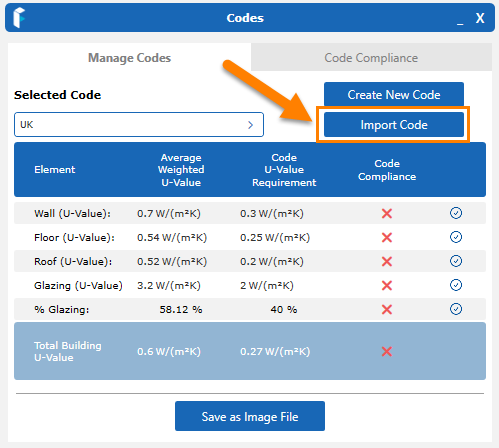
Back in Revit, to import the code that was created, use the Import Code button. The code will then get added to the dropodown list and will be available for selection.
Click on the wheel icon to get options such as sharing or deleting.
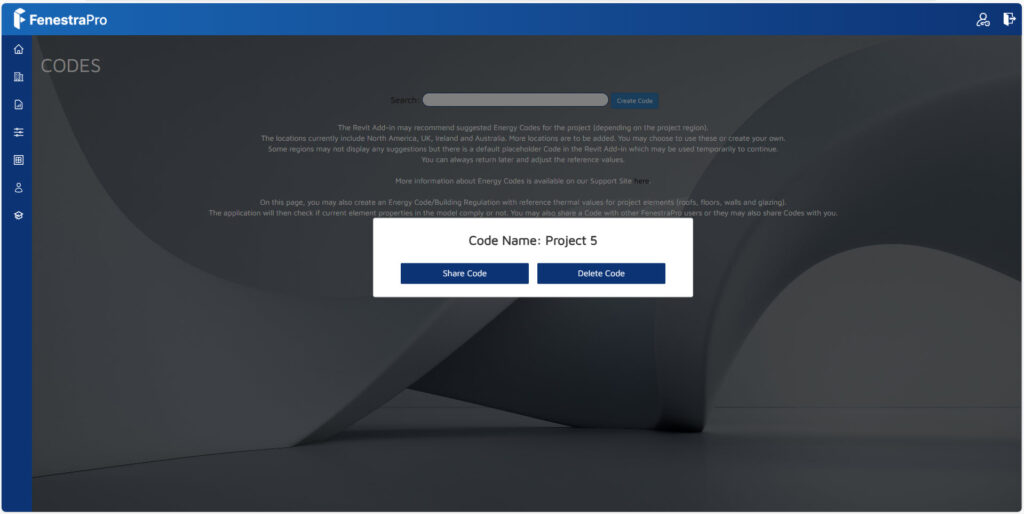
There are 3 options to share the Code with another user that is included in your FenestraPro license, with a Team that has been created for a project or by email address. Note: all recipients must have access to a FenestraPro Account to view and use the Code in the application.


Once your Energy Code is saved online, you may return to the Revit Add-in. Use the Refresh Codes button in the Add-in to display the new Energy Code that was created. This can then be selected. The values will be displayed alongside the actual average thermal values for the element properties in the model. If elements do not meet these target values, the project values will display in red. Elements with incomplete or without thermal properties will display warning symbols.
Users may input values for each element to create settings for an Energy Code such as ASHRAE 90.1, IECC or UK Part L, Title 24 for California State etc. This will then be used as a reference for the thermal values assigned to the elements in Revit (walls/floors/roofs/glazing). Codes that are created can later be edited, deleted or renamed. You may create several Codes as a list and choose from these later when working with other projects as they will be saved.
If you have not yet created a Building Code, you will see an option to Create New Code. If you have already created a Building Code, you will still see an option to create another code. You may also return to your online account to edit or delete any custom code.
When creating code values, the current ranges used for values accepted are outlined below:
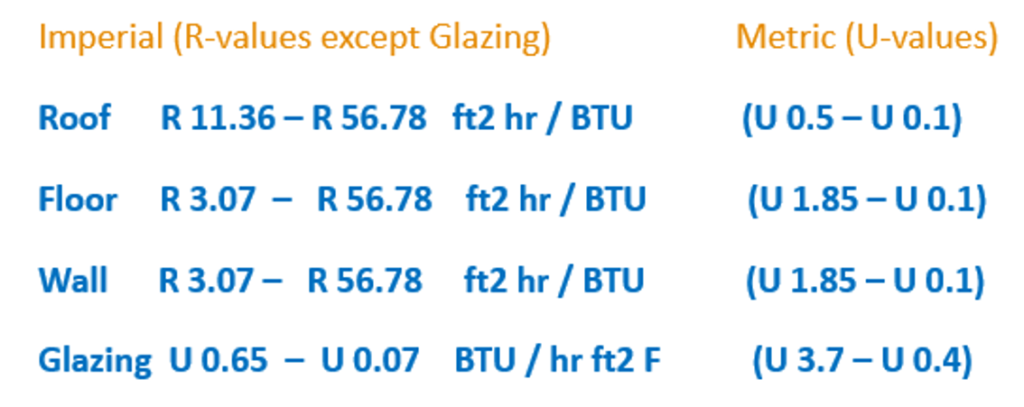
The maximum percentage of glazing value is 95%. Values input above this will default back to 95. This is similar to Revit which allows for a minimal framing percentage of 5%.
Values that are input above or below the set ranges will default to the maximum or minimum value allowed. Users are also advised to check the list of existing codes before creating new entries as a similar one may already exist. If you input a code with the same name as an existing entry, the code will not be created. In this case, simply use a different name.
Information created in Custom Codes will be saved in FenestraPro for sessions with all Revit projects. Codes that are created are not project-specific, so they will remain available for use with another project also.
Once you have created a Code, this will be used as a reference once it is displayed in the dropdown box.
If inputted values are not accepted, a message will show to prompt you to modify the inputs. This will prevent you from saving the Code until the values are corrected and within the typical ranges expected.
Note: When creating or editing a code, if you cancel out of this window, the new entry will not be saved.

