The Add Curtain Wall feature provides a means to generate Curtain Walls directly on the Revit model using FenestraPro based on performance criteria.
These elements can have defined dimensions and settings but these may later be changed for other Curtain Wall types with similar properties.
The Add Curtain Wall feature only becomes available when a blank solid wall (without glazing) is selected from the Revit model or from the Façades List.
Note: If there is already glazing present on this Surface already, this feature may not be available.
If several Surfaces have been selected, one Curtain Wall will be generated over all the Surfaces that are selected (if they are adjacent or stacked on top of each other) using the settings that you have input. Surfaces that are separated, will each receive an independent Curtain Wall. To generate curtain walls independently on Surfaces, assign new curtain walls individually.
Note: At least one existig glazed curtain panel for each for solid and glazed examples with thermal properties assigned must be in use in the model before using this function (these families will be used when generating the Curtain Wall). There will be a dropdown list of panels available. Only panels in the Revit model with analytical properties will appear in the dropdown list for selection. If panel types are missing in the model and first need to be defined, a message will display to advise you.
If you intend to use glazed and solid panels, at least one panel type for each with thermal properties assigned must first be used in the model before using this function. There will be a dropdown list of panels available. Only panels in use on the Revit model with analytical properties will appear in the dropdown list for selection.
If you need to update the Revit model by first loading curtain wall panels into the project, restart the application to update the identification of project elements.

1. Make selections on the Model (by hovering over and clicking areas in the Viewer or select from the Facades List). Current results on the dials should be zero since there is no glazing here.
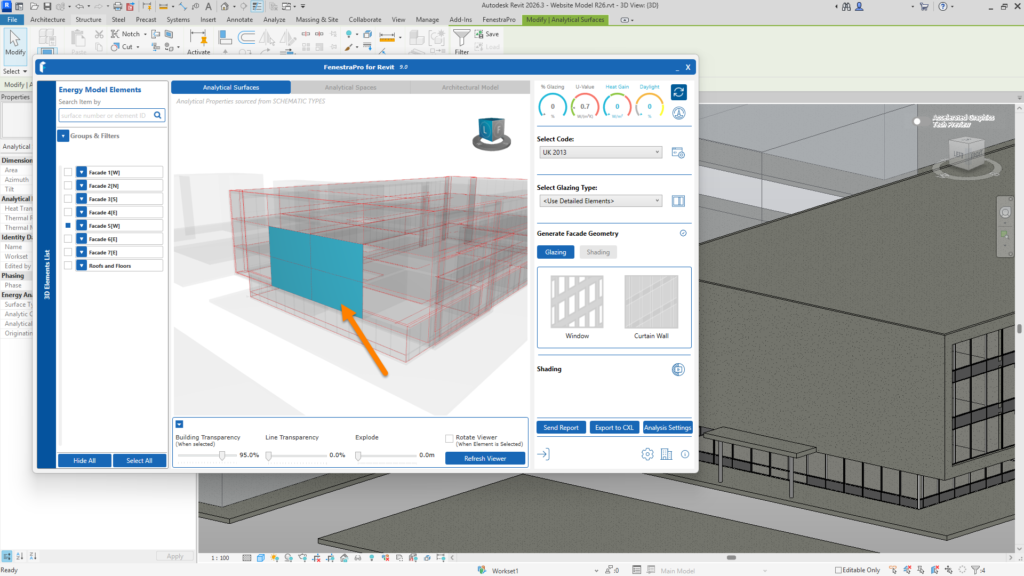
2. Click on the Add Curtain Walls tab to enter the settings area. This will open the dialog window for creating Curtain Walls.
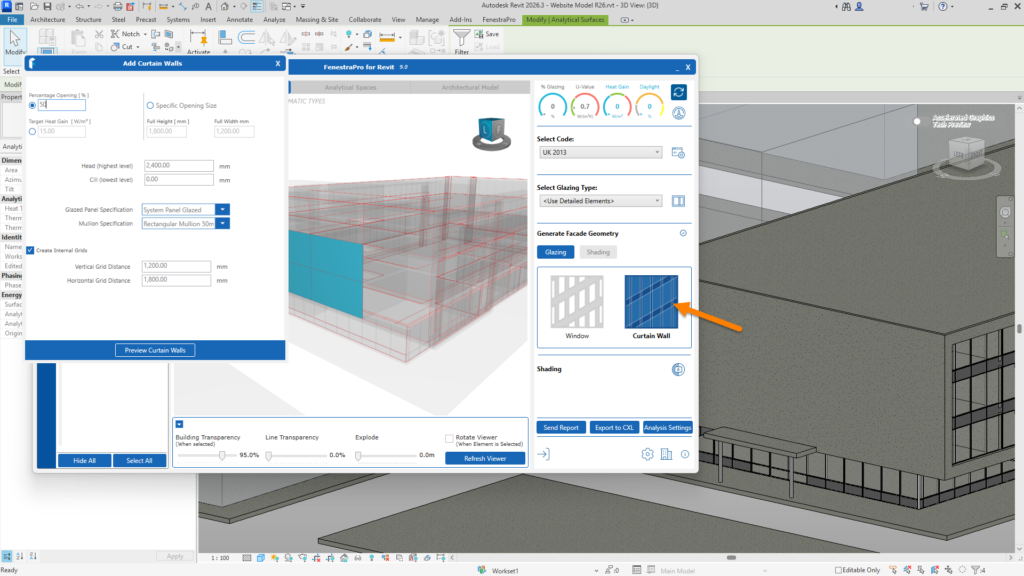
3. Select one of 3 performance criteria:
a) Percentage Opening (% on the Surface) (target solar load or opening size cannot then also be defined)
b) Target Solar Load (W/m2 or BTU ft2 hr)
(percentage or opening size cannot then also be defined)
c) Specific Opening Size (define dimensions) (percentage or target solar load cannot then also be defined)
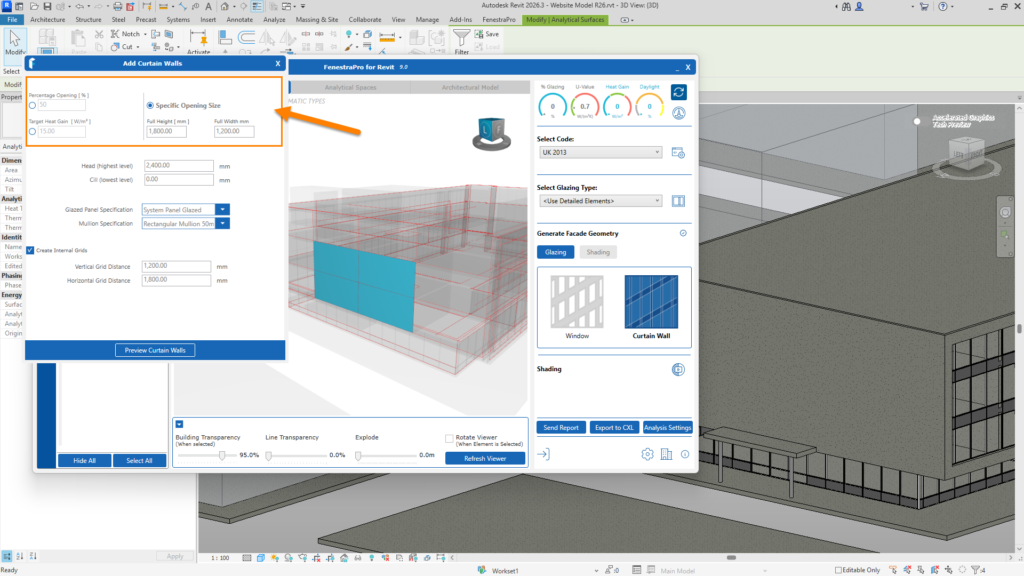
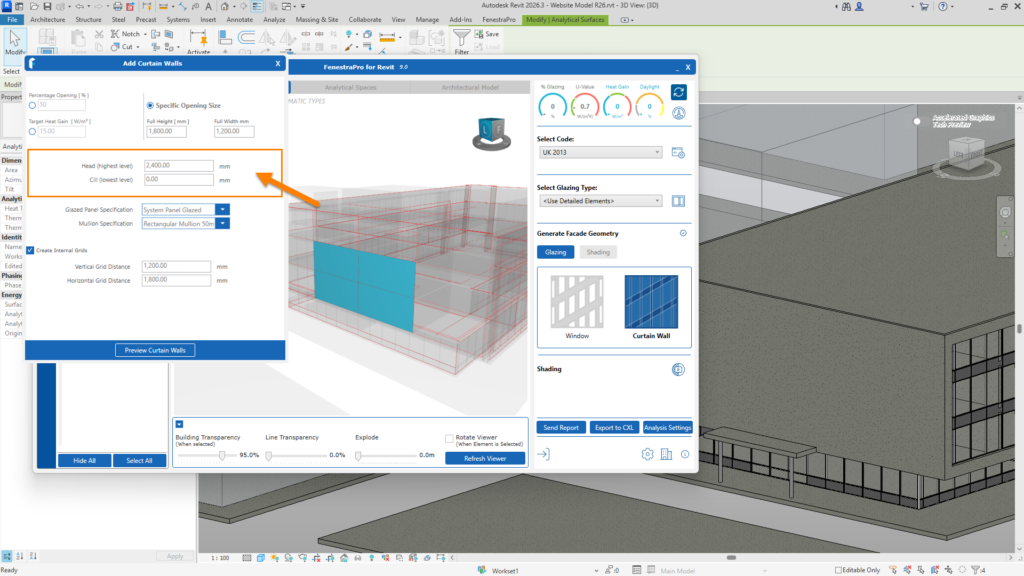
4. Define head and sill heights for the curtain wall in the next section. Some value (other than zero) for sill height must be entered for the process to generate a preview. Note: By setting these values and also having a target value set for glazing percentage or Heat Gain, the width of the opening may be adjusted to achieve the targets defined.
5. Define the Curtain Panels and Mullions to use. There is a dropdown list of existing panels and mullions in the project. You may select one of these to use to generate the glazing and spandrel panels (these may be swapped out later).
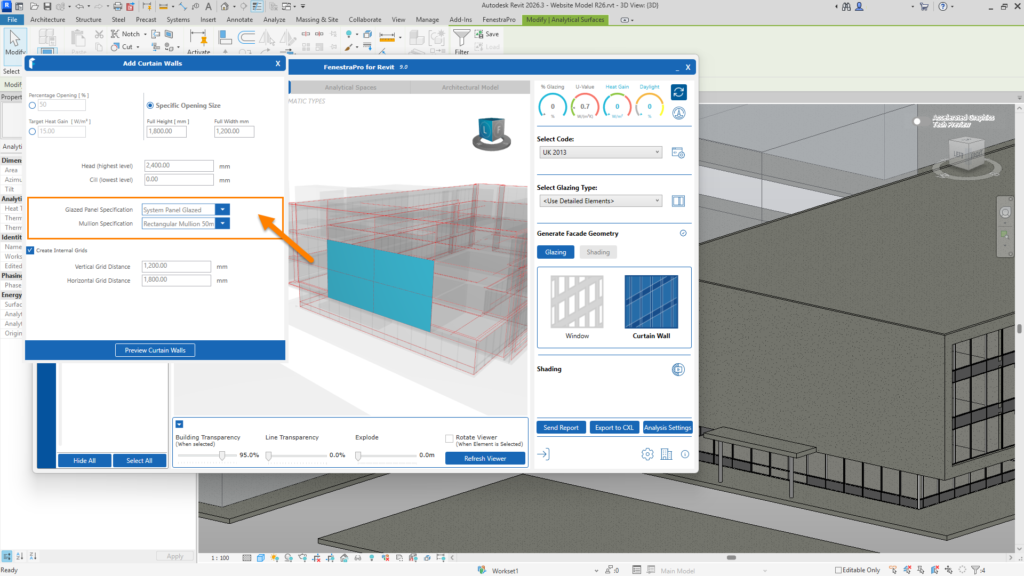
Note: There must be at least one family already present on the model for each of the following: a Glazed Panel, Solid Panel and Mullion. The glazed and solid panel families must also have thermal properties already assigned in Revit. If you have not yet assigned analytical properties to at least one curtain panel, a message will display to advise you.
This may be resolved by assigning thermal properties to existing curtain panels in the project. You may select an element from the Properties Browser in Revit and by expanding the list, right click and use Type Properties in Revit to set Analytical Properties (only one curtain panel type in use needs to have properties assigned). Use the Refresh button to update the FenestraPro Dashboard with the current model condition. In some cases, you may need to restart the application with a new energy model to update (if you have just loaded a curtain panel into the model and used it on the model).
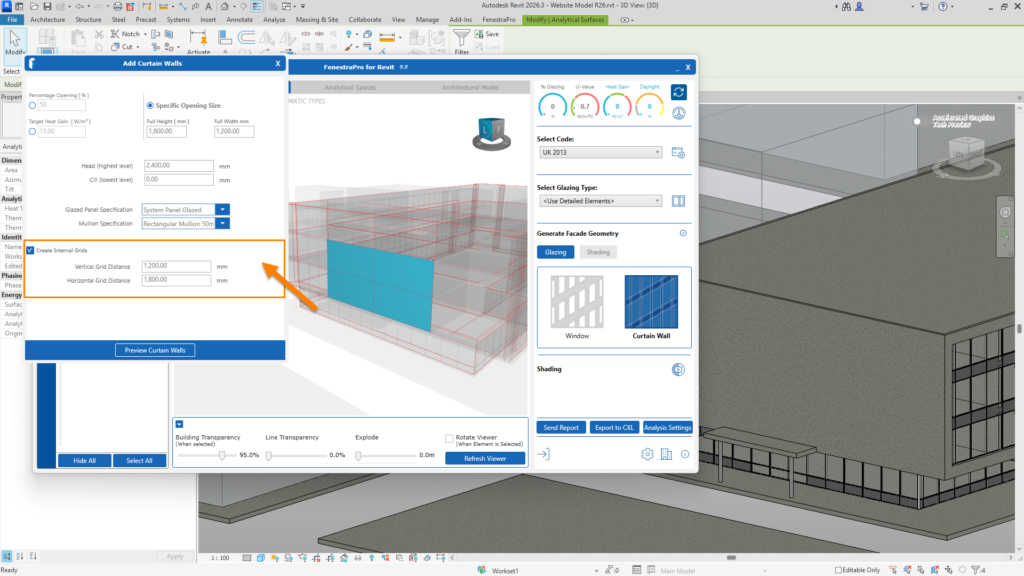
6. Define the internal grids for the curtain wall. Here you can choose whether you wish to define the grid distances for the curtain wall mullions (vertical and horizontal).
7. Preview the glazing on the model in the application Viewer before you confirm. Click on Preview Curtain Walls.
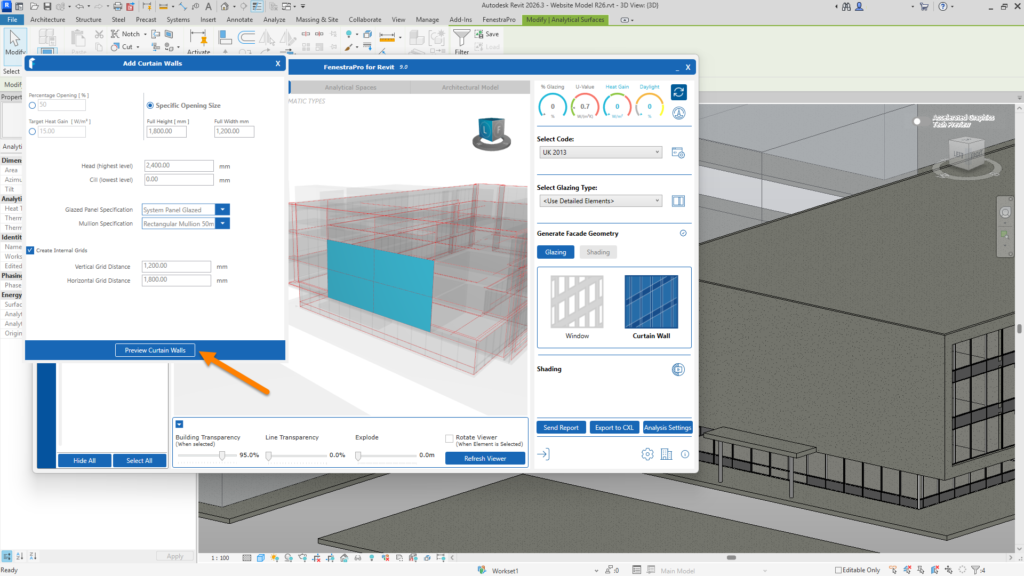
Here you may preview the proposed elements by group (tabs at the top of the window) or Preview All elements that will be generated.
There are further settings here to modify the panel types and mullions to be used or modify mullions and grid distances/offsets if required. Sill offsets are related to the placement of spandrel panels at floor plate levels.
You may also use the Go Back button to return to the previous window to configure settings again if the preview is not as expected.
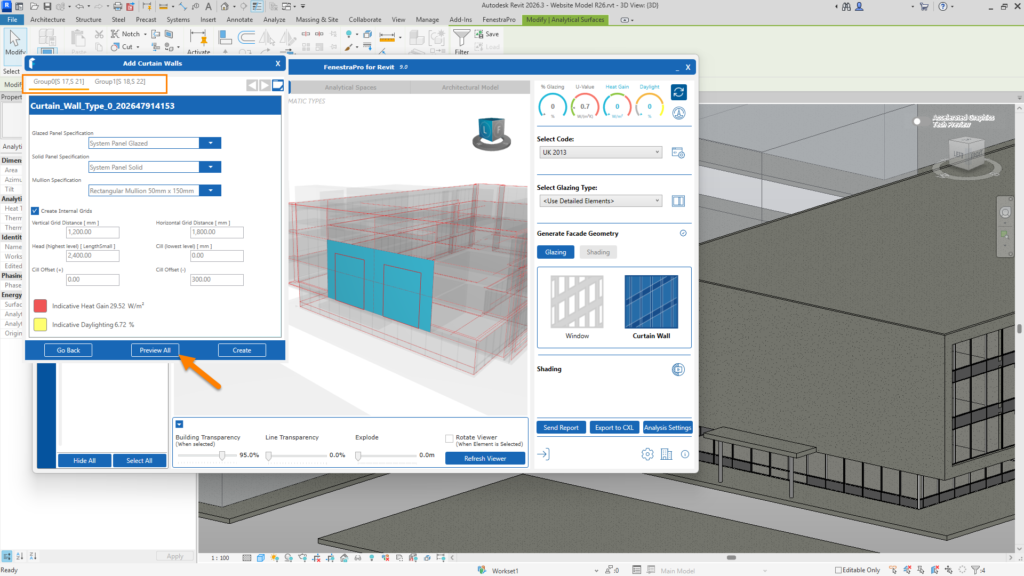
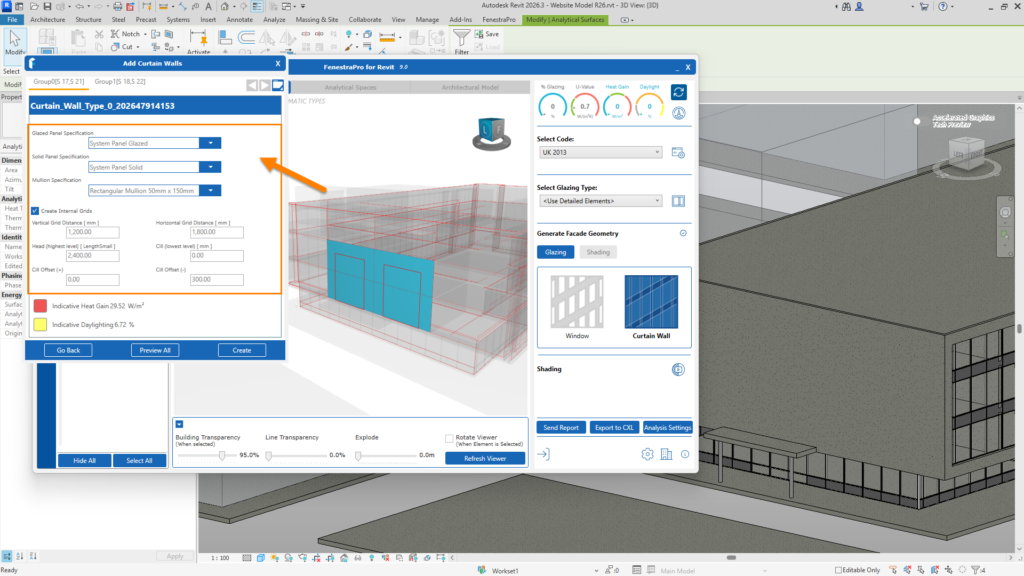
A preview of the results is also displayed here before the glazing is generated.
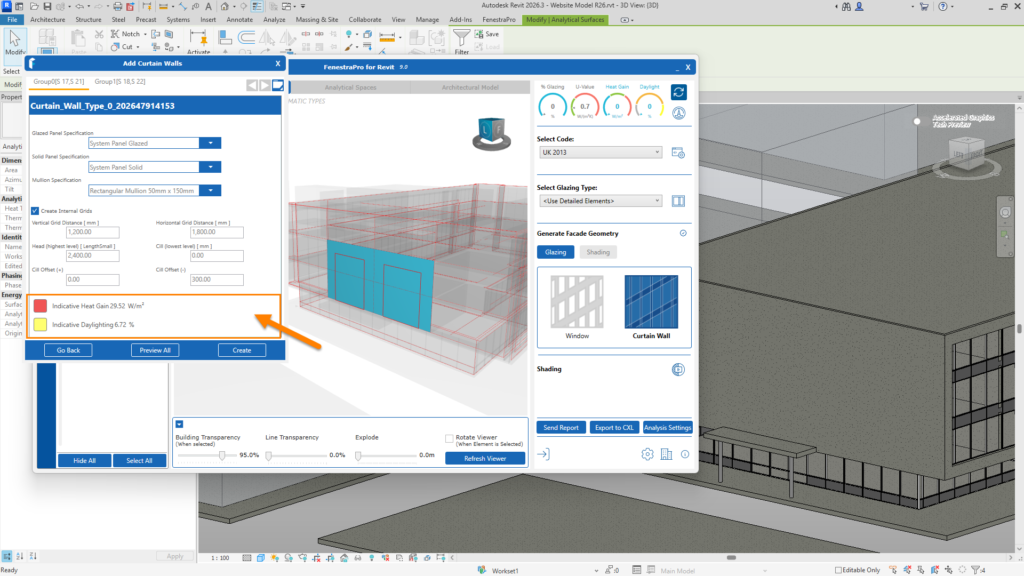
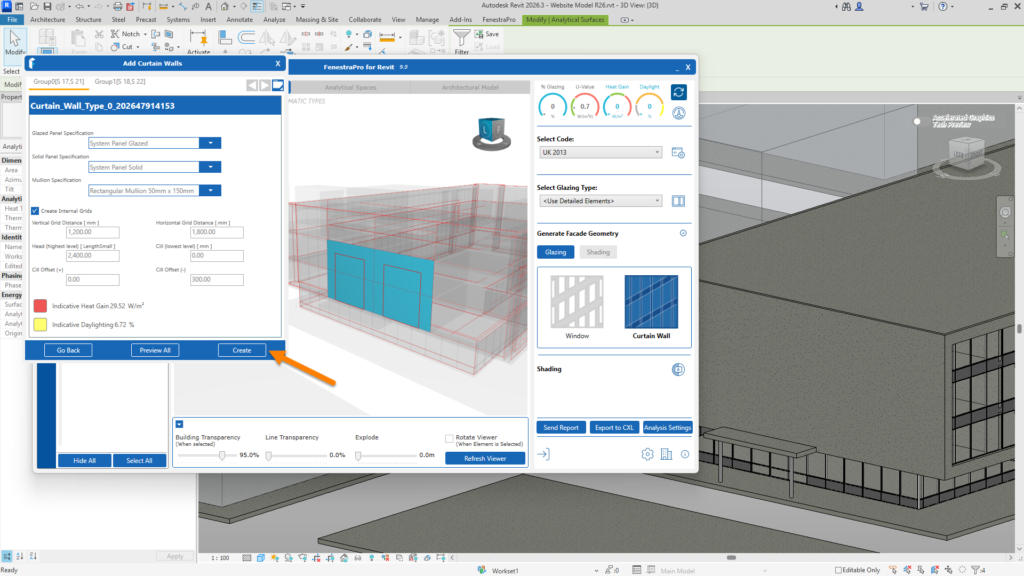
8. Then use the Create button to generate the glazing on the Revit model.
9. The final step is to use Refresh to update the results (since the model condition had changed). A message will display to confirm that this will now occur. Typically, click Yes to proceed. If you wish to review the new elements, you may click No and later manually use Refresh on the Dashboard to update the application.
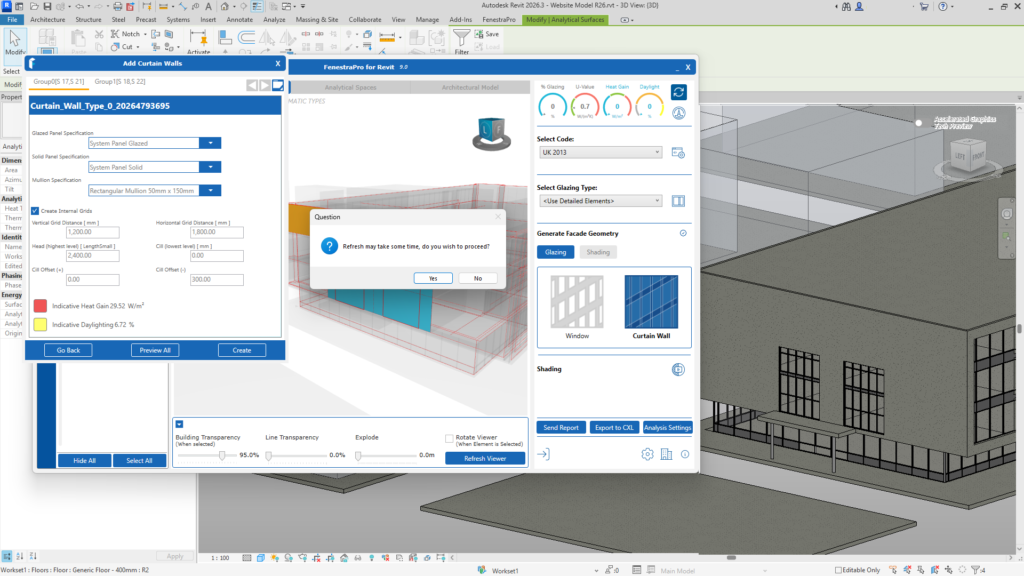
10. When this is complete, results will display for the Rooms/Spaces behind the Surfaces with new glazing elements. Please do not open Revit’s Energy Settings while the Refresh calculation is ongoing since this will interrupt the process, please wait until the update has completed.

Curtain Wall spanning multiple floors
By selecting two or more sequential Surfaces (on top of each other), a continuous curtain wall may be created spanning over both floors. A spandrel (opaque) area is also created at the floor plates.

Note: If you delete the Curtain Walls on the Revit model, you will need to Refresh again to update the model condition. If you try to create alternative glazing on the same Surfaces when the results relate to the previous model condition, this will not function (the application will still display the glazing on those Surfaces). The application should always be updated to the current model condition using the Refresh button on the Dashboard so that this is consistent.
Under the Project Details button (below the Refresh button) there is also a setting to ‘Recalculate the Building’ if required. This may be used if the Revit model and application become out of sync (when changes are made to the Revit model but the application has not been updated). This is explained under this Section.
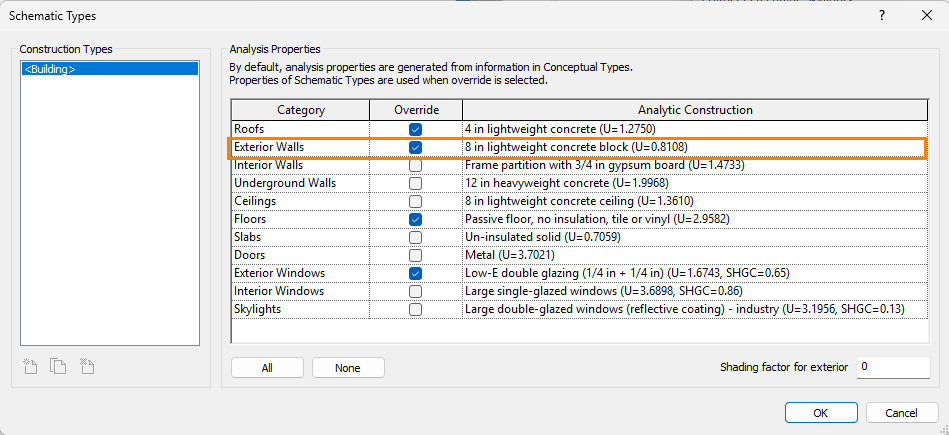
FenestraPro for Revit Version 9 supports the reading of Schematic Types if detailed properties are not set. For solid/spandrel curtain panels, if detailed properties are not set, these families will use whatever is defined for the Schematic ‘Exterior Walls’ type (this is a common parameter that will apply to timber, concrete walls etc as well as solid/spandrel curtain panels). Please note that this Schematic Type may be set to concrete block, brick, clay etc which may not be appropriate for Curtain Panels. In a Revit model where there are no traditional solid walls (all facades are curtain walls with a mixture of glazed and solid panels), you may select to define the type for Schematic ‘Exterior Walls’ as ‘Spandrel Glass’ etc which would apply to all solid panel families where detailed properties are not defined.
Where the model has tradtional solid walls as well as spandrel/solid curtain panels, defining a Schematic Type for the ‘Exterior Walls’ category will apply to all families in the model where detailed properties are not defined. Since this analytic construction may not be suitable for all families in the model, you may wish to define Analytical Properties for some wall families or spandrel panels in Revit’s Type Properties instead. For example, setting the default Schematic Type to metal for ‘Exterior Walls’ may be appropriate for spandrel panels where no detailed properties are defined, but may not be suitable for other wall families in the model. Likewise, defining a Schematic Type as Brick may be appropriate for some wall types in the model but not for spandrel panels.