Your Forma Envelope (as defined by the FenestraPro extension), can be exported to Revit using FenestraPro for Revit v8.1.1 for Revit 2025, which includes the Forma Connect tool.

FenestraPro Connect (allowing users to send a Forma model to Revit) will require access to premium features in the Forma extension and also currently requires a separate license for FenestraPro for Revit (Revit 2025 version). A message in Forma will advise that this function requires a subscription. To explore subscription options, click on the Connect button in the extension to view details.
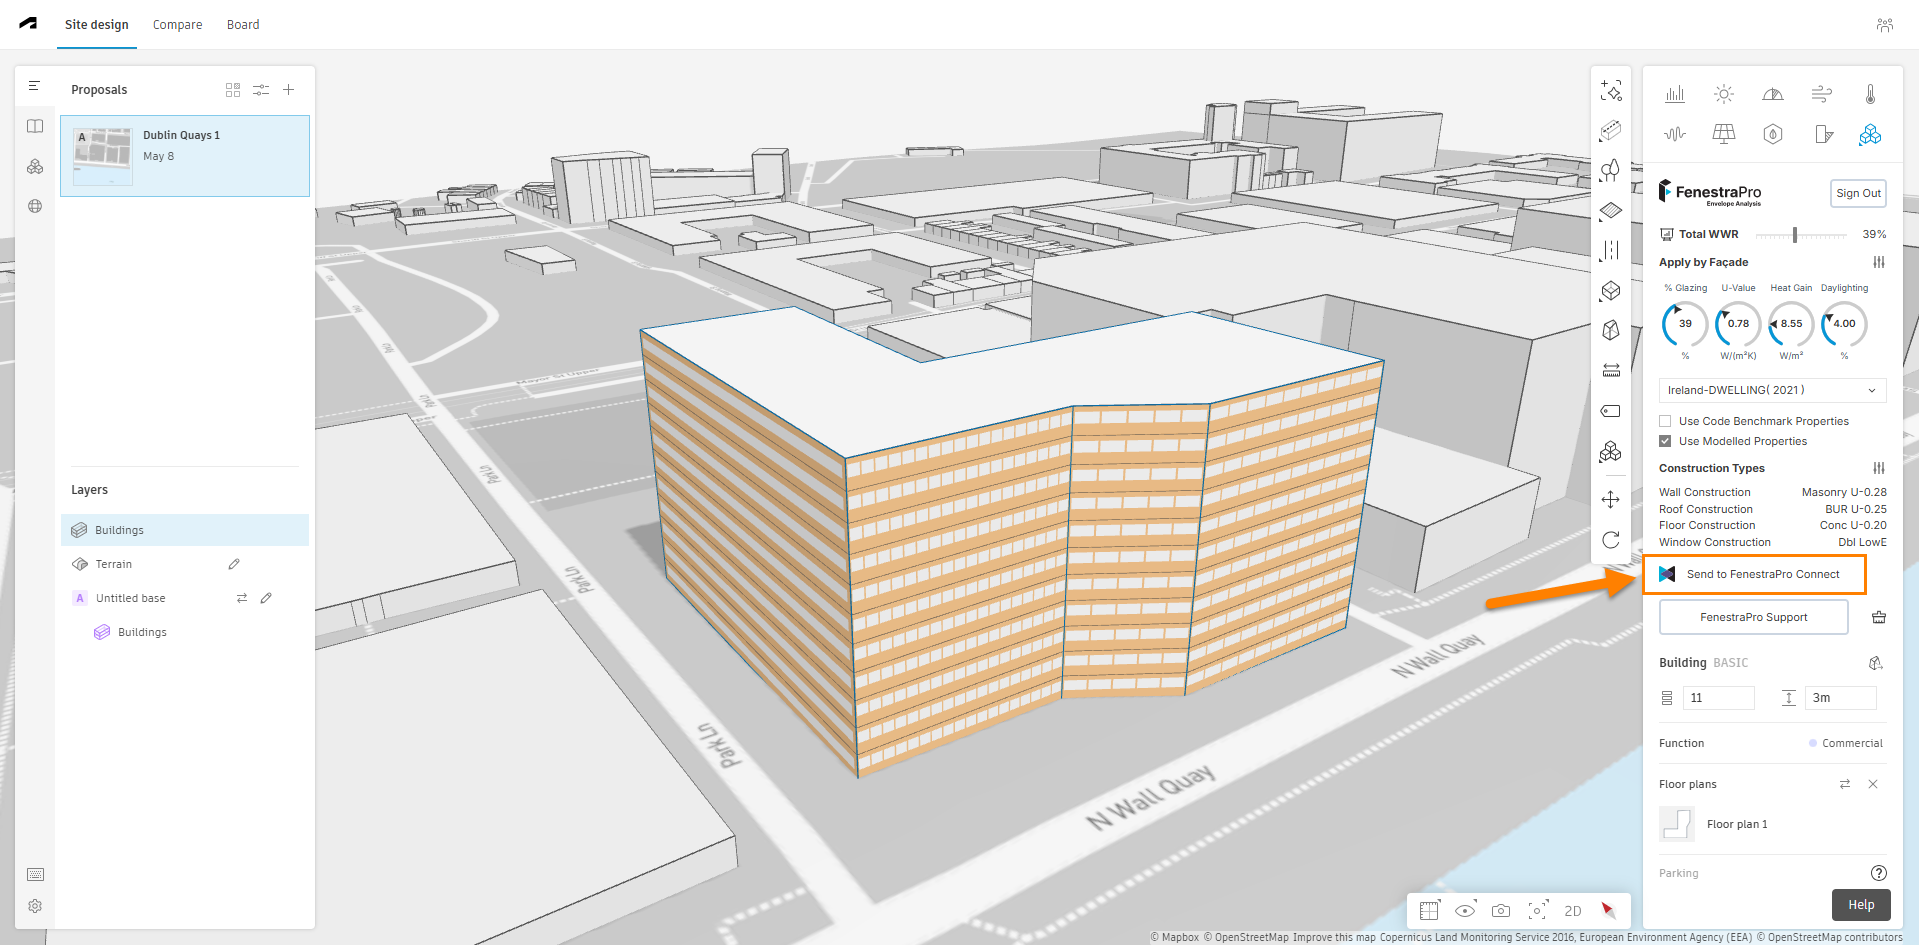
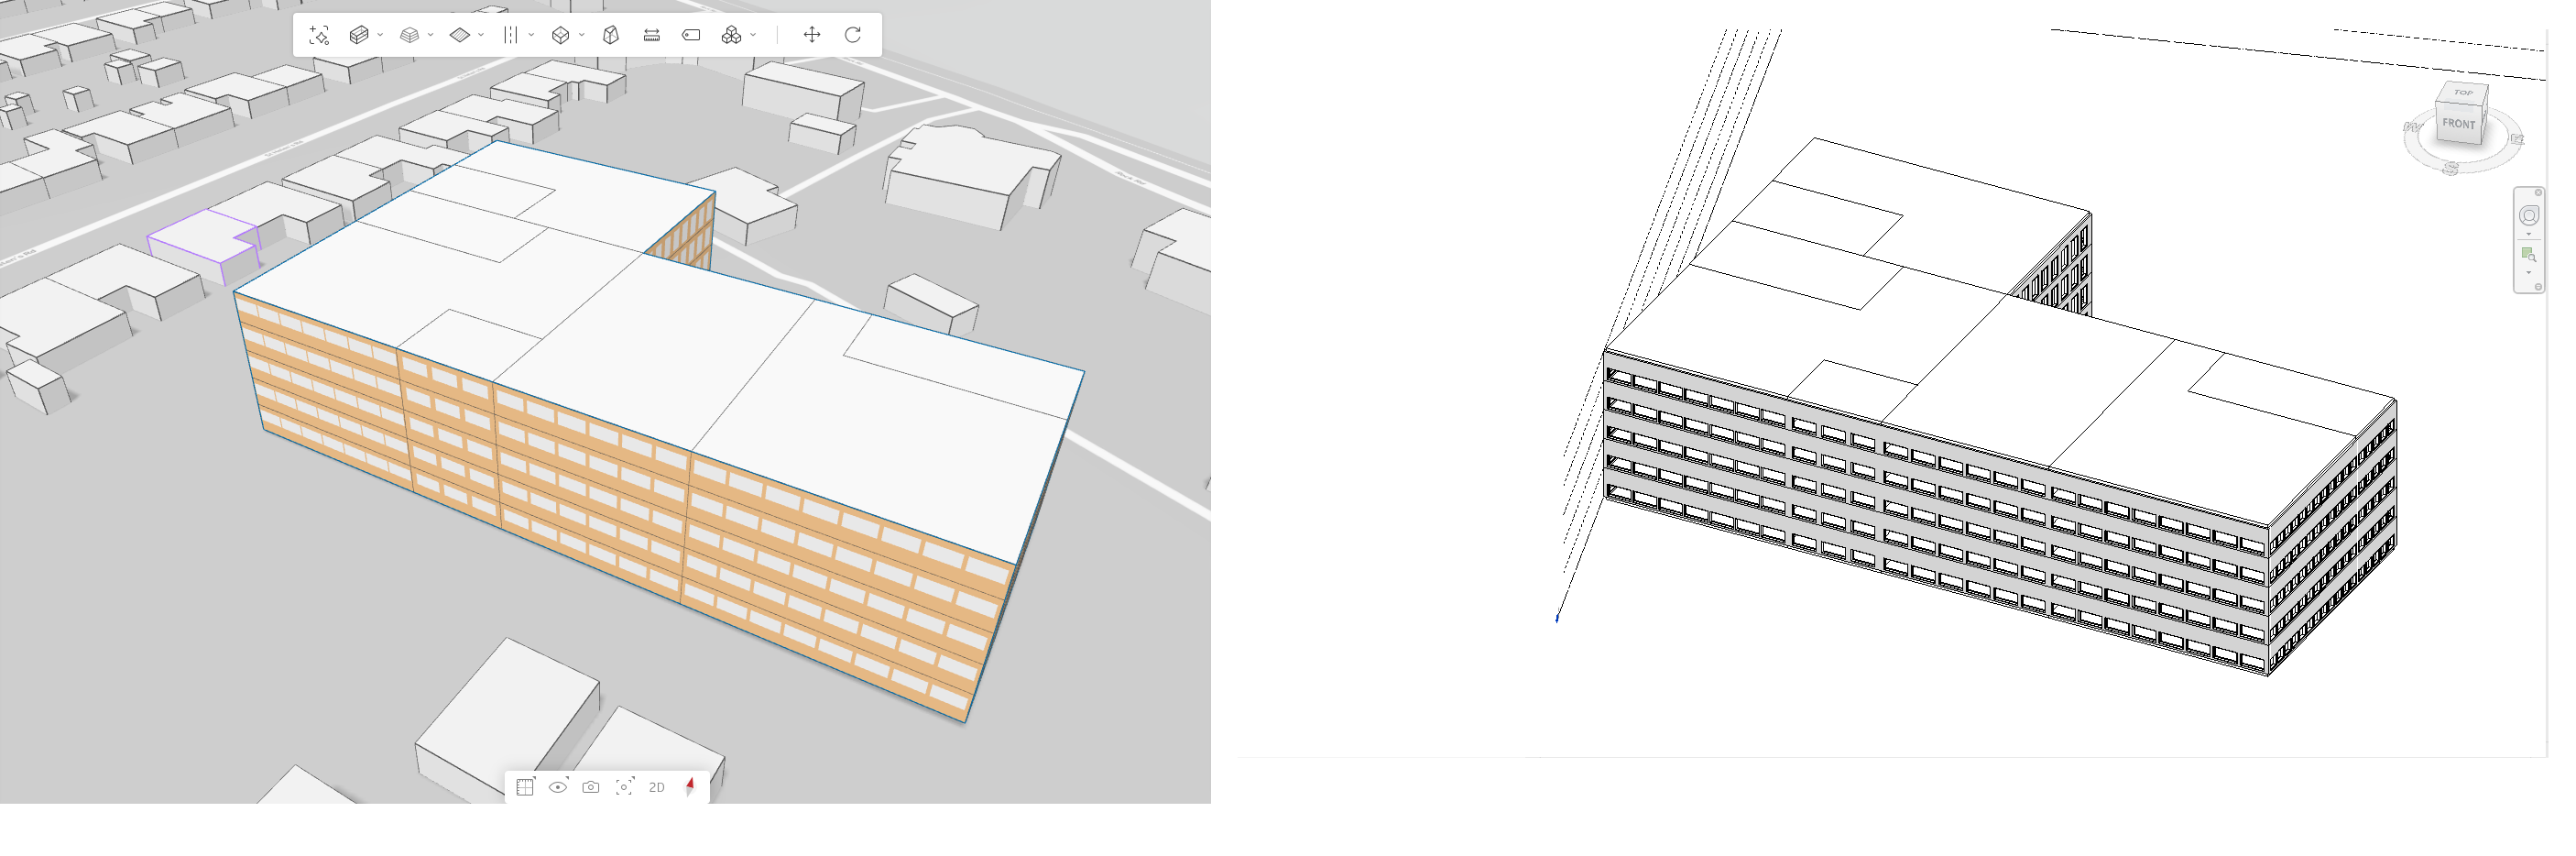
- First export your model from Autodesk Forma using the FenestraPro extension and the ‘Send to FenestraPro Connect’ feature.
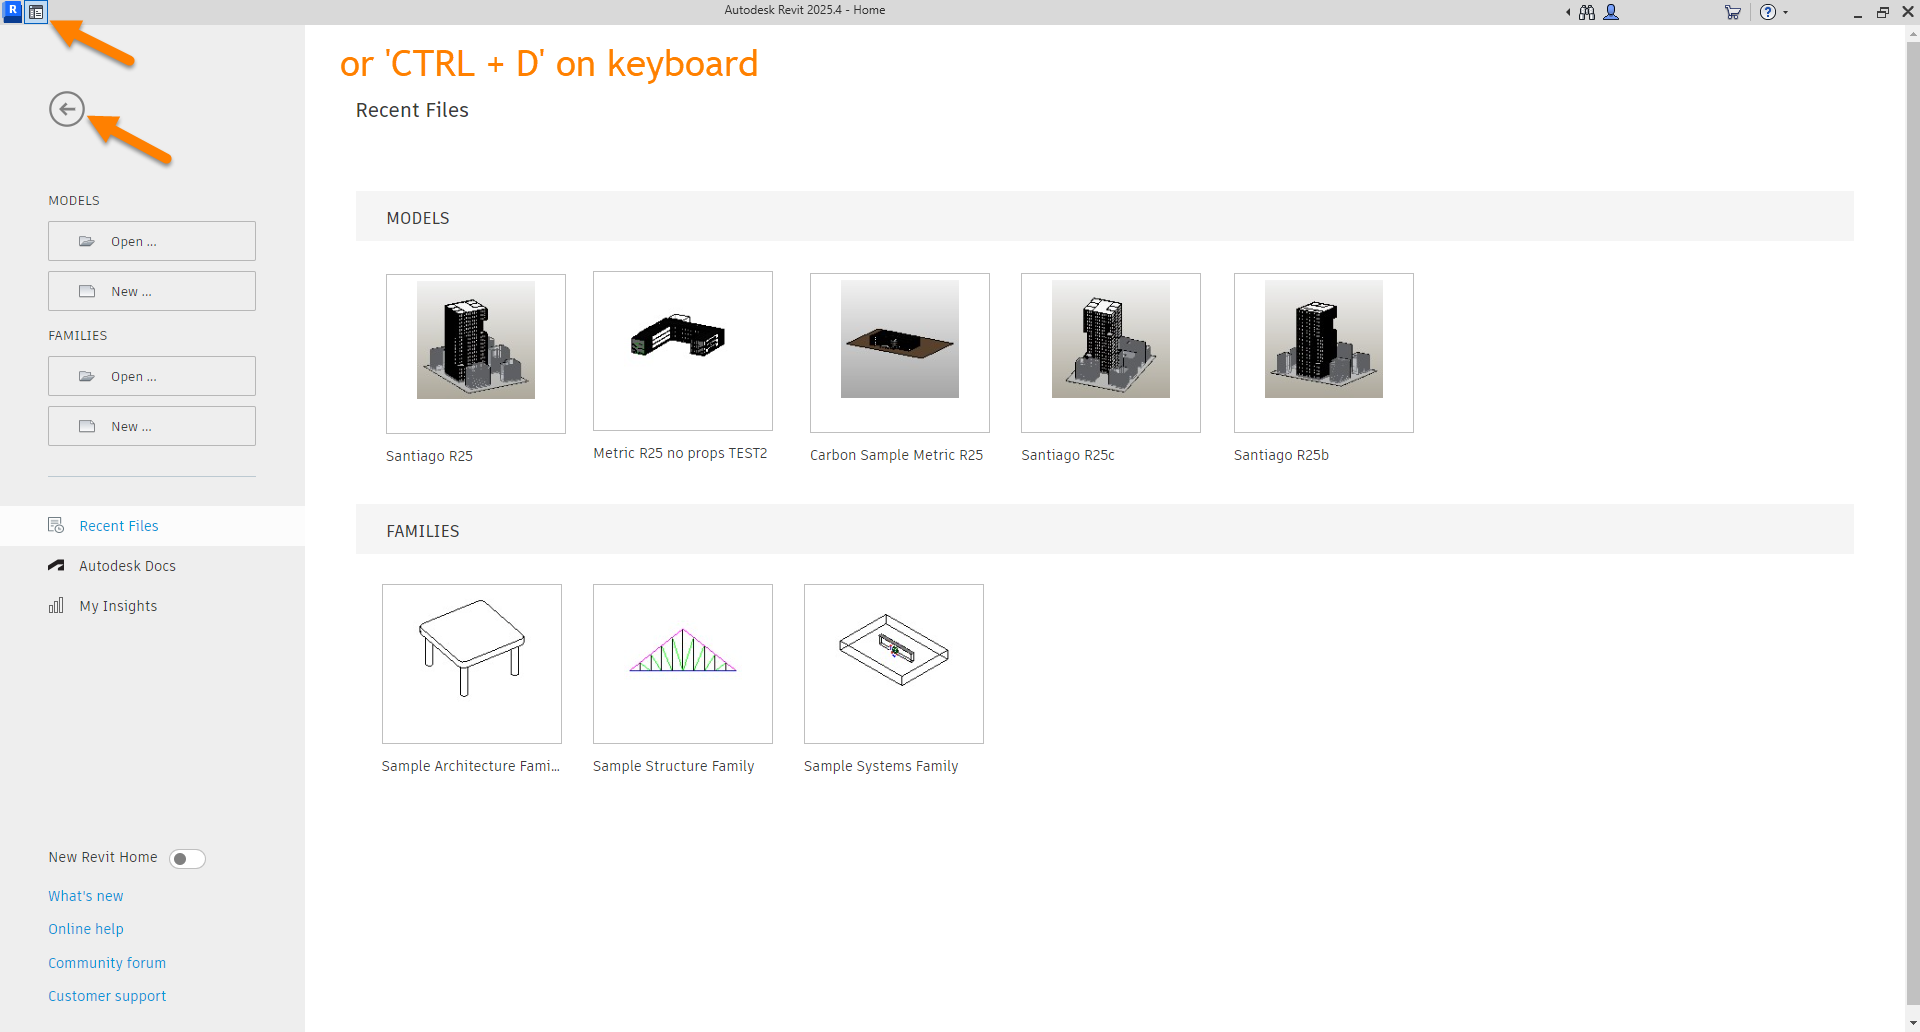
- In Revit, then open the Forma Connect tool under the FenestraPro menu. You can access this using the Back Arrow, CTRL + D on your keyboard or the Home button when reviewing recent files in Revit. You should be able to see the Revit menus (greyed out) but if you have FenestraPro for Revit installed and go to this menu, Forma Connect will be available. You should not have any active Revit model open (an advisory window will display if you have an active model open and try to import geometry from Forma).

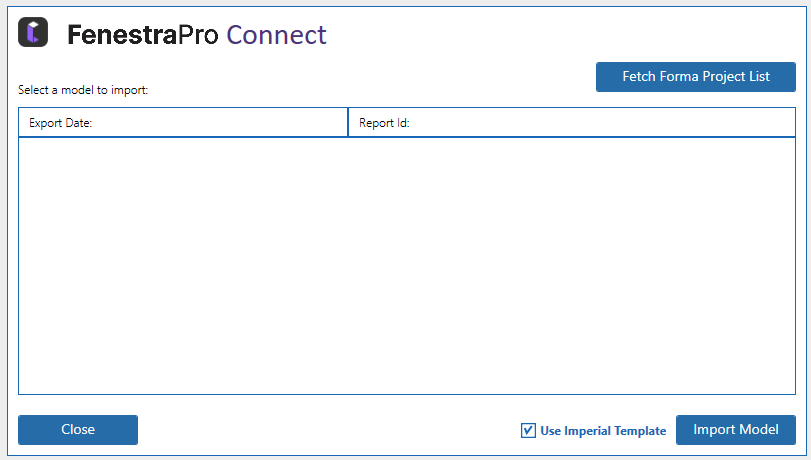
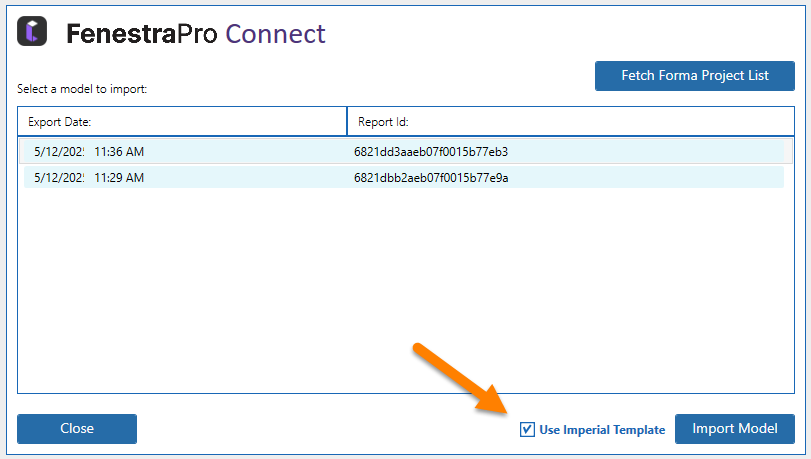
- A window will open with options. Click on the the Fetch Forma Project List button. If a model has been exported, it will display here (previous recent models will also display here).
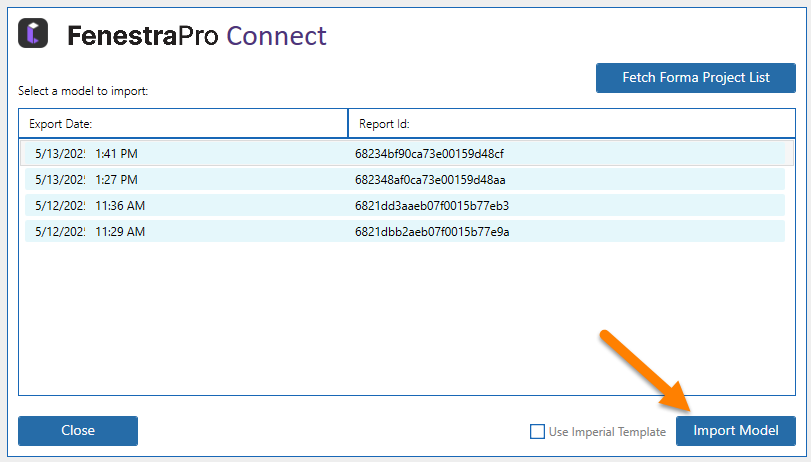
- Select the model (currently a timestamp and date is used to identify the project).
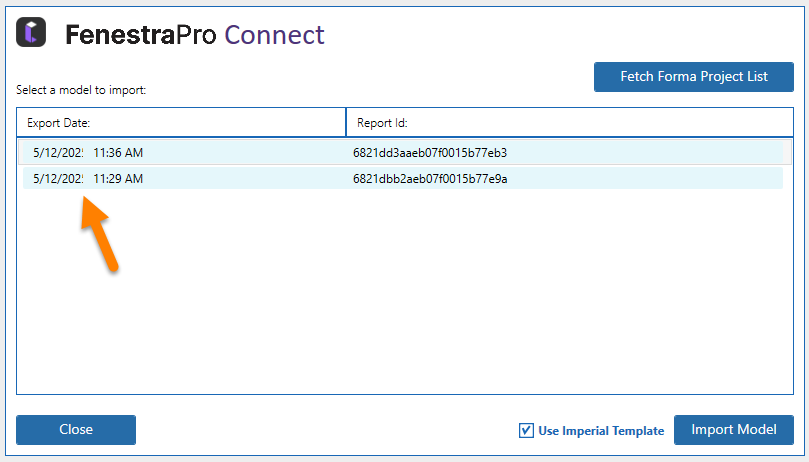
- If the model is imperial or you wish to use imperial units, leave the ‘Use Imperial Template‘ check box checked, otherwise uncheck this for metric models. By default, the imperial units option is checked when importing models.
- Then use the ‘Import Model‘ button to convert the model to Revit elements. The Forma model will be converted to detailed Revit elements with window configurations (if defined in Forma) and using the same construction types as defined in Forma. The project location is also preserved.
Forma geometry should be imported using the FenestraPro templates provided (these are used to manage your model automatically). The project can then be moved to your own in-house template later if required. Note: Care should be taken If moving a project to your own template, since only the active families in use in Revit will be transferred. If the model is purged, or if element families are swapped for other types, the original families used when importing the model may be lost.
Note: If you are opening any App in FenestraPro (such as Connect) the first time after installing, you may need to enter your license key and login first to use the tools.
Note: You will need to use the same email address when setting up licenses for both applications (Envelope Analysis for Forma and FenestraPro for Revit). This is necessary for the import to process correctly. If you already have a FenestraPro for Revit license, please contact us directly to discuss access to Forma (support@fenestrapro.com). If you have access to Forma and wish to discuss options for a FenestraPro for Revit license, please contact us also.
A FenestraPro template is used to import the geometry. This template has the same construction types as the default Forma values. Note: Bespoke Construction Types that are created in Forma cannot currently be replicated in Revit but these can be added manually to the project using ‘Type Properties’. This will be addressed in a future release.
It is possible that some elements may not always convert to detailed Revit elements due to complexity in Forma geometry e.g. Roofs. These elements may need to be modelled in Revit to complete the project.
If space separation lines are used in Forma as internal walls, these will tend to divide the roof and floor elements into parts in Revit so that these may require some adjustment or remodeling. Internal walls are not currently converted to Revit elements since the building envelope is the priority.
.
Shade Elements
If shade geometry has been added to the envelope in Forma, this may need to be removed before exporting to Revit as this can affect the conversion process. This issue is to be addressed soon. Surroundings and Terrain (or Base elements in Forma) are not currently exported with the model.
![]()
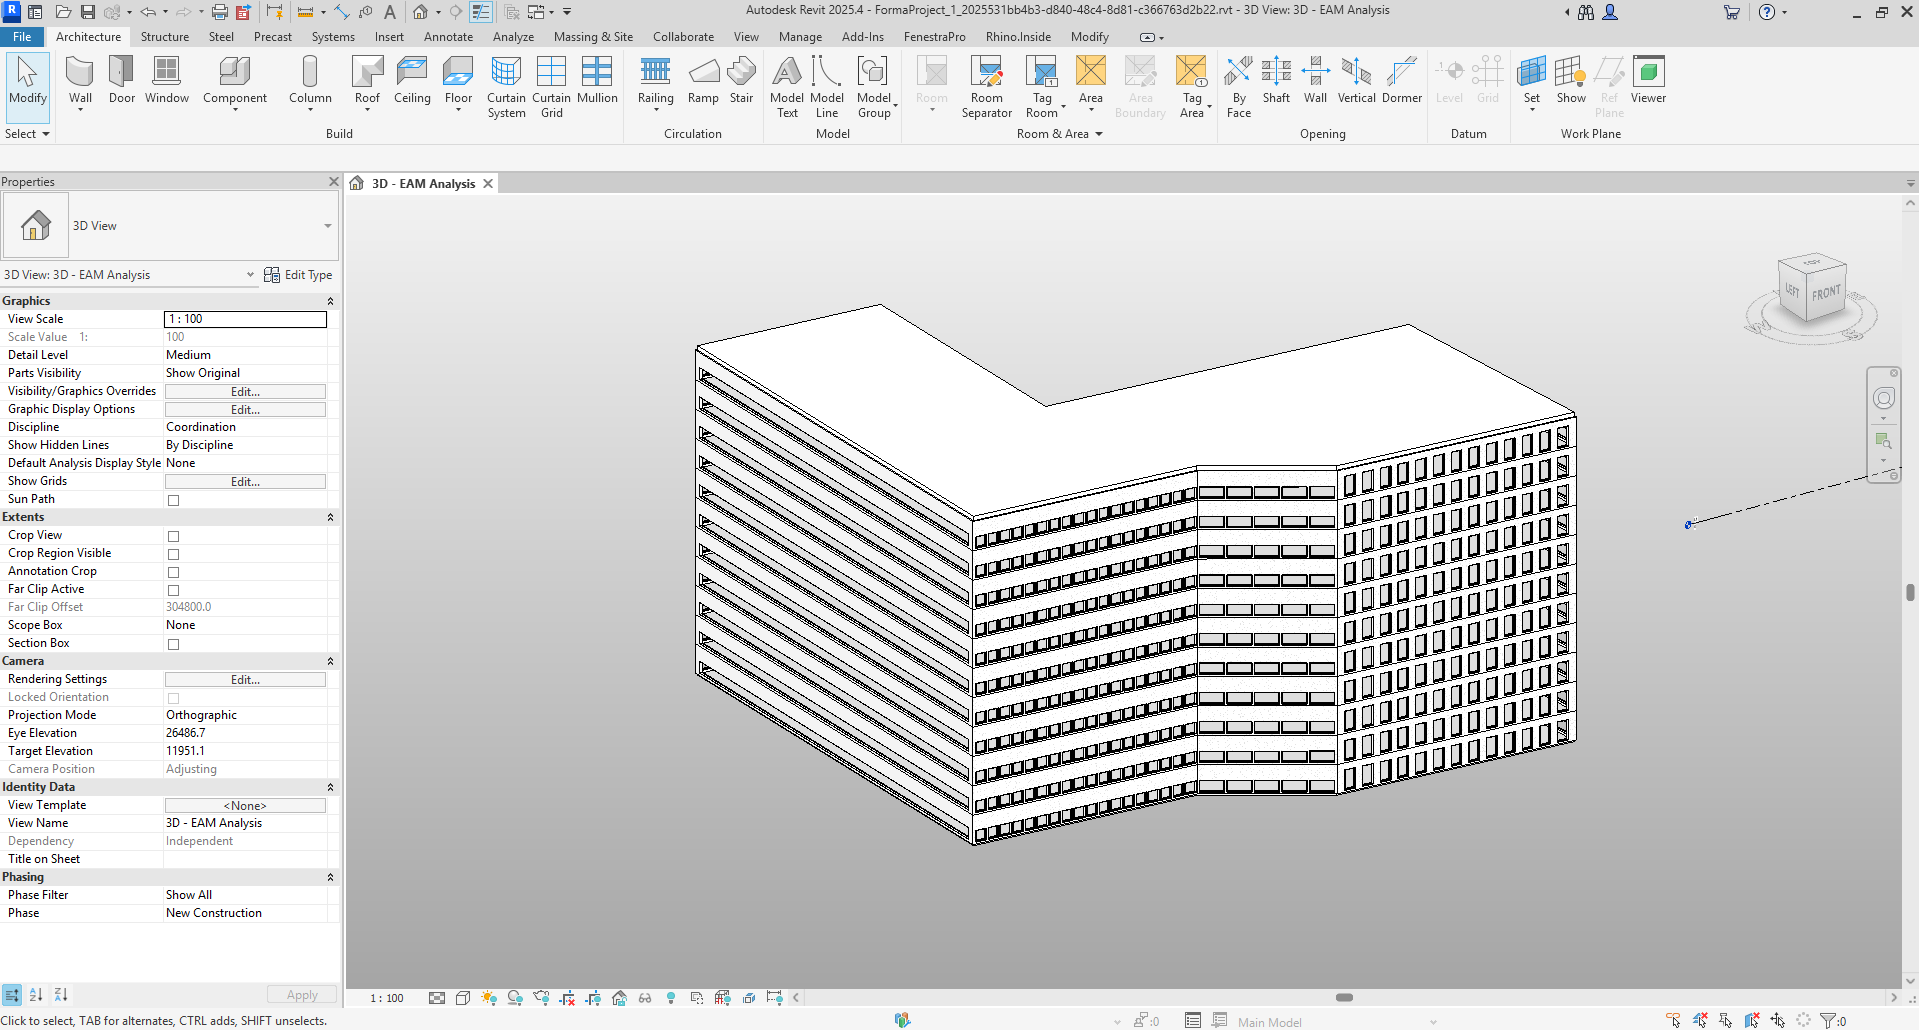
Model Adjustments
Some model preparation may also be required for certain joint conditions of mode elements or where element functions need to be modified (where internal floors become balconies or interior walls extend outside). This is part of the normal modelling workflow to improve model integrity when converting conceptual geometry to detailed elements. FenestraPro for Revit may be used to check for model issues and to help in generating a complete energy model from the geometry, particularly the EAM Check tool.
![]()
Moving the model to your own template file
Once the model has been converted and can be seen in Revit, it may be moved to your own template. Please note that only the currently active families in the model will transfer with the model to the new location. Other families in the default FenestraPro template will have to be recreated there if required. You may use several methods to transfer/copy the project to a new location (copy and paste, saving as a new file by creating a sheet view in Revit etc). Please note that when moving a model, the file size may be reduced and purged so that settings which have been defined may need to be recreated (site location, rooms, views etc).
Summary
- Export the model from Forma first using the ‘Send to FenestraPro Connect’ button.
- In Revit, use the Forma Connect feature to import the model (get the recent projects list and select one), set imperial option on/off if required.
- The model will be converted to detailed elements with the same construction types as defined in Forma.
Known Issues
- Where very small lines are modeled in Forma, this may cause an issue converting the model to Revit. This is currently being investigated and a solution is being reviewed for a future update.
- Shading devices on the Forma model need to be removed before sending the model to Revit as these will cause an issue in conversion.
- Internal walls or surrounding buildings are not currently transferred to Revit.
- It can happen that some geometry does not appear in Revit due to complexity or conversion issues – these may require completion/modelling in Revit. Please contact us if you have specific issues as we are can advise (support@fenestrapro.com)
- The Revit model may require some adjustments to fix issues (element functions, where there are multiple roofs etc. Please generate an Energy Model in Revit to check success. Then please review this page HERE on Model Preparation for guidelines on fixing typical issues.
