This feature is available for both the Concept and Detailed Tools.
This will create a set of Surfaces which are particularly relevant for your project and these will be saved for future sessions with this model. These Surfaces will be collected into a Group and may be later accessed for comparison purposes if modifications are made. In the Detailed Tool, expand the Groups area for more options.

From the expanded Groups area, select Add New Group. Note: Existing Groups may also be edited here by clicking on the pencil icon. This will only appear if a custom Group already exists.

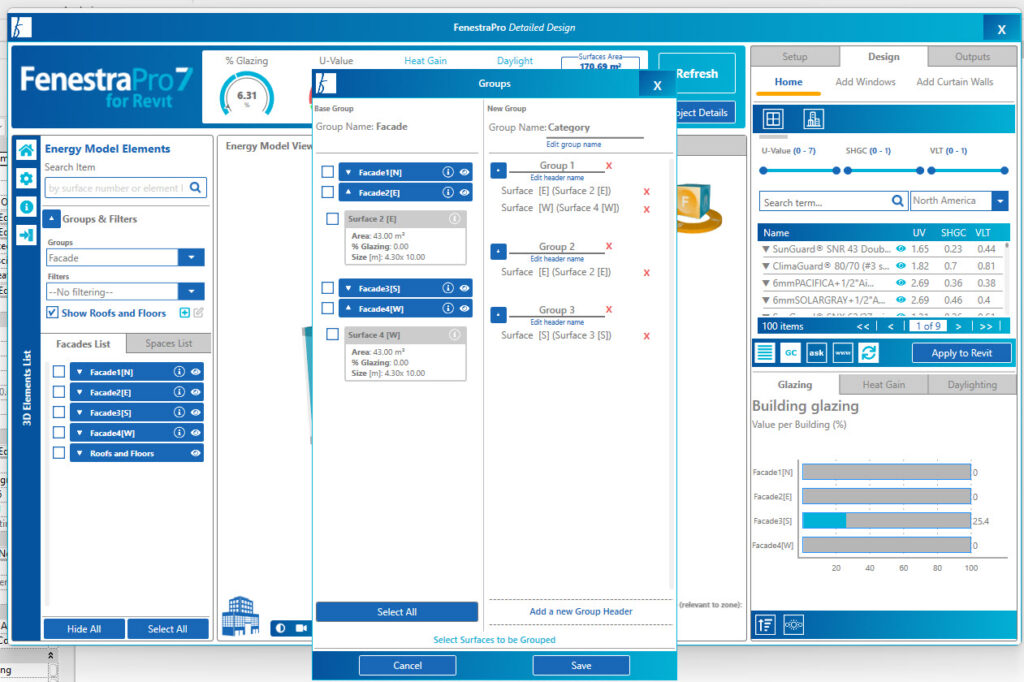
A new window will open with options to create a Group.

1. Input a name for your new Group category. Input a name here.
-
-

Enter a name for the Group category 2. Then click on ‘Add a new Group Header’ button. This will allow you to input a name for the Group itself.
Click on the Add a new Group Header button 3. Enter a name for the Group.

Enter a name for the Group 4. Then select Surfaces to include in your Group. These can be on any Facade (they do not all have to be on one orientation).

Select Surfaces from the list to include in your Group 5. Then, once selections have been made, a button will appear to add these selections to the Group.
-
-

Click on the button shown to Add selected Surfaces to your Group -
6. The selected Surfaces will appear in the custom Group list. You may always remove some Surfaces by clicking on the red X if required.
-
-
Surfaces appear in the custom Group list - 7. Click on Save to create this Group.
Save the custom Group -
Note: It is possible to create multiple Group Names under a category

-
8. A message will display to confirm. Click on OK to close this window.
-
-

Click OK to confirm and close this window 9. You may check if your custom Group has been added by using the dropdown list under the Groups area in the Facade Navigator. Selecting this Group in the list will highlight on the model in the Viewer. You may also rename the Group by right-clicking on the name in the list as normal.

Your new Group will appear in the list - To add further Groups under this Category, click on the pencil icon to edit and select Add a new Group Header again. Each time this button is clicked a new Group will be created. The pencil icon will appear only when you have selected this custom Group in the Facade Navigator. To return to viewing all Surfaces on the model again, click into Group by and choose Façade. You may also delete any custom Group that has been created by clicking on the red X beside the name when you are in the custom Group Editor.
- 10. To add additional Surfaces to a Custom Group, you may right-click on any Surface in the Facade Navigator list to get this option. The Groups panel will open and you may save the changes.

Add any Surface to a custom Group by right-clicking 11. If you try to add a Surface to a custom Group but no custom groups have been created, a message will advise.
Adding Surfaces when no custom Groups have been created yet - If no Custom Groups have been created, you will see a message display to advise. Click Ok to continue. Another dialog window will then display to prompt you to create a Group.


-
- If no Custom Groups have been created, you will see a message display to advise. Click Ok to continue. Another dialog window will then display to prompt you to create a Group.