This Section will explain the User interface for the Detailed tool…

When you click on the Detailed Tool on the Revit menu, the FenestraPro Splash Screen will open.


The Setup/On-boarding stage involves extracting the Revit model into the application, checking for model issue, assigning default glass properties if required, defining an Energy Code, checking compliance and getting results in the Building Manager.


In the next stage, select from a list of suggested Energy Codes (if available), or create a Code to check compliance with thermal properties of model elements. You may also continue with the default placeholder Energy Code and return later to adjust these settings.
Then Continue to the next stage.

In the next stage (Compliance), existing element thermal properties (U-values or R-values) in the model (if assigned) are compared to the target Energy Code values. If element thermal properties do not comply, you will see a red X display. Properties that do comply will have a green checkmark. You may use the Set button to override Revit elements for calculation purposes. This will assume that the Code values that were selected are intended to be used but you do not have to update element assemblies in Revit (materials, thicknesses, layers of components etc).
Revit elements are not changed by the application, only the Code values will be used to advise on compliance and produce an overall Facade Performance result on the Dashboard. You may always return to this area later to adjust element values. For the moment, you can Continue to the final stage (the Building Manager). Note: there must be some value in each element category box (Roof/Floor/Walls/Glazing) before you can continue forward.

In the last on-boarding stage, you can define settings for the project (location type (urban,rural etc), terrain type (city,valley etc) as well as occupancy hours and dates.
If there are significant shading effects from surrounding buildings (modeled as mass objects), self shading or shading devices, then check that ‘Calculate Shading‘ is turned on. This will produce additional shading results and reduce the Heat Gain results for certain spaces. Click on the Download Solar Data button when ready and wait for results tot complete (this may take several minutes depending on the complexity of the model).

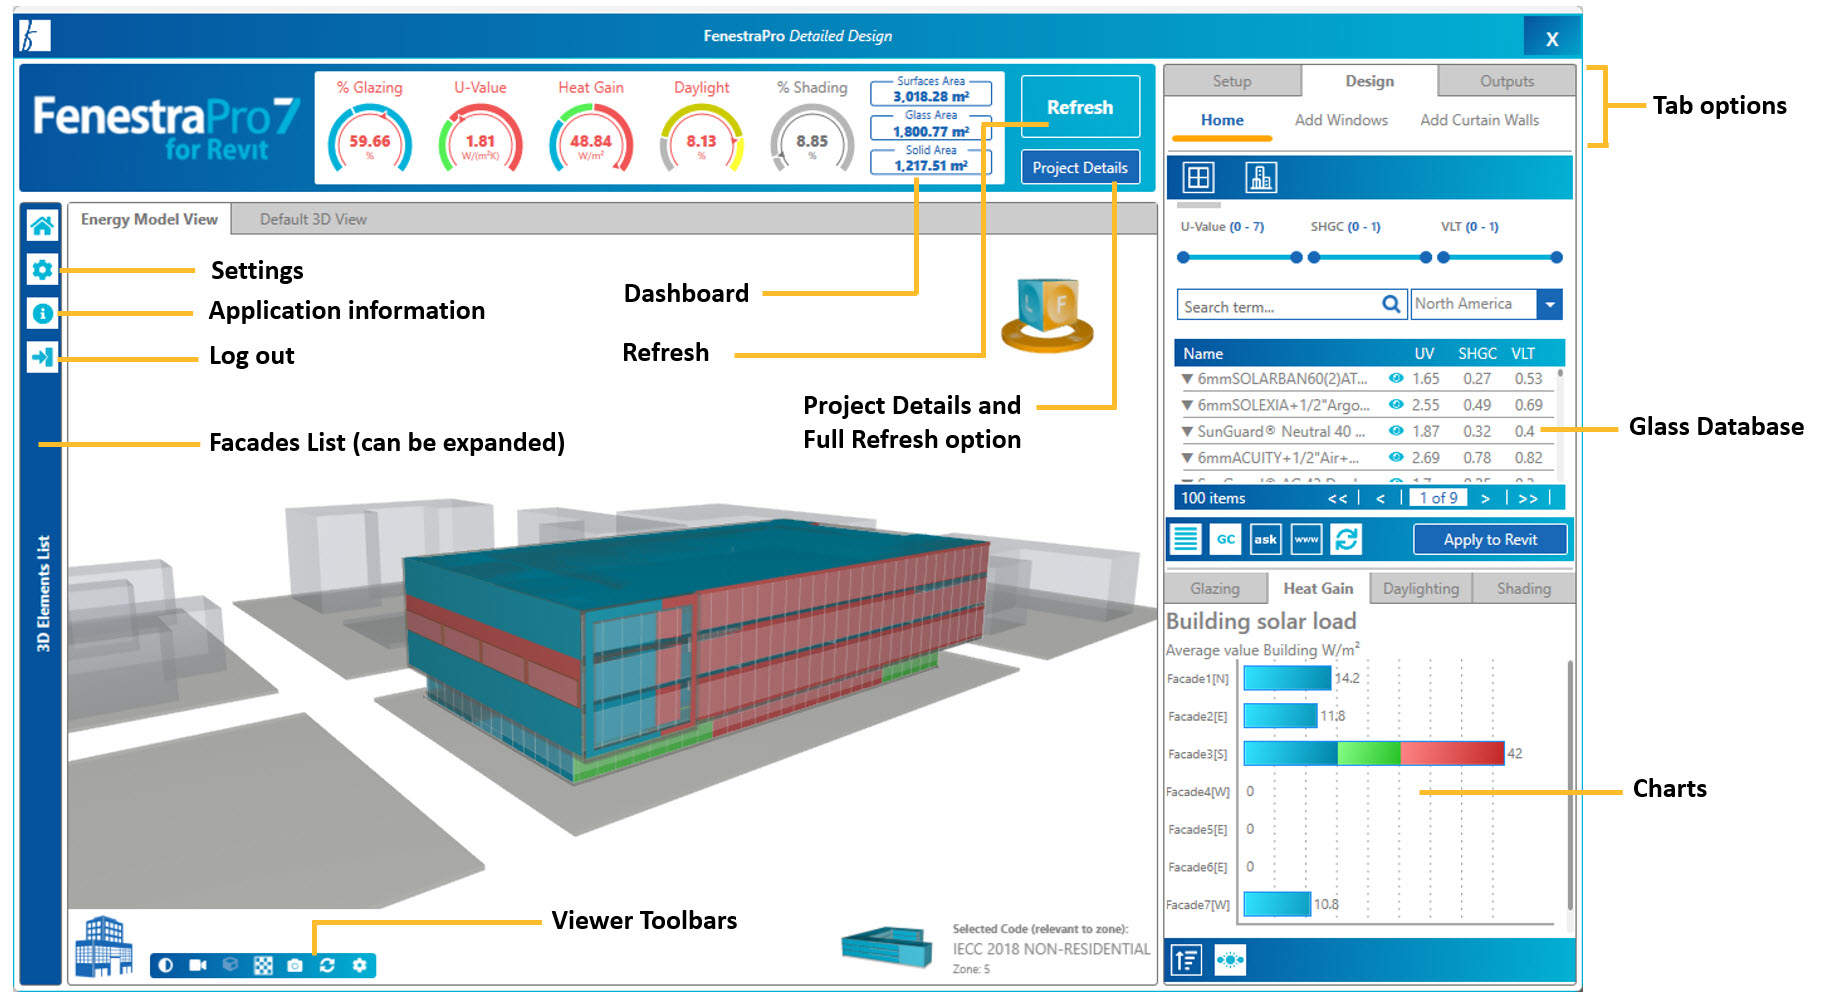
When this is complete, a confirmation message will display – click OK and then click on the Let’s Start button to move into the main window of the application. Here you can swap out glass types in Revit that will affect Heat Gain and Daylight results, generate glazing on the model based on performance targets, review areas that are over-heating, produce reports of results and element properties etc


In the Facade Manager, there is a Model Viewer, Charts, Glass Database and Facades List (to make selections and review details). This is covered in more detail under Detailed Revit Models – Facade Manager.