To review guidance for the Revit 2025 version, please scroll to the bottom of the page HERE
Version for Revit 2024/2023
In this area, you can audit the model for issues, as well as visualize and review how to improve the model condition.
If glazing elements do not have properties, this will be flagged in red font and the Assign Glass button will appear. Click on this to ‘fix’ this issue. This was covered in the previous article Section 7.0.1.1
Once Assign Glass is done, you may advance to the Model Check function. This is recommended the first time you load your project to ensure that model integrity is good. It is an optional stage if you are confident that the model is in good condition, you may continue to the next step (Element Performance and Compliance).
Model Check
A list of warnings may appear here if there are issues in the model. Warnings can advise when:
- Elements are not Room Bounding
- Elements do not have thermal properties
- Elements overlap
- There are Energy warnings in Revit etc

Click on the Model Check button to start the wizard and go step by step to visually check for issues. This is a preliminary check for elements present in the model. Checking if Analytical Surfaces and Spaces exist in the model and if they are complete (all areas of the model are covered or if some are missing) will help to understand if some areas are not getting results. Walls with ‘Exterior’ function in Revit should be used externally (not for internal walls), walls with ‘Interior’ functions should only be used internally. Where walls begin externally and continue internally, there should be a break at the boundary and separate walls with different functions used. All walls with external functions are read and will contribute to results, therefore internal walls should typically not be included.
You may also check if Roofs have been modeled as Floors (they should be modeled as Roof families). It is good practice to check from under the building also, eg. ceilings should not be used as external soffits (for overhanging roofs etc), and all gaps should should be closed. If floors are missing (the application will only use thermal properties of the Ground Floor later for compliance). Balcony Floors should have ‘external’ functions in Revit and separating external balcony walls should not continue inside the building (make a break and use separate ‘interior’ walls). Generally building elements should be set to ‘Room Bounding’ in Revit (Properties Palette) so that Energy Spaces have correct boundaries. In some cases, you may wish to turn off the ‘Room Bounding’ setting (eg. for structural columns, to ignore certain elements etc).
Each step will highlight relevant elements in the Model Viewer:
Check Analytical Surfaces. This will display all energy surfaces on the model. If some are missing, the model may need attention.

Check Analytical Spaces. This will display all energy spaces in the model. These are randomly colored boxes and it will be obvious if any are missing and the model may need attention.
Check Exterior Walls. This will display all the walls set to ‘Exterior’ function in Revit (Type Properties). There should typically not be any internal walls included.

Check Interior Walls. This will display all walls set to ‘interior’ function in Revit (Type Properties). There typically should not be any external walls included.

Check Roofs. This will display all Roof elements in the model. If some are expected to display but do not, they may have been modeled as Floors. These should be checked in Revit and corrected if required.

Check Floors. This will display all Floor elements in the model (both interior and exterior function). They should line up with levels set in Revit
 .
.
Check Room Boundaries. This will display all elements that are set to ‘Room Bounding‘ in Revit. Elements that do not have this setting will not be included. Elements that do not have this setting will also be listed under warnings.

Check Levels. This will display all Levels set in Revit. Floors and Roofs should generally align with levels so that Energy Surfaces and Spaces are assigned correctly.


Automatic Test
You may also run a Test if you wish to check the model integrity. This will produce a list of outstanding warnings. Family Types in Revit without analytical properties will be listed (not each instance).


Warnings are color coded. Red warnings indicate issues which may have a significant impact on the results eg. No Analytical spaces (the Energy Model did not generate in Revit) or No Analytical Properties for Glazing.
Yellow warnings relate to missing Thermal Properties for non-glazed envelope elements (Roofs, Floors, Walls). Checks are done for the Energy Mode set in Revit and Phase setting. Energy warnings from Revit are filtered into the most relevant for energy analysis.
Hovering over or clicking on an item in the Warnings List will highlight the element in the Model Viewer to identify the location and assist in resolving issues in Revit. The application can resolve missing glazing properties (See the previous Section on Assign Glass) and override thermal properties for Roofs, Floors and Walls when missing. Currently, other issues are not fixed by the application but this may be expanded in a future version. Changing element functions automatically is not simple as it may affect other elements in the Revit model and fixing Room Bounding conditions cannot take into account user intentions.
Note: If model conditions are resolved or modified in Revit, you must relaunch the application to update to the current model condition (there is no Refresh/Update button provided at this stage). You may close the application and relaunch if any modifications ned to be made in Revit (Room Bounding settings, element functions, remodeling a Floor as a Roof element etc). Any default glass that was assigned will be remembered on relaunch and you will not have to repeat this. If you quit the application before onboarding is complete, you will need to start from the beginning (Model Check – Define a Code – Check compliance – Get Results). You will also need to save the model in Revit to retain any changes, since closing the Revit model will lose any recent changes and the model will revert to the previous condition.


Revit 2025 Version
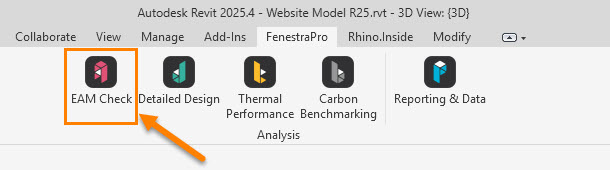
In the Revit 2025 version of FenestraPro for Revit, the Model Checking has been separated from the main application and is now called the EAM Check (Energy Analytical Model).
This separate tool provides an opportunity to audit your model for issues before analyzing it with the Detailed Application. This will ensure a a more streamlined set up in the main application if you have already checked your model previously or you are confident that you can move ahead to analysis.
Note: If an Energy Model cannot be generated in Revit, a message will display to advise. You should then check model issues in Revit to ensure that an Energy Model does generate (even if incomplete). Please consult the guidelines HERE and on the following page HERE for advice on why an energy model may not generate. Typical issues may include gaps in the model, non-room bounding elements, elements with incorrect functions, imported (non-Revit) geometry etc
EAM Check (Revit 2025 version)
To open the Model Checking tool, click on EAM Check on the Revit menu. This will open an auditing wizard for checking your model for issues before proceeding with energy analysis in the Detailed Design tool. You can also elect to fix some of these issues which will help to improve the model when it comes to Revit attempting to generate energy surfaces and spaces.
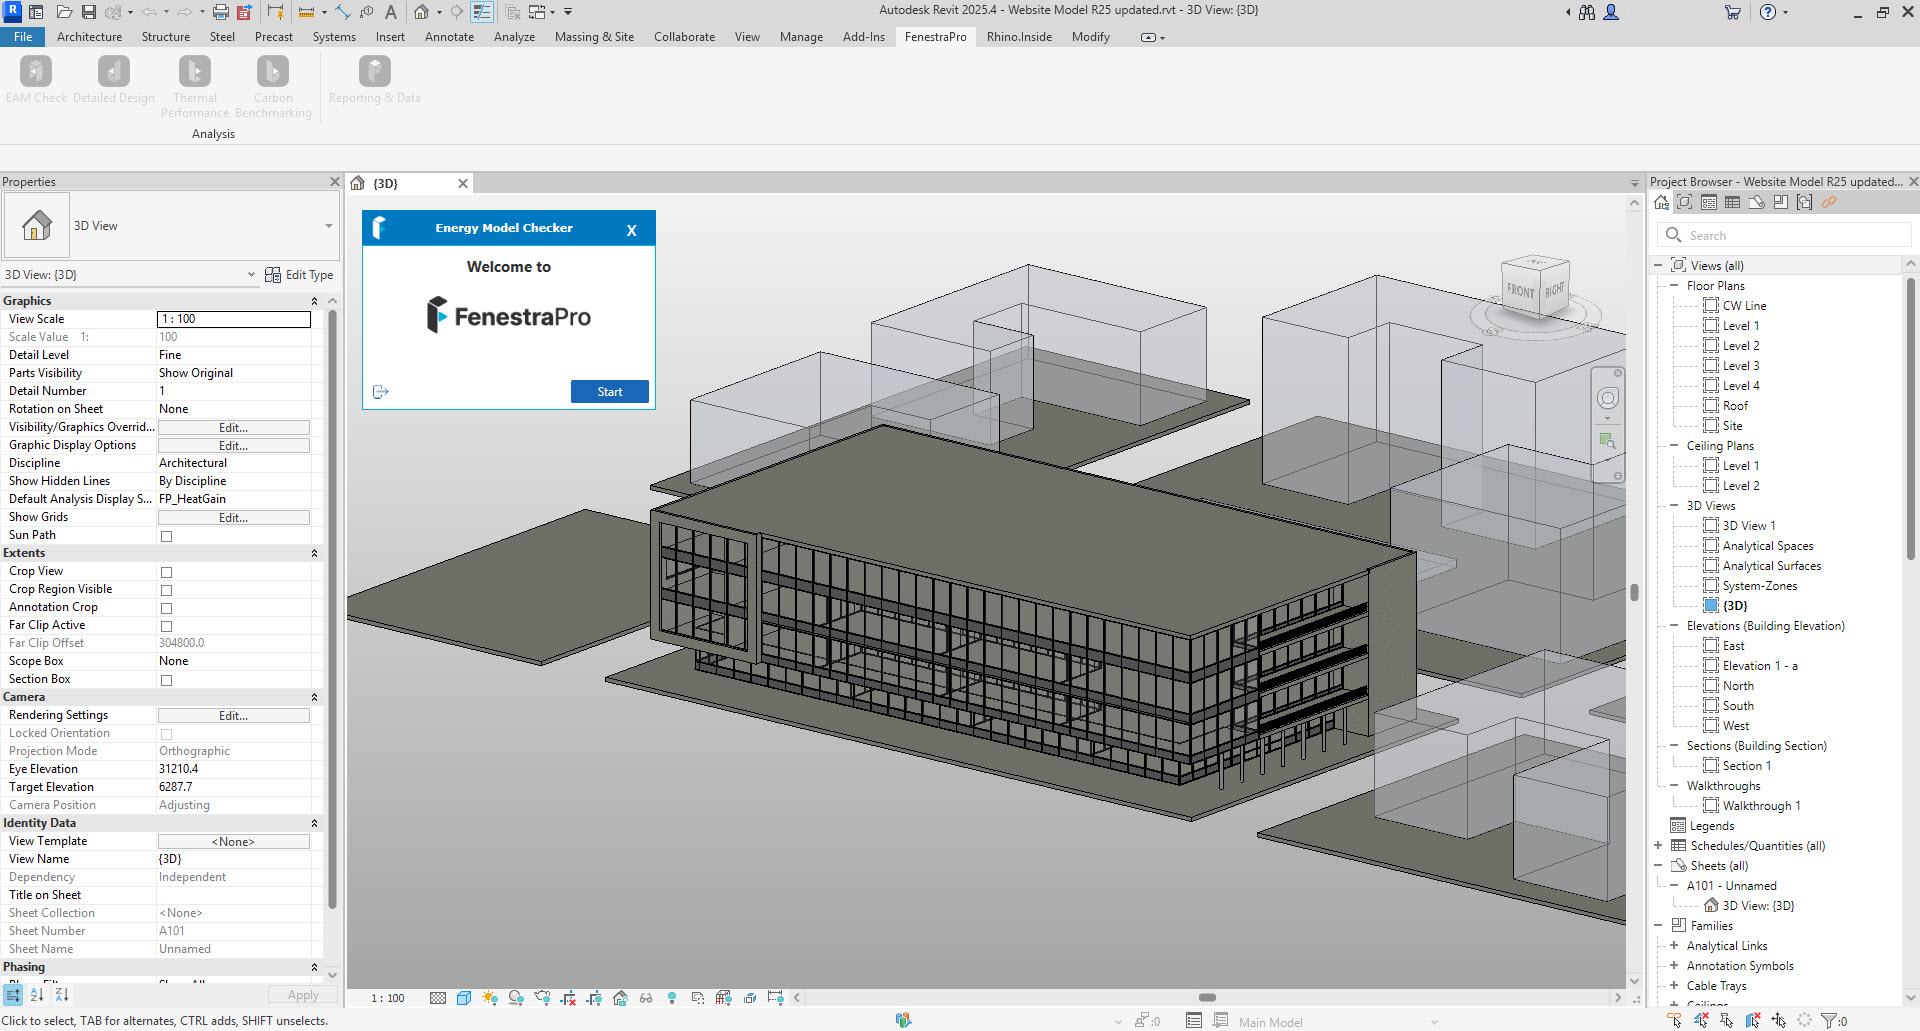
A window will then open to start the tool. Click on Start to continue.
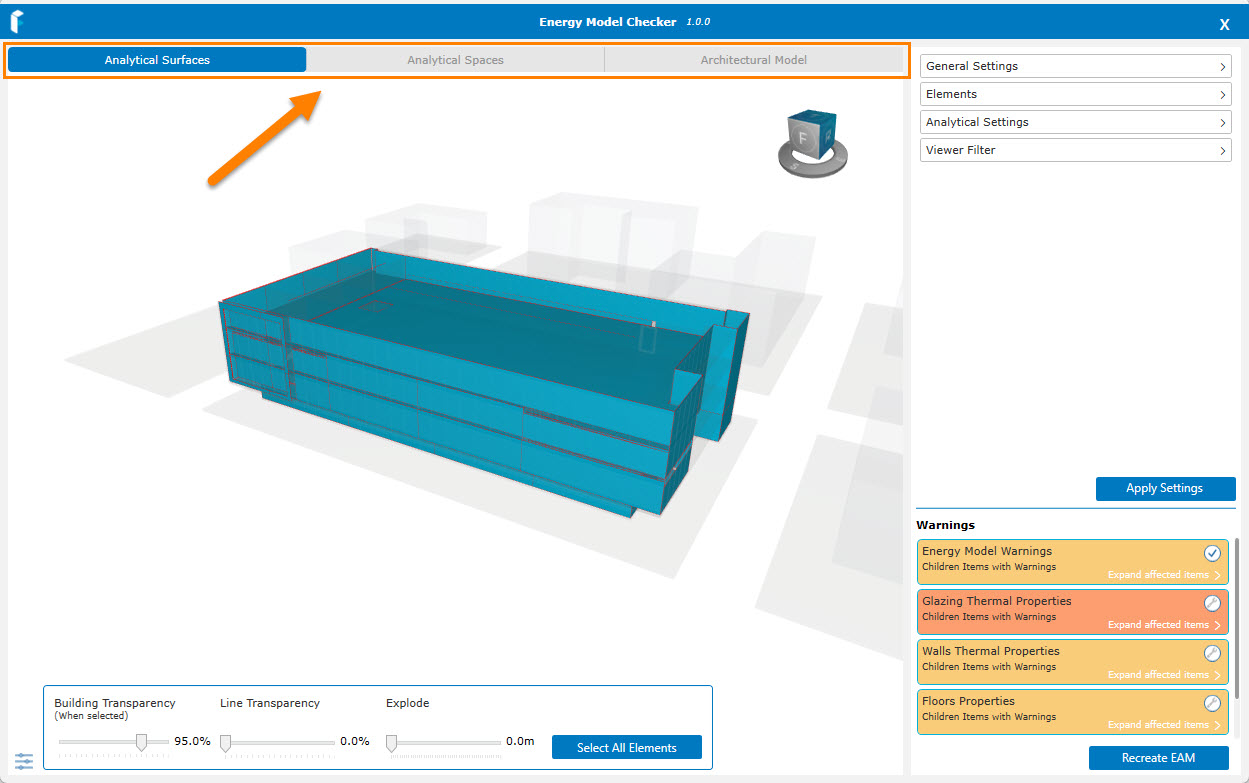
This Tool has 3 Viewer options (tabs across the top):
- Analytical Surfaces (review energy surfaces on the model)
- Analytical Spaces (review energy spaces in the model)
- Architectural Model (review model elements)
These options allow you to review if the model has generated all analytical surfaces or spaces or if some appear to be missing. These views also list warnings and you may expand the lists to view individual items, highlight the element in the viewer and resolve issues. The viewer also has controls to adjust the building, line transparency or to explode the model elements by adjusting the sliders provided.
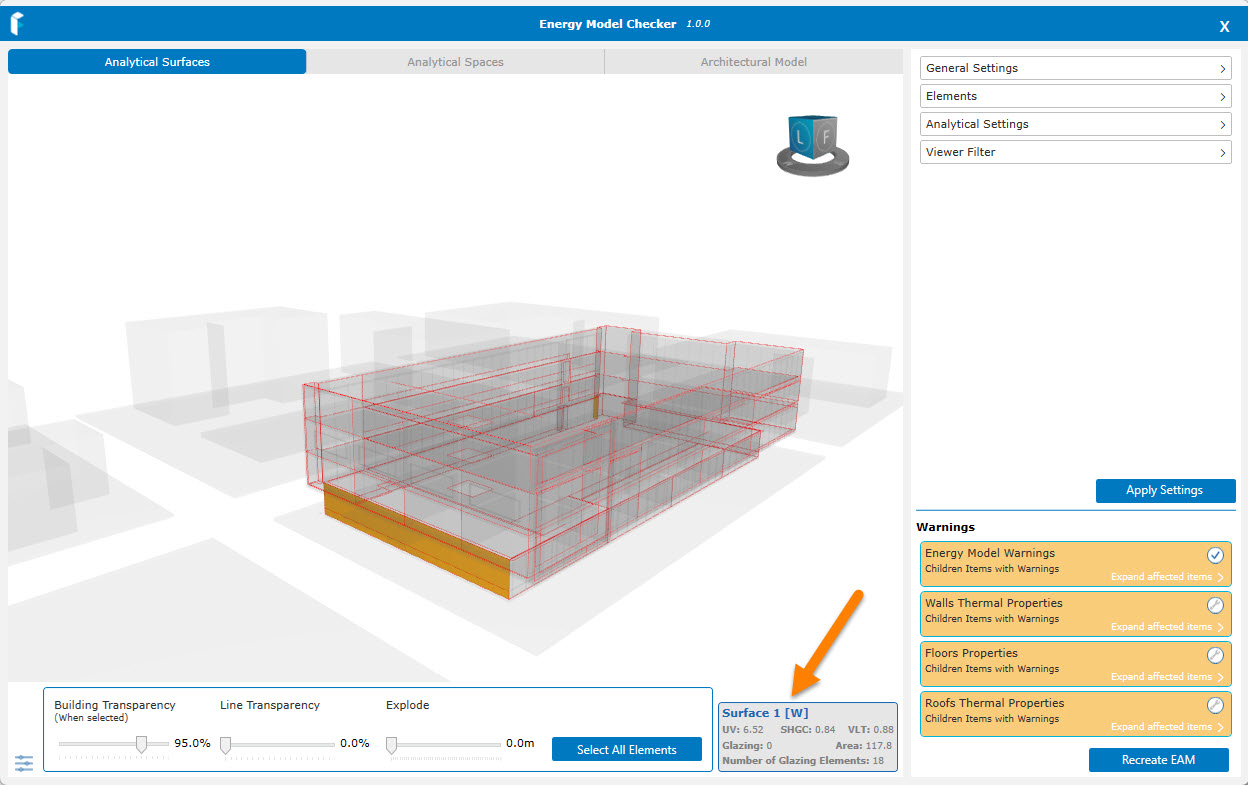
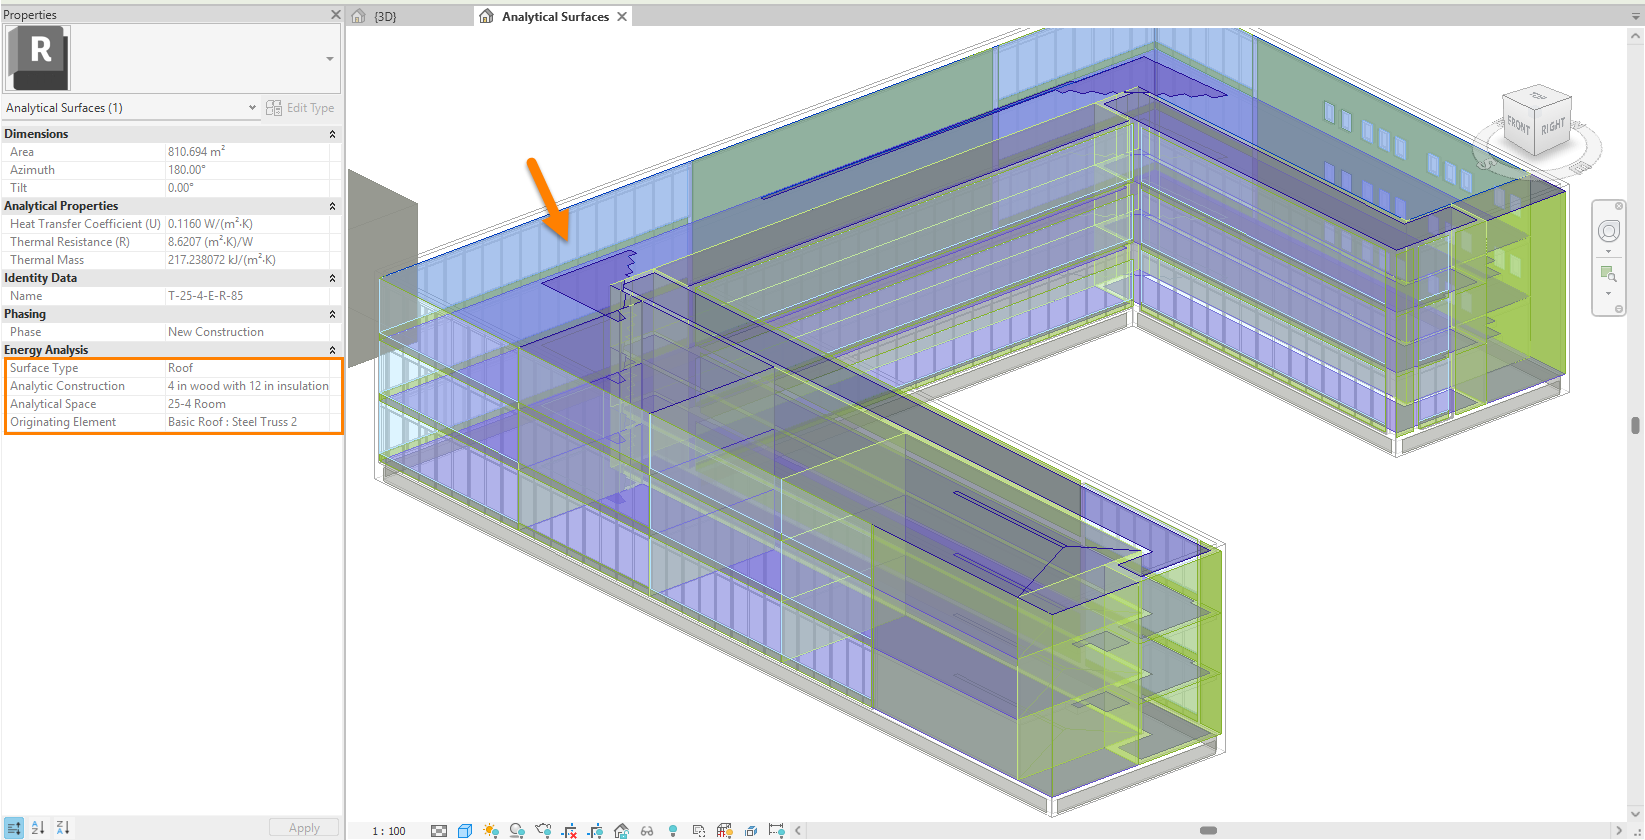
Analytical Surfaces
This first view tab provides a view of the energy surfaces on the model. You may hover over a surface to review properties (thermal properties, area, glazing properties etc). A small panel will appear with values to advise if properties are present. You may click on surfaces one at a time to select multiple areas and review average properties.
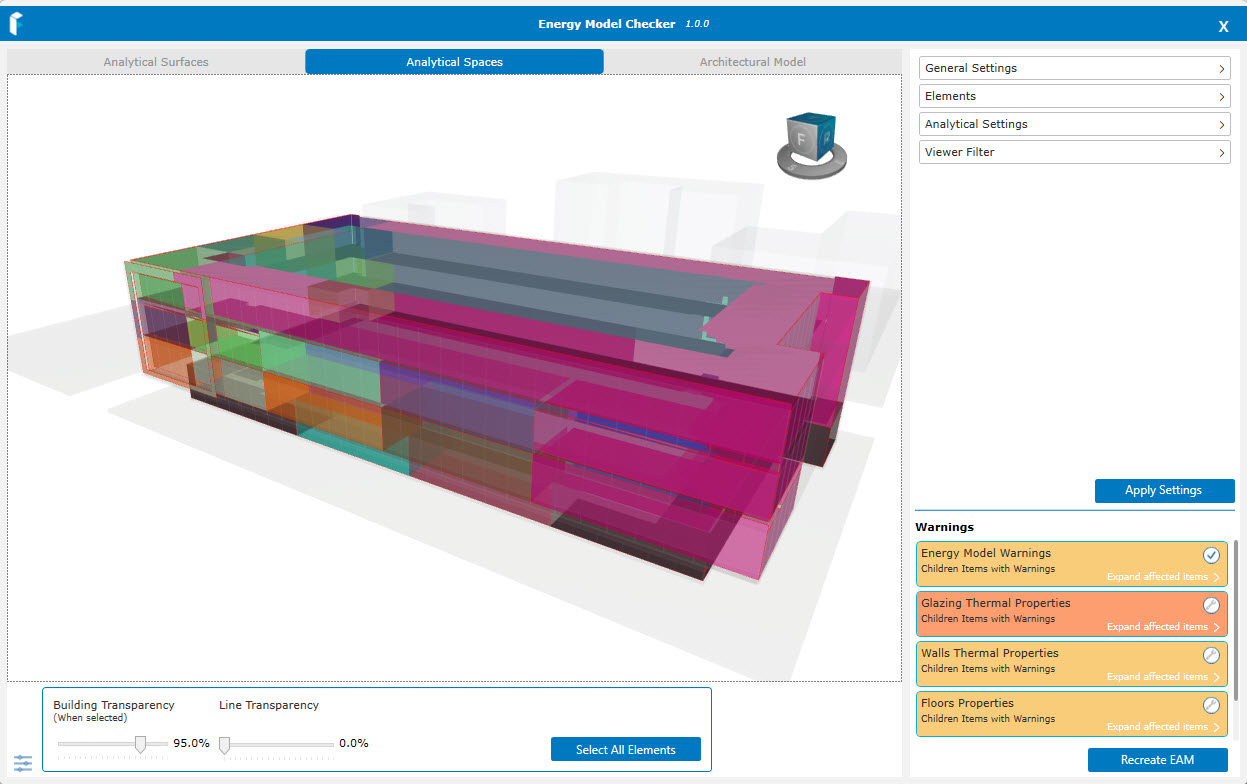
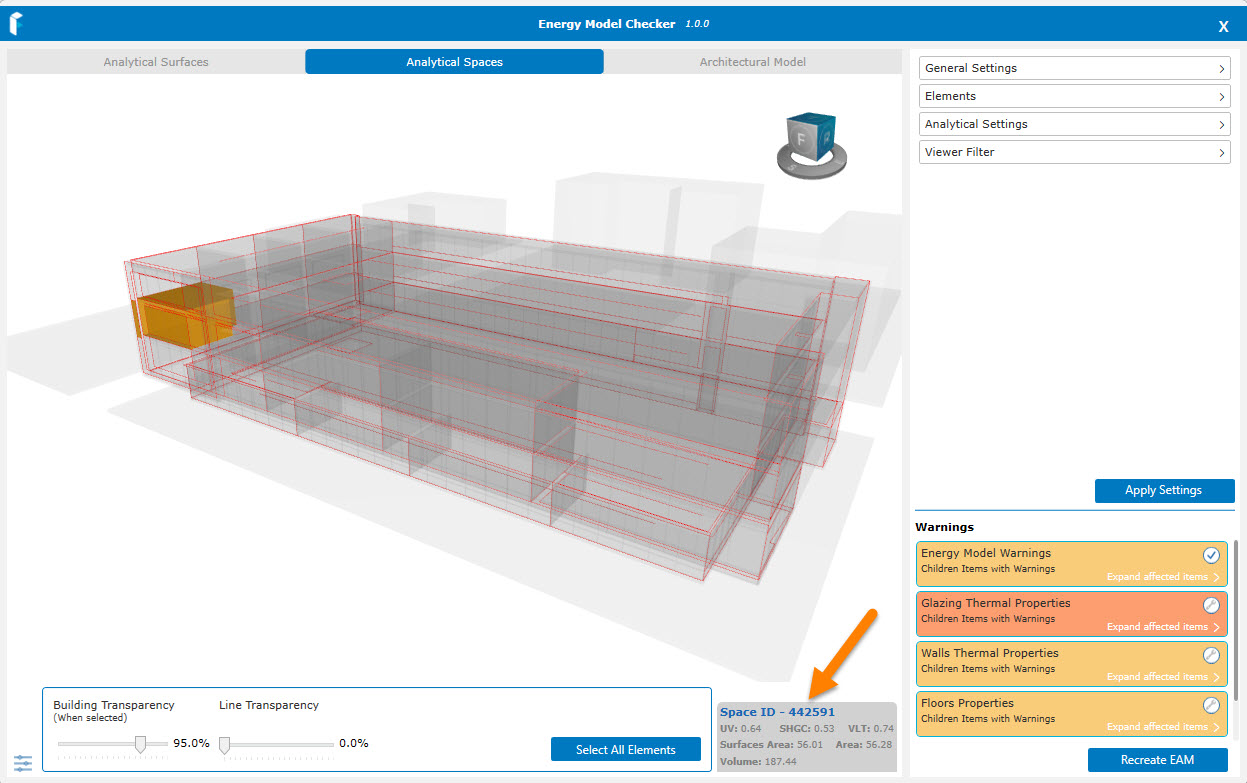
Analytical Spaces
This second view tab provides a visualization of the energy spaces in the model and associated properties. Hovering over a selected space will give guidance on the associated properties of elements connected to that space.
Under the Analytical Surfaces or Analytical Spaces views, elements may be highlighted under the General Settings area – Elements by hovering over the eye icon. Interior or Exterior walls may be reviewed for example.
Architectural Model
This tab provides a review of model elements. You may expand the lists to review warnings where elements may overlap or have missing properties etc. An orange triangle will display for issues. You may also select individual or multiple elements or the group and turn off visibility in the Viewer if required. Hovering over a warning symbol will reveal a message about that element. There are also options to search by name or element id. The eye icon will allow you to turn off element visibility in the application Viewer.
Functions of elements may also be reviewed here under the Architectural Model tab by making selections (check boxes) and these elements will highlight in the Viewer. Warnings will also appear here if issues are suspected (no thermal properties/elements are non-room bounding etc).
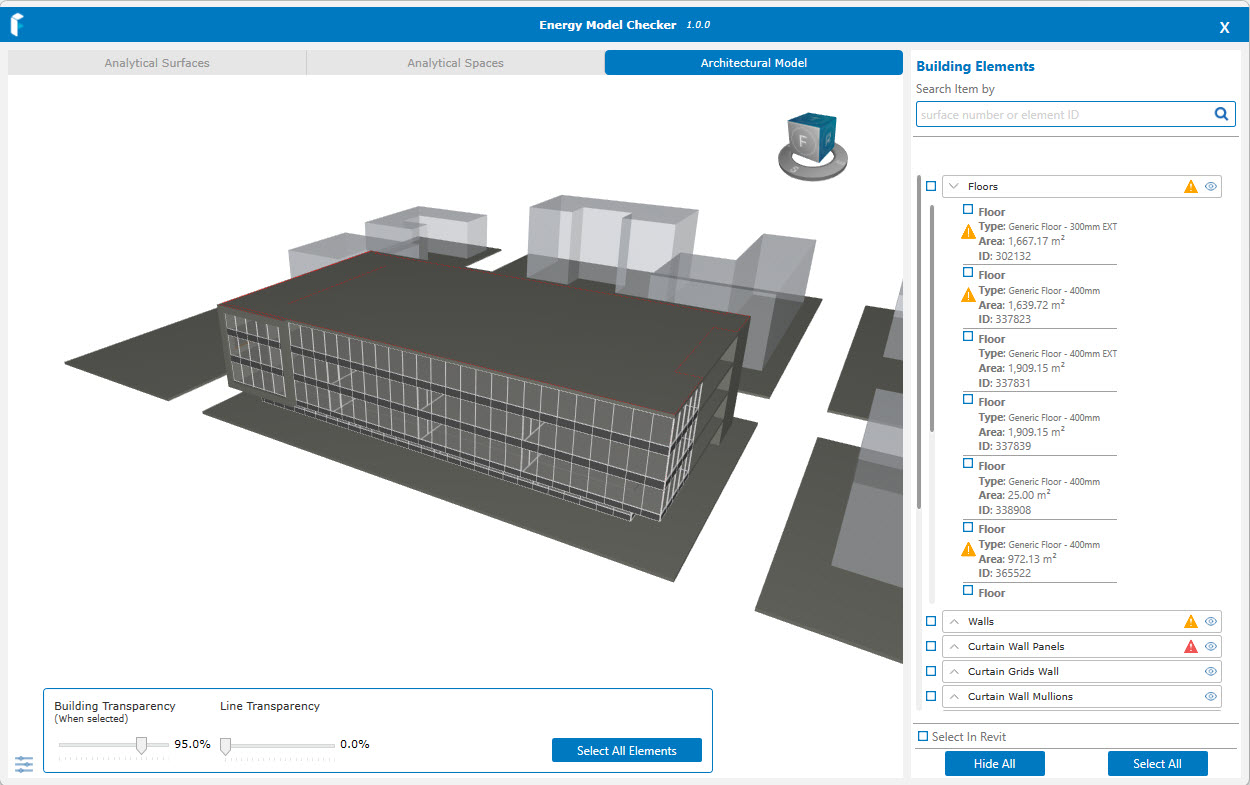

You may also search by element ID if this is known (this is the Revit ID for the same element)

Under the first two Viewer tabs (Analytical Surfaces or Spaces), there are further options to review Revit settings and to adjust if necessary.
Settings in Revit
The application lists the relevant Energy Model settings which may be modified using the application and the Revit settings will then update.
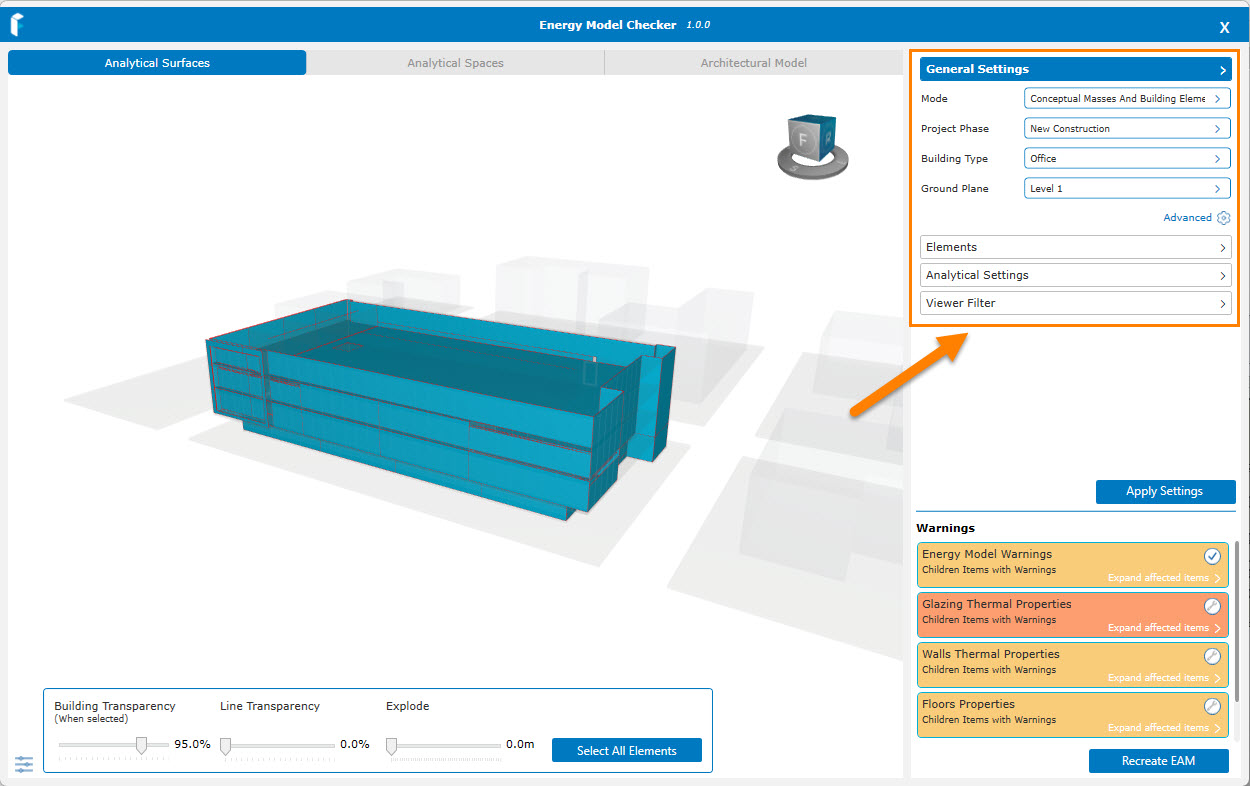
These settings include: General Settings, Elements and Analytical Settings.
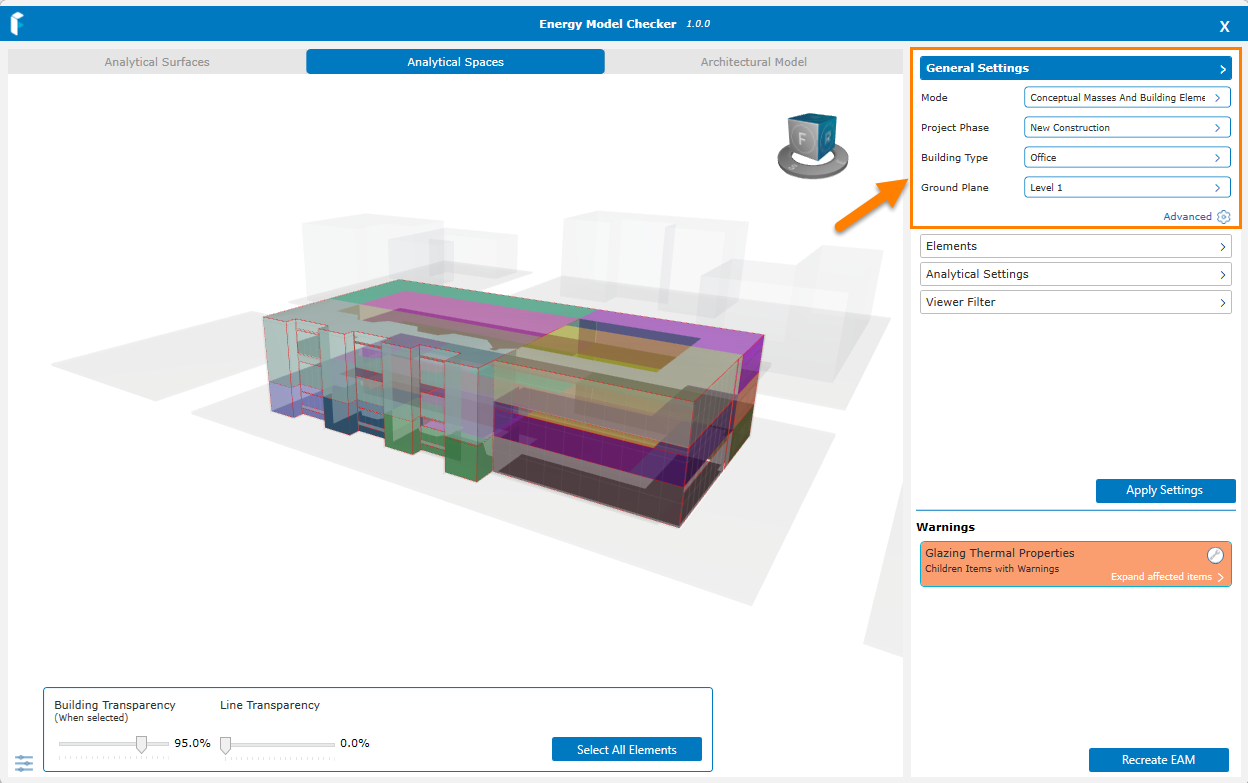
General Settings (Mode, Project Phase, Building Type, Ground Plane)
These can be adjusted if necessary to suit the model. For example, the Ground Plane should be set to the appropriate level where analysis will begin. If this set to a level above what is expected, some areas may not receive energy surfaces or spaces. The Phase should contain the model elements for analysis (setting to another phase may hide some elements).
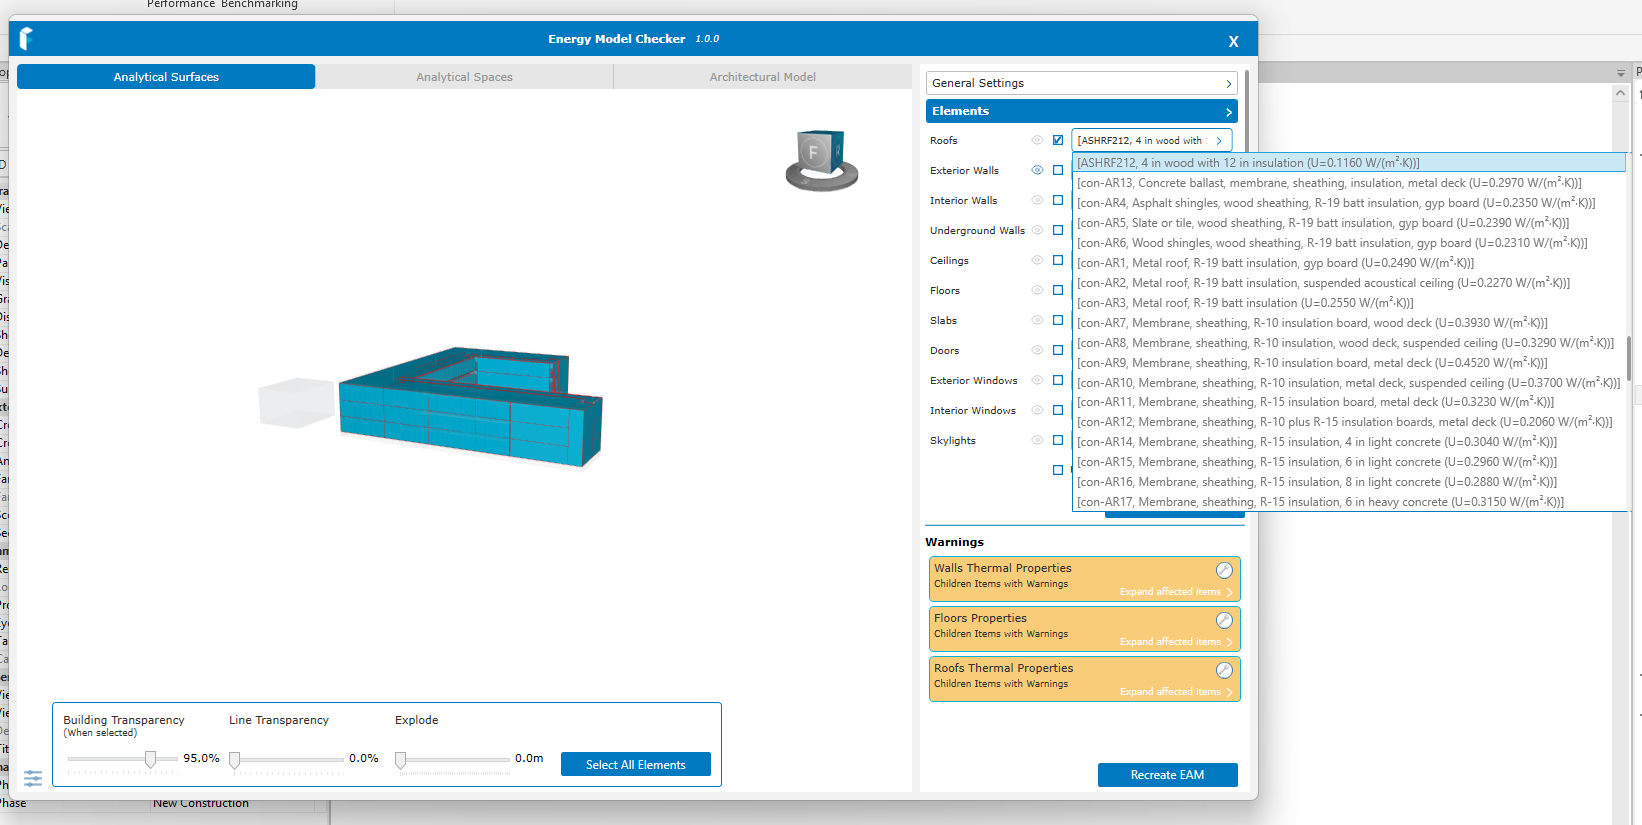
Elements (select from Schematic Types)
A list of Schematic Types available set in Revit is displayed. These will be used for properties when the Energy Model is created in Revit. The override checkbox must be checked and the schematic type selected in the dropdown list. If the Use Detailed Elements checkbox is not checked and elements have no properties set under Type Properties, these schematic types will be also used when reviewing the Energy Model. You can also use the eye symbol to review the relevant elements. Apply the changes and then recreate the Energy Model. You may then review properties under in the Analytical Surfaces View in Revit. Note: these schematic values are used to set properties for the model’s energy surfaces in Revit.
Analytical Settings (resolutions)
This area controls the Analytical Resolutions in Revit. If these are set to a value which is too high, the model may have missing energy surfaces or spaces in Revit when the EAM (Energy Analytical Model) generates. Adjusting this here helps to set it correctly in Revit.
Check out how to use the Tool in these short videos:
Fixing Phase Issue
![]()
Fixing Revit Settings Issues
Viewer Filter (building type, display by level)
This provides options to define visibility in the Viewer according to building space types and levels.
After changing settings, you may then use the Apply Settings button to update the changes to Revit.
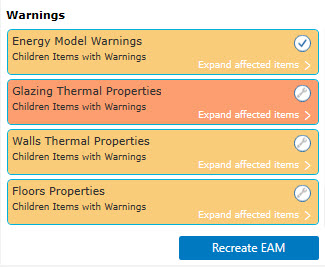
Warnings
Warnings will appear in the application to advise where elements are missing thermal properties. Generally, envelope elements require thermal properties for energy analysis. You may elect to resolve these issues or consult with your team and modify the model in Revit. If you elect to ‘fix’ the issue, all affected items will be resolved. For Glazed Elements, specific glass types may be assigned to the affected families.
Note: It is intended in a future release to offer to resolve specific selections for affected solid element families (walls, roofs, floors) note: this is currently not functional and is to be updated soon.
You may wish to read the guidance on model preparation HERE and on energy model issues HERE before choosing to modify the model. Fixing issues using this application will create a new family type with a thermal layer for solid model elements (walls, floors, roofs) or assign glass types where these are missing. Any changes may always be reverted.
Clicking on the wrench icon will attempt to apply an assembly layer to the Revit family (wall, roof, floor) or assign a glass type where this is missing. This will give the elements thermal properties which may later be adjusted. A message will appear where you may confirm if you wish to proceed.
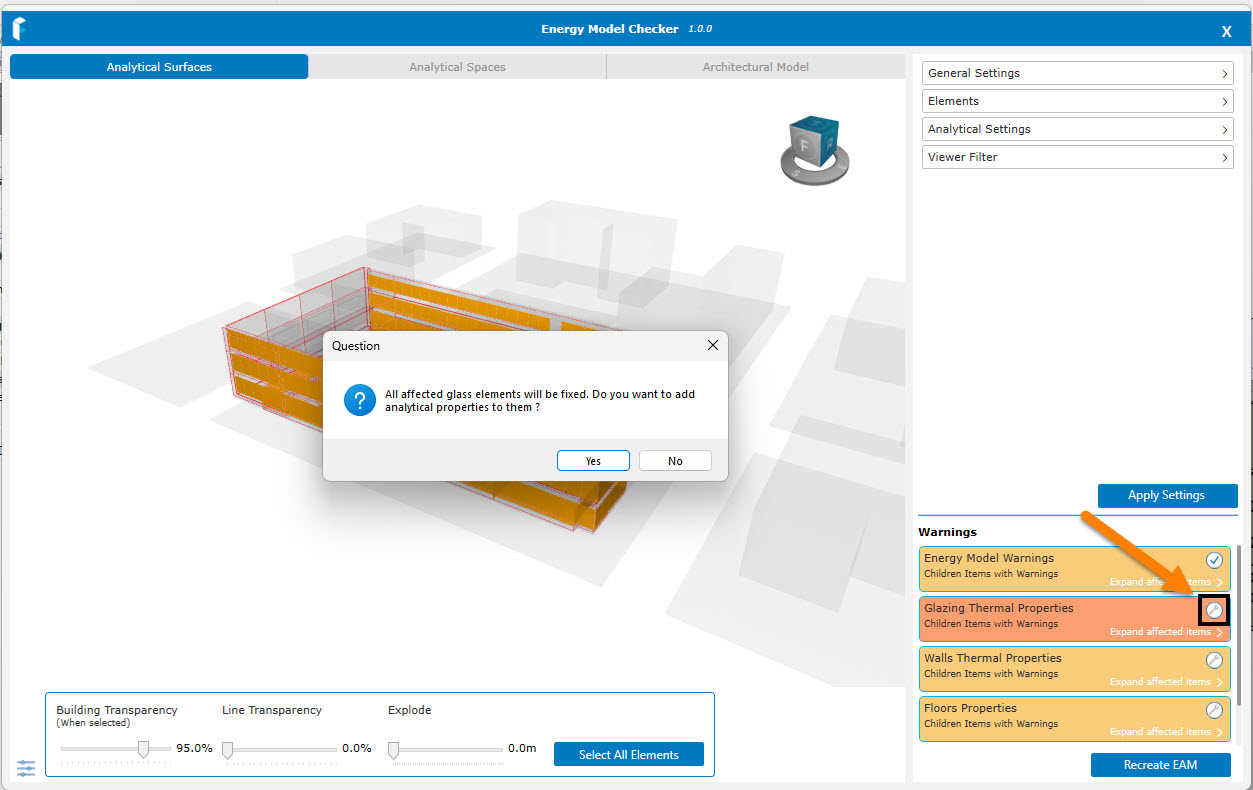
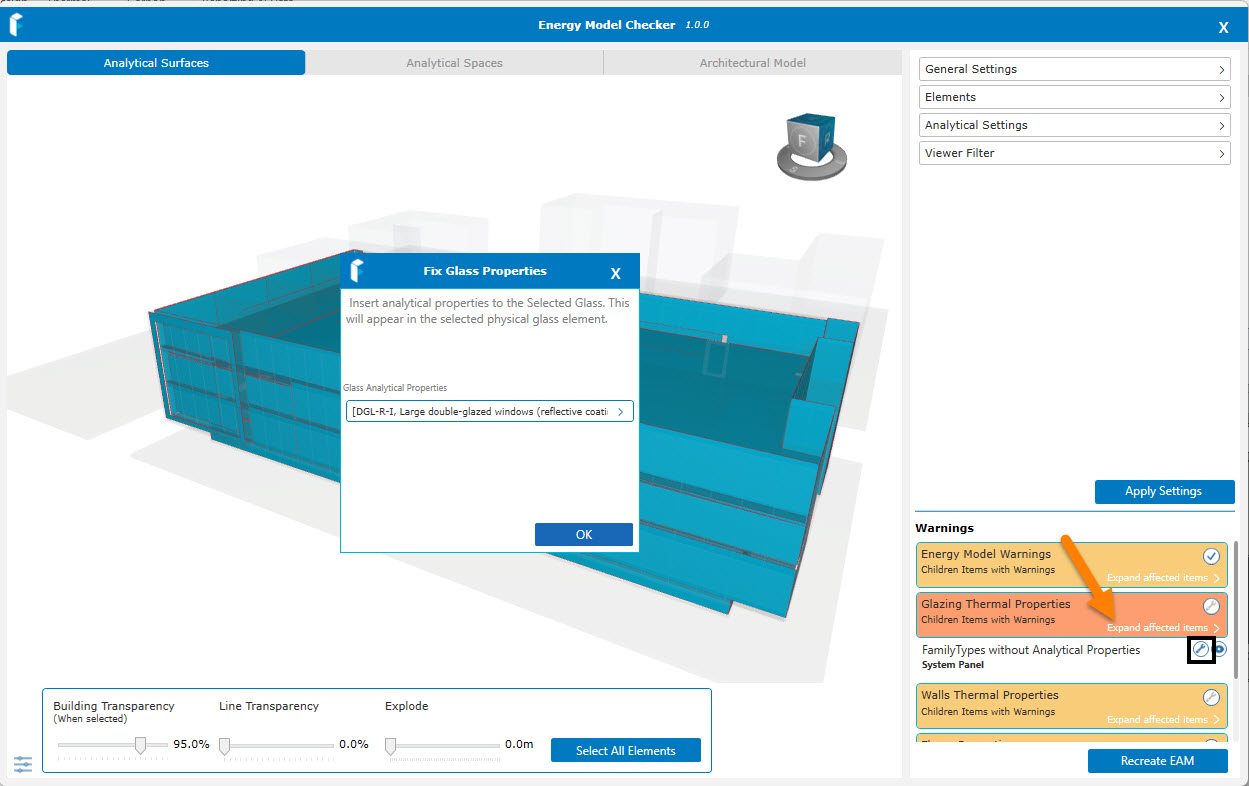
For Glazed Elements, the options in the dropdown list come from Revit’s Schematic Types. Selecting a glass type here can be assigned to glazing families with missing properties. There is also an eye icon to highlight the affected elements in the Viewer. Click OK to apply a selection and a confirmation message will display.
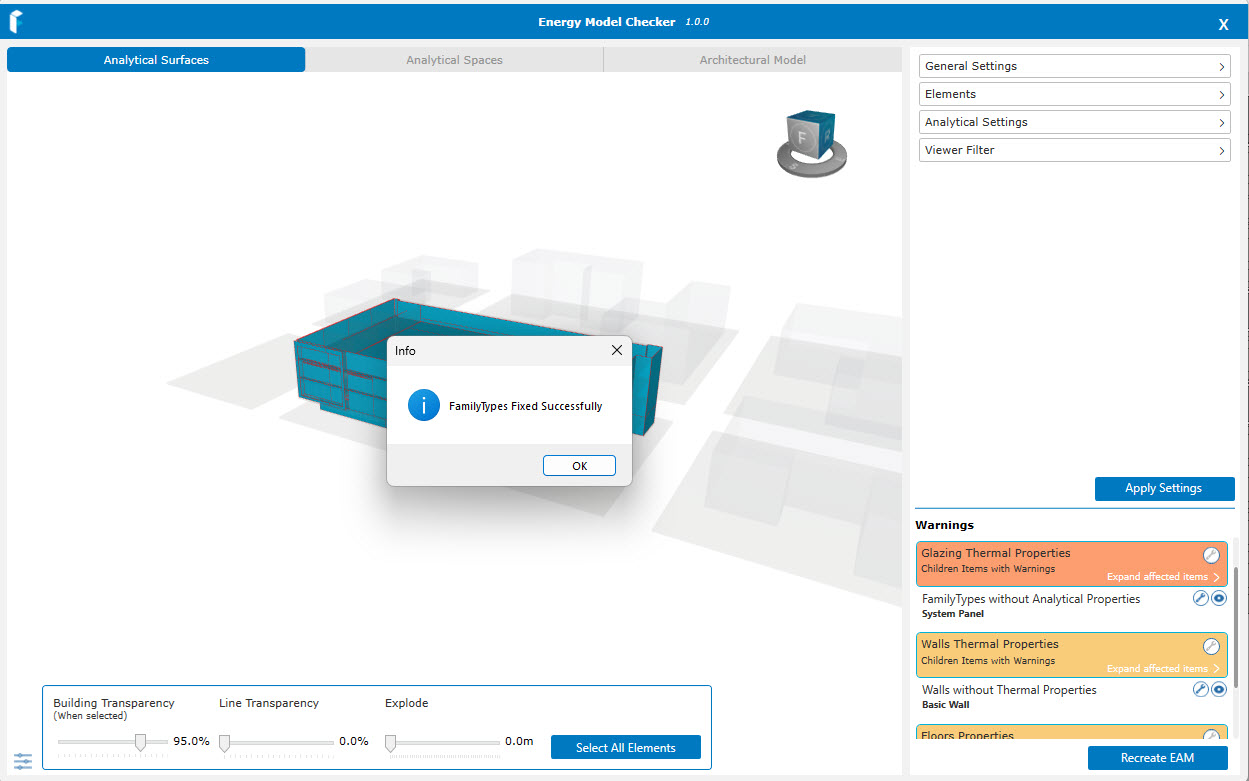
Then click on ‘Expand affected items‘ again to close the list of affected glazing families.
For solid model elements, applying specific construction types is not currently functional (all elements will be updated to a new family with a thermal layer).
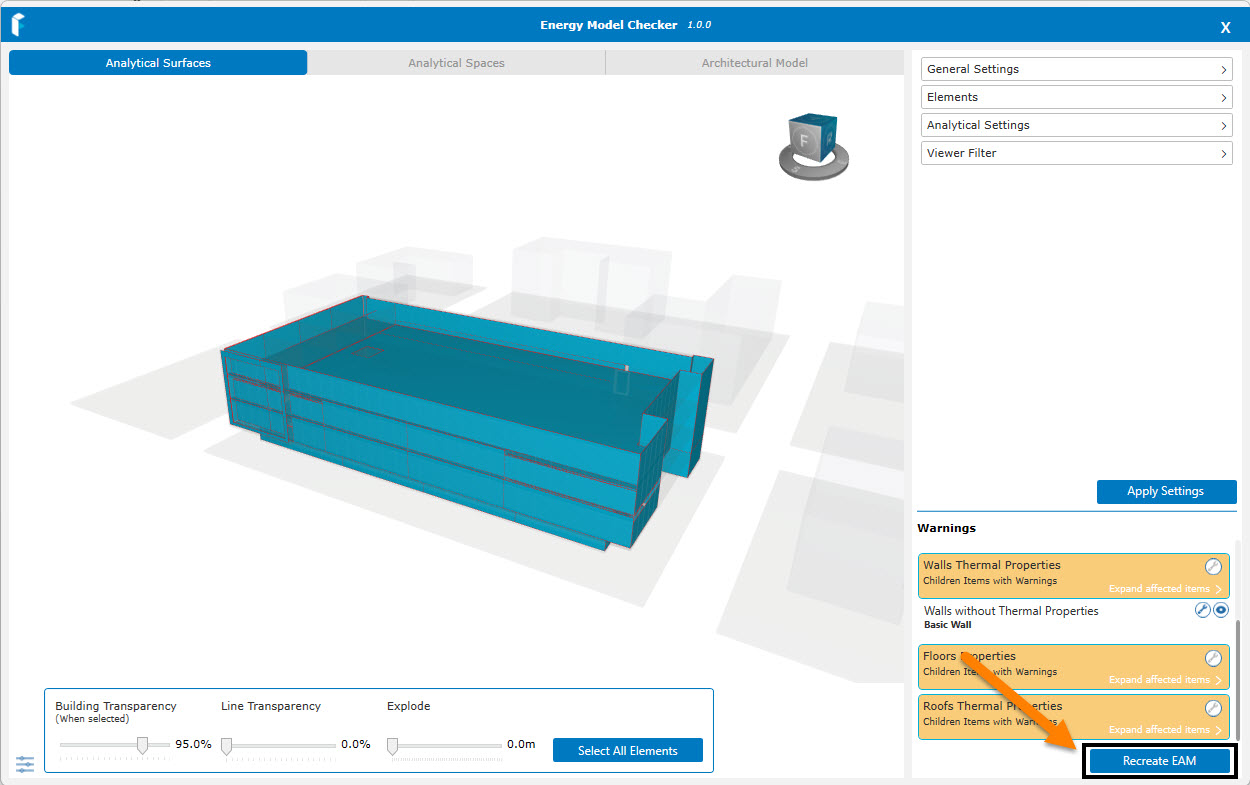
The Energy Model in Revit should then be recreated by clicking the button provided ‘Recreate EAM‘ (this will update the energy model in Revit and this application will refresh to read the changes (issues that were resolved will show as having properties and warnings will be removed). The model in the Viewer may then display with more areas having energy spaces/surfaces.
![]()
Fixing Thermal Properties Issue
Note: there may be occasions where model issues cannot be resolved or if issues listed are resolved, other issues may remain which prevent the energy model generating fully (e.g. gaps in the enclosure, separation lines on plan, elements with incorrect functions etc). These issues may need to be resolved in Revit.
Please Note: By fixing issues, you are adding a 25mm / 1 inch layer to the element assembly. This may have implications in an advanced complex model where joints and connections to other elements are critical. You may wish to review these implications in Revit or with your design team. If you do not save the model and close it in Revit, no changes will be made. You may also wish to make a copy of your model to experiment (particularly if the model is shared with a team and modifying may require consultation). You may also elect not to fix any issues but review/modify the model in Revit or consult with your design team. New families are created for affected elements which you may revert to original families or if the Revit model is not saved, no changes are written to the model.
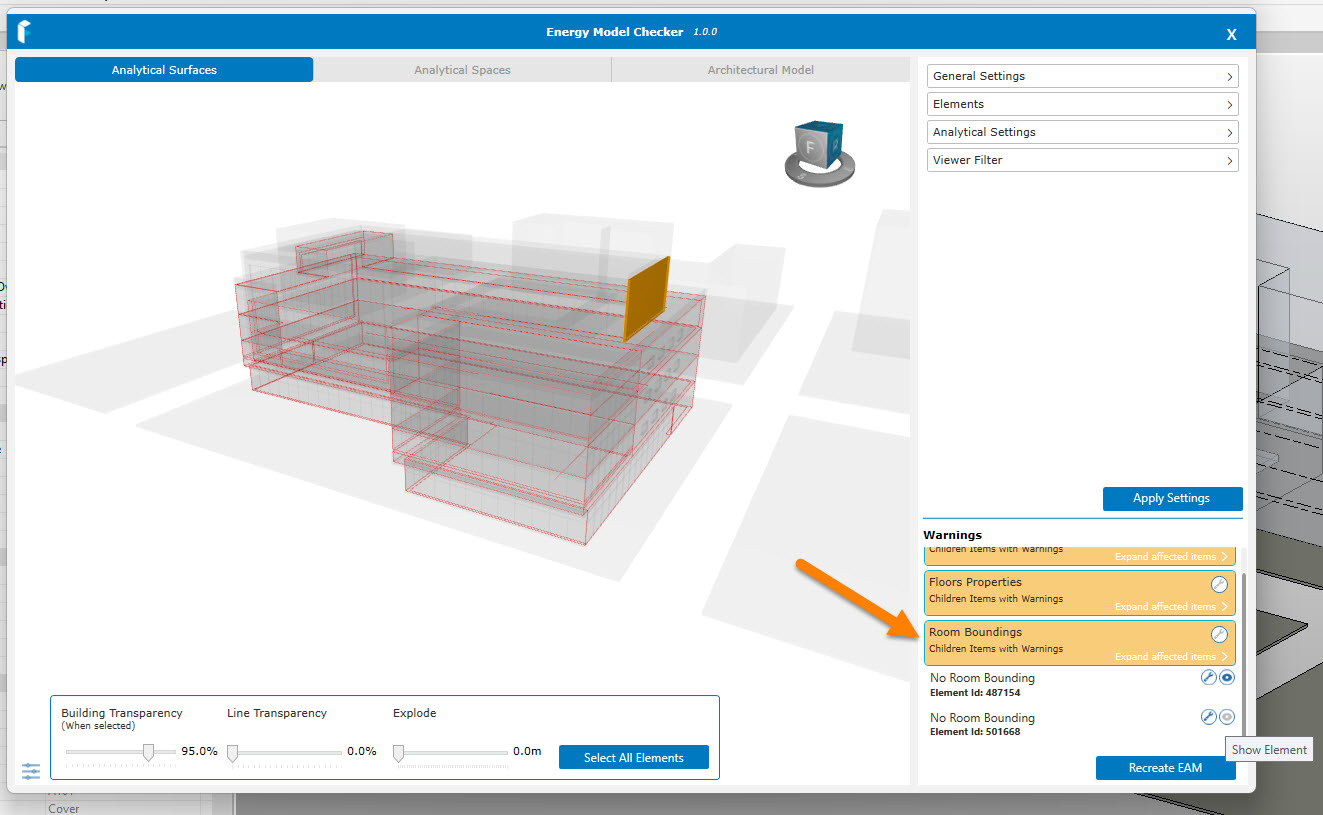
Room Bounding Issues
Elements in the model that are not set as ‘Room Bounding’ will be listed under warnings. You may review these and if you wish to resolve them, the wrench icon can be clicked to change these elements to ‘Room Bounding’ in Revit. Generally, envelope elements in the model should be set as Room Bounding in order to include them in the energy model calculations, although you may wish to have structural columns and other elements set as Non-Room Bounding for specific reasons.
After making modifications to the model, the Recreate EAM should be used to refresh the energy model and update the application with the current model condition. Areas which are missing from the energy model will often appear if the room bounding setting is adjusted.
![]()
Fixing Room Bounding Issues
Note: the older Model Check remains present in the Revit 25 version but is non-functional and is to be removed soon since the logic has now moved to the separate EAM Check tool.
![]()
